Step 1: Streamline the Program
1. member folder: Delete if you do not need member functionality.
2. special folder: Delete if you do not need special topic functionality.
3. install folder: Please delete this after the website installation is complete.
4. plus folder: Retaining view.php, list.php, count.php, and the img folder is sufficient to ensure basic functionality.
Other files can be retained selectively, such as:
diy.php Custom form functionality
guestbook.php and guestbook folder Built-in guestbook functionality
search.php Search page
download.php Download functionality
Step 2: Backend Security
Many webmasters fail to even change the default backend path ‘dede’ after setting up their sites, and they also use ‘admin’ as the username and password. This allows hackers direct access to your backend. Therefore, please change the backend path to a less guessable folder name, and definitely change the password.
Step 3: Server Security
Disable write permissions for: plus, include, and the backend directory.
Disable execute permissions for: templets, uploads, and data.
Note: For space purchased from our site (West Digital), disable write permissions in the security settings, and disable execute permissions in the directory protection settings!
In website security, execution permissions on directories are highly sensitive. Generally, directories that allow writing should not have script execution permissions. For the DedeCMS system, there are two writable directories: data and uploads. The data directory mainly contains basic configuration files and cached data, while uploads is the directory for saving uploaded attachments. This article introduces how to remove execution permissions for these two directories across different server environments. We also recommend removing execution permissions from other directories that generate pure static HTML but have write permissions, making the system more secure.
IIS under Windows
IIS6.0
Open the site in IIS. Right-click on the uploads, data, and static HTML generation directories, select “Properties” from the menu, and set the execution permission to “None” in the directory properties panel. (See Figure 1)
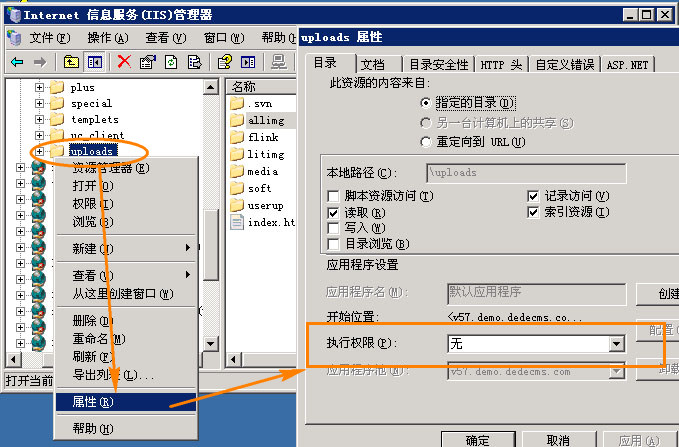
(Figure 1)
IIS7
IIS7 is similar to IIS6.0. Select the corresponding directories for the site (data, uploads, and static HTML file directories), and double-click “Handler Mappings” in the features view panel. (See Figure 2)
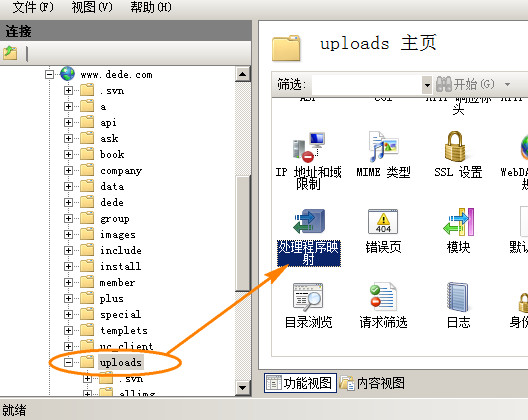
(Figure 2)
In “Edit Feature Permissions…”, simply remove script execution permissions. (See Figure 3)
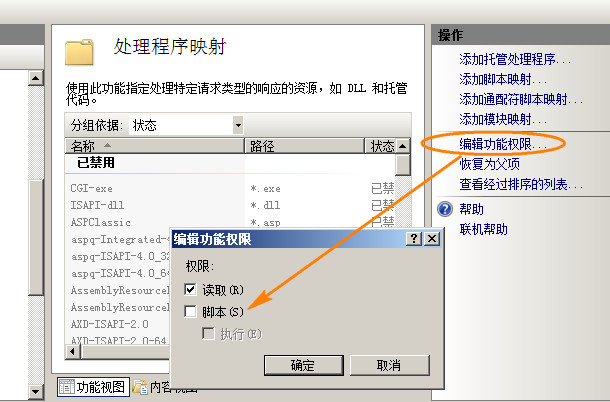
(Figure 3)
Directory Script Execution Permission Settings under Apache
Dedicated Host Configuration
Apache does not have a graphical management interface like Windows IIS. We need to manually modify the Apache configuration file to set directory script execution permissions.
First, locate the Apache configuration file httpd.conf. Typically, this file is located in the conf folder within the Apache installation directory. (See Figure 4)
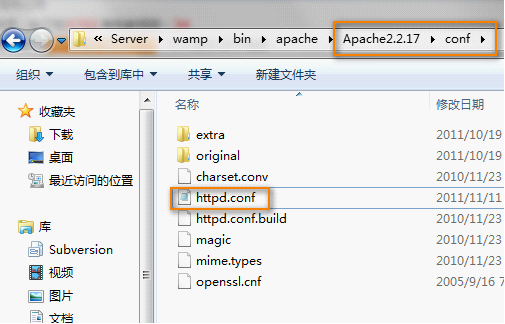
(Figure 4)
Open the httpd.conf file and find the section shown in Figure 5:
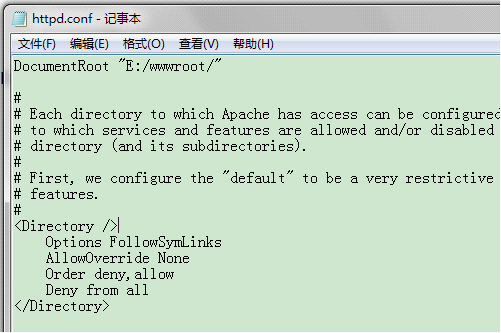
(Figure 5)
Add the directories where script execution needs to be restricted below:
The configuration content is:
1 |
<Directory "DIR"> |
2 |
<FilesMatch ".(php|asp|jsp)$"> |
3 |
Deny from all |
4 |
</FilesMatch> |
5 |
</Directory> |
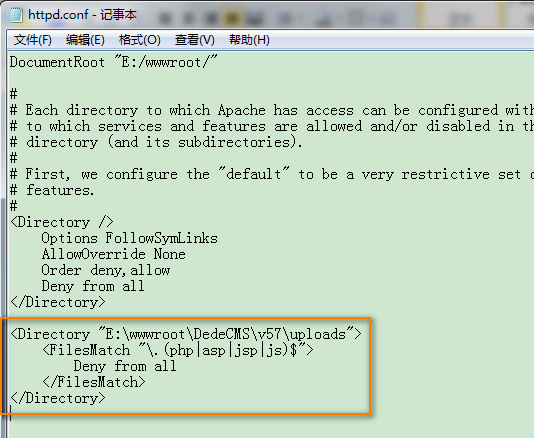
(Figure 6)
After completing the configuration, restart Apache for the changes to take effect!
Before the operation, I created an index.php file in the uploads folder. Figure 7 shows the access status before configuration.
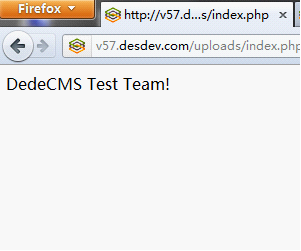
(Figure 7)
Figure 8 shows the effect of accessing the page after restarting Apache.
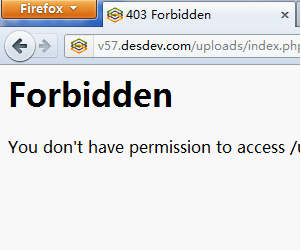
(Figure 8)
Virtual Host/Space Configuration
Before configuring, confirm whether your space supports .htaccess and rewrite. This method uses rewrite rules in the .htaccess file to achieve the effect of prohibiting specific scripts from running.
The rule content is as follows:
1 |
RewriteEngine on |
2 |
RewriteRule uploads/(.*).(php)$ – [F] |
3 |
RewriteRule data/(.*).(php)$ – [F] |
4 |
RewriteRule templets/(.*).(php)$ – [F] |
Execution of PHP scripts has been restricted for the uploads, data, and templets directories;
Save the above content into a .htaccess file and place this file in the root directory of your site.
This way, the execution permissions for directory scripts are controlled. The effects before and after uploading the rules are the same as Figures 7 and 8.