Amazon EC2 instances use Elastic Block Store (EBS) for storage. When necessary, you can restore data using EBS snapshots. Here is an introduction to how to create EBS snapshots and restore them.
Creating a Snapshot
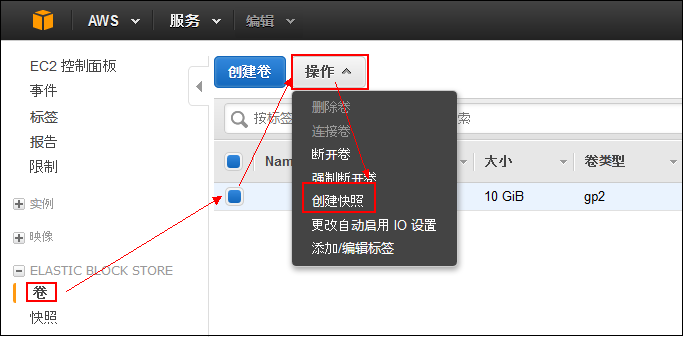
1. Open the EC2 console. As shown below, click “Volumes”, select the volume for which you want to create a snapshot, click “Actions”, and select “Create Snapshot” from the dropdown menu.
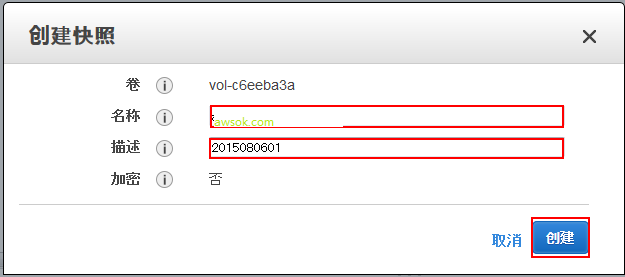
2. Enter the snapshot name and description. Click “Create”. Set the “Name” to a distinctive snapshot name for easy identification and selection in the future.
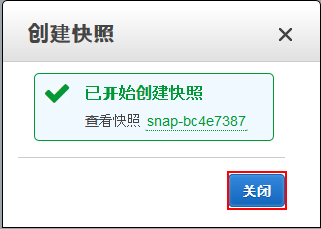
3. Once created, click “Close”.
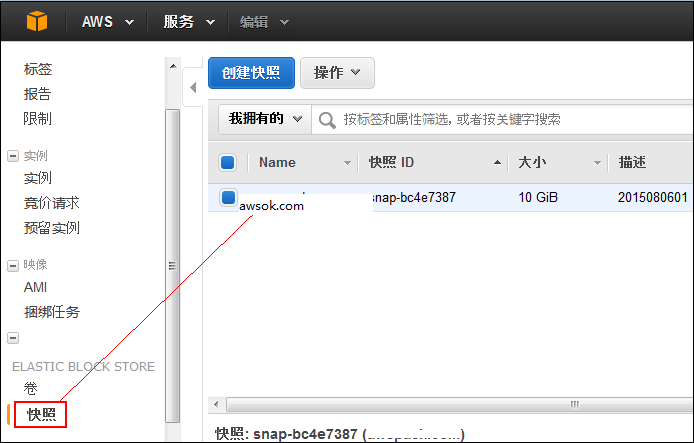
4. Confirm that the snapshot has been created successfully.
Restoring EBS from a Created Snapshot
To restore data via a snapshot, follow these steps:
- Create an EBS volume from the previously created snapshot
- Stop the EC2 instance
- Detach the volume connected to the EC2 instance
- Attach the newly created volume to the EC2 instance
- Start the EC2 instance
1. Create an EBS volume from the previously created snapshot.
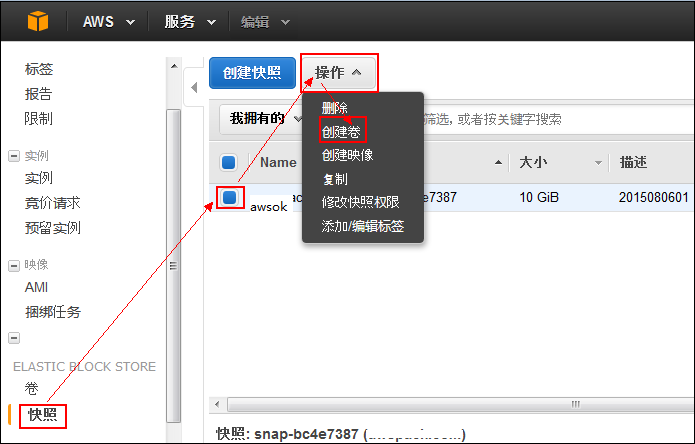
Select the newly created “Snapshot”, click “Actions”, and select “Create Volume” from the dropdown menu.
2. Keep the default settings as shown below and click “Create”.
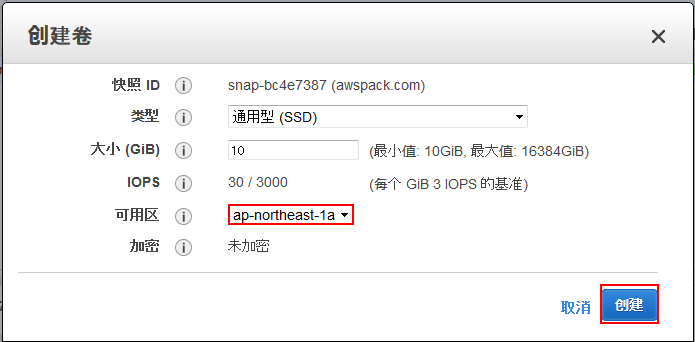
Note: You must create the volume in the same Availability Zone (AZ) as the EC2 instance.
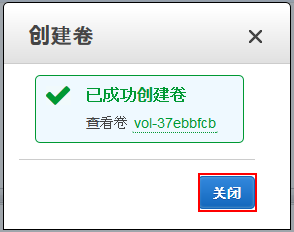
3. Once the volume creation is complete, click “Close”.
4. Confirm the newly created volume.
 5. To replace the volume, you need to stop the EC2 instance.

6. Detach the volume previously connected to the EC2 instance.
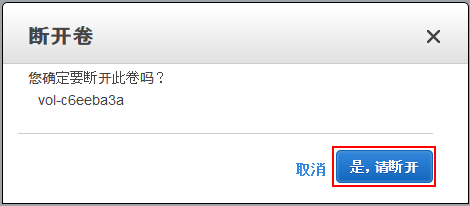
Select the volume, click “Actions”, and select “Detach Volume” from the dropdown menu. 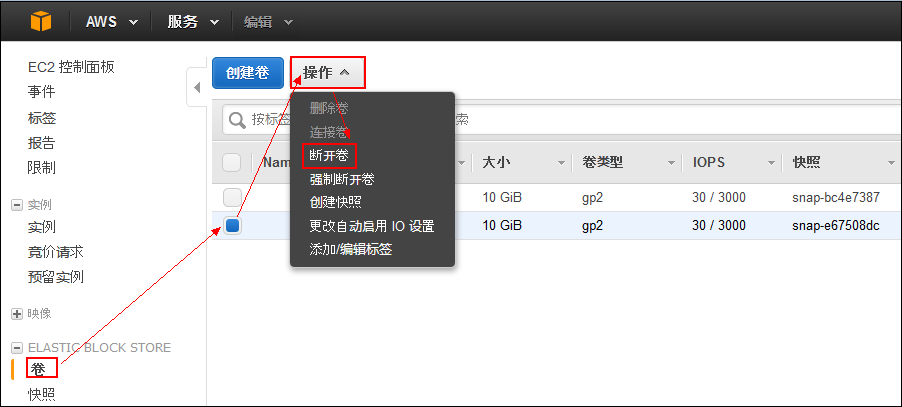 7. Click “Yes, Detach”.
8. Attach the newly created volume to the EC2 instance.
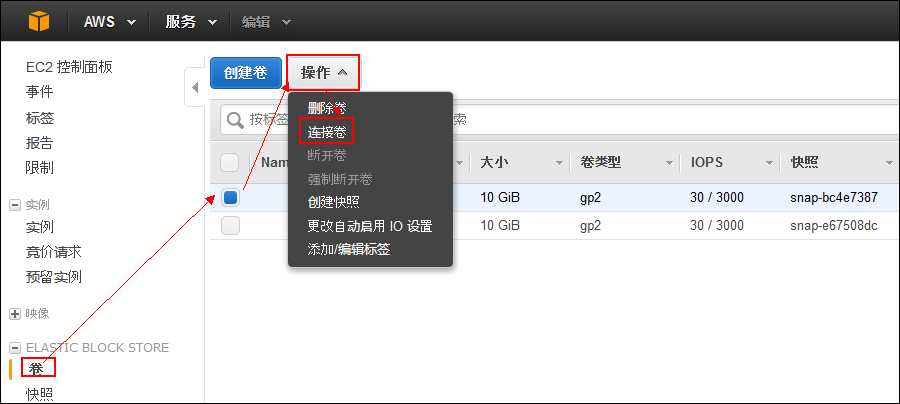
Select the newly created volume, click “Actions”, and select “Attach Volume” from the dropdown menu. As shown below:
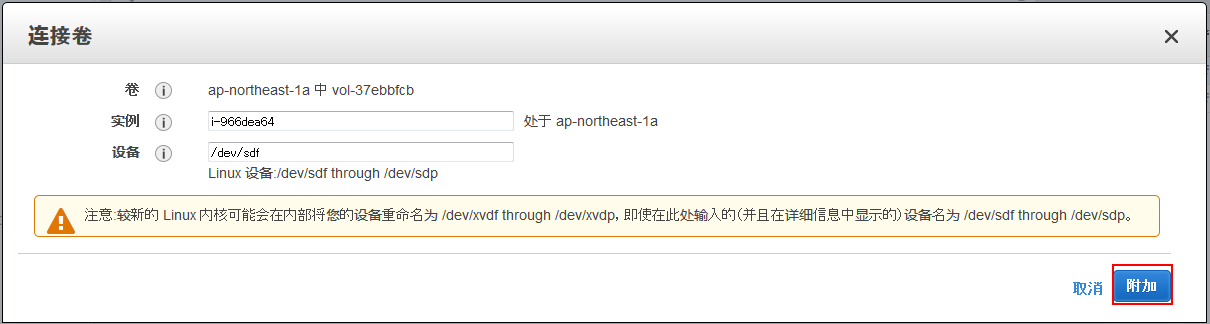
 9. Keep the default settings and click “Add”.
 10. Confirm that the volume has been attached successfully.
 11. Successfully restart the instance.

Additional Notes
EBS snapshots can also be shared with specific users. Interested readers are invited to refer to our blog post [AWS AMI or EBS Snapshot Sharing].