1. Introduction
This article explains how to implement a Continuous Integration and Continuous Deployment (CI/CD) solution based on Amazon ECS using AWS CodePipeline, AWS CodeBuild, and AWS CloudFormation.
When developers commit new code versions to GitHub, the system automatically triggers code retrieval, image packaging, pushing images to the repository, updating container services, and registering them with the load balancer.
The solution involves the following components:
- GitHub: The source used in this example, which is a PHP sample website committed to GitHub. AWS CodePipeline supports GitHub, AWS CodeCommit, or S3 as sources. You can Fork the demo software project from the following link:
https://github.com/awslabs/ecs-demo-php-simple-app
- Docker: The container used for service release. The Build stage of the demo solution uses the Ubuntu/Docker 1.12.1 base image hosted by AWS CodeBuild.
- Amazon EC2: The cluster of container hosts for ECS.
- Amazon VPC: The network where the services reside.
- Amazon ECS: AWS-managed container orchestration service. Documentation link: http://docs.aws.amazon.com/zh_cn/AmazonECS/latest/developerguide/Welcome.html
- Amazon ECR: AWS-managed container image registry. Documentation link: http://docs.aws.amazon.com/zh_cn/AmazonECR/latest/userguide/what-is-ecr.html
- AWS CodePipeline: AWS-managed continuous integration and delivery service that allows you to quickly and reliably update applications and services. It integrates with mainstream open-source tools like GitHub and Jenkins. Documentation link: http://docs.aws.amazon.com/zh_cn/codepipeline/latest/userguide/welcome.html
- AWS CodeBuild: AWS-managed build service used to package code into deployable software packages. Documentation link: http://docs.aws.amazon.com/zh_cn/codebuild/latest/userguide/welcome.html
- AWS CloudFormation: Automated scripts for creating and managing AWS resources in bulk. Documentation link: http://docs.aws.amazon.com/zh_cn/AWSCloudFormation/latest/UserGuide/Welcome.html
- Developers commit a new version of the code project to GitHub.
- In the Source stage of the Pipeline, it detects updates to the specified GitHub repository, pulls the code project from GitHub, and starts the configured CI/CD Pipeline.
- In the Build stage of the Pipeline, AWS CodeBuild packages the new version of the code project into a Docker image.
- AWS CodeBuild pushes the packaged image to Amazon ECR.
- In the Deploy stage of the Pipeline, AWS CodePipeline triggers AWS CloudFormation, which defines the Amazon ECS Task Definition and Service.
- AWS CloudFormation creates a new version of the Task Definition associated with the new Docker image and updates the Service.
- Amazon ECS retrieves the new version of the Docker image from Amazon ECR and runs it to replace the old Task, completing the service update and deployment.
2. Solution Architecture
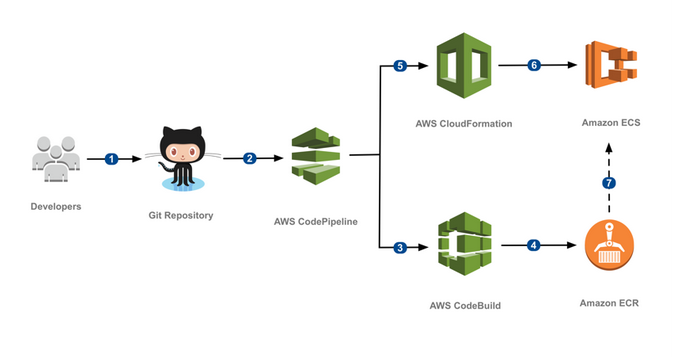
The workflow is as follows:
3. Setup
The setup process is divided into two main parts: Infrastructure and CI/CD Pipeline construction.
3.1 Infrastructure Setup
You need to prepare the network, load balancer, S3 bucket, and the host cluster required for running ECS.
3.1.1 Network Setup
Create a VPC, subnets, Internet Gateway, and route tables. Attach the Internet Gateway to the VPC, configure the route table with 0.0.0.0/0 pointing to the Internet Gateway, and associate it with the subnets.
The subsequent EC2 host cluster, load balancer, etc., will all use this network.
3.1.2 Load Balancer
Create an ALB (Application Load Balancer) listening on port 80.

Select the corresponding subnets.
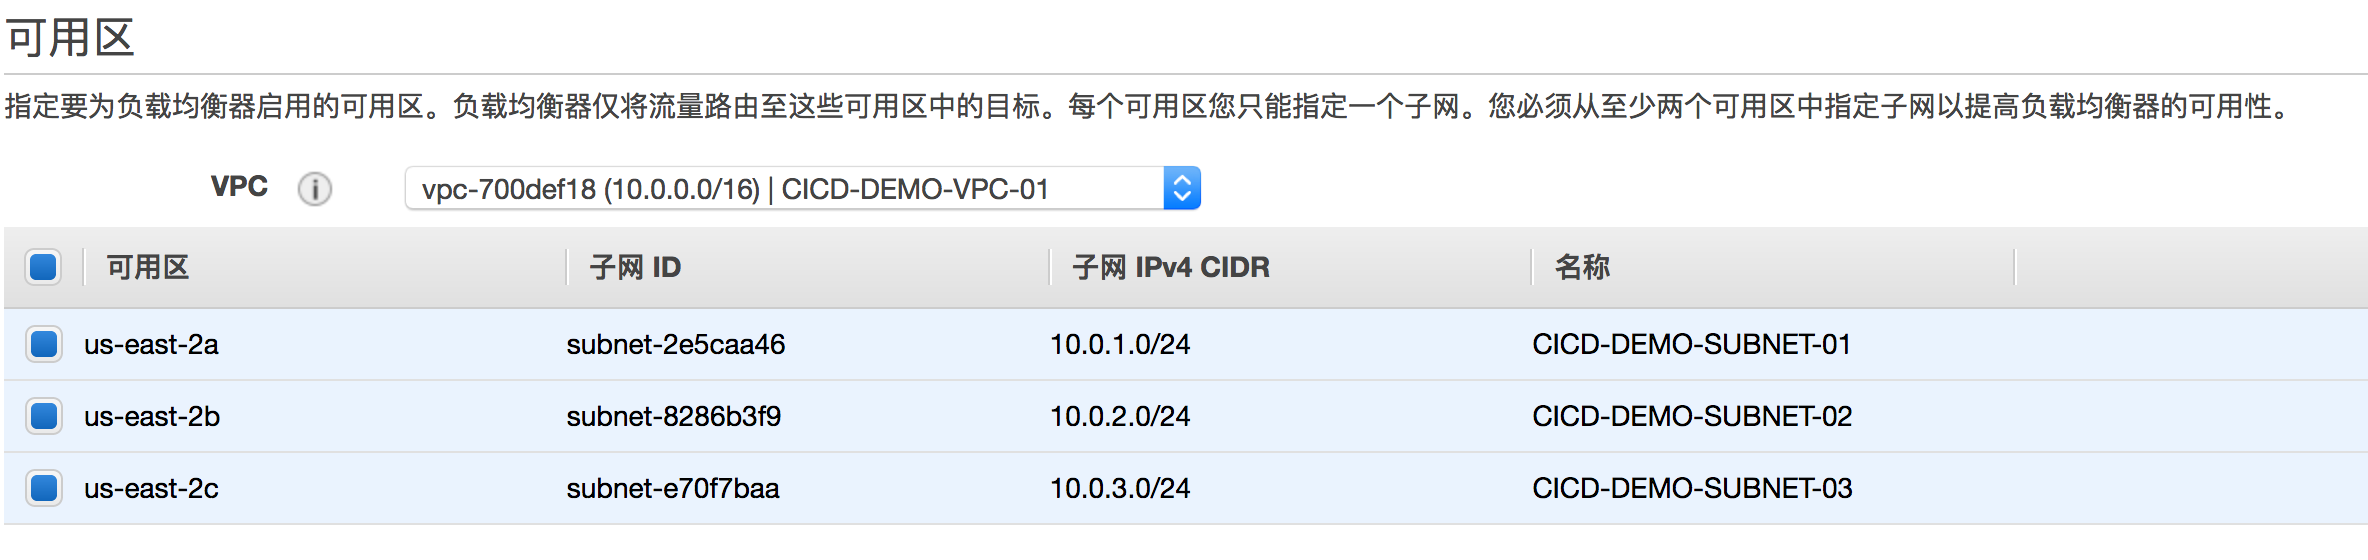
Create a new security group for port 80 and create a Target Group.
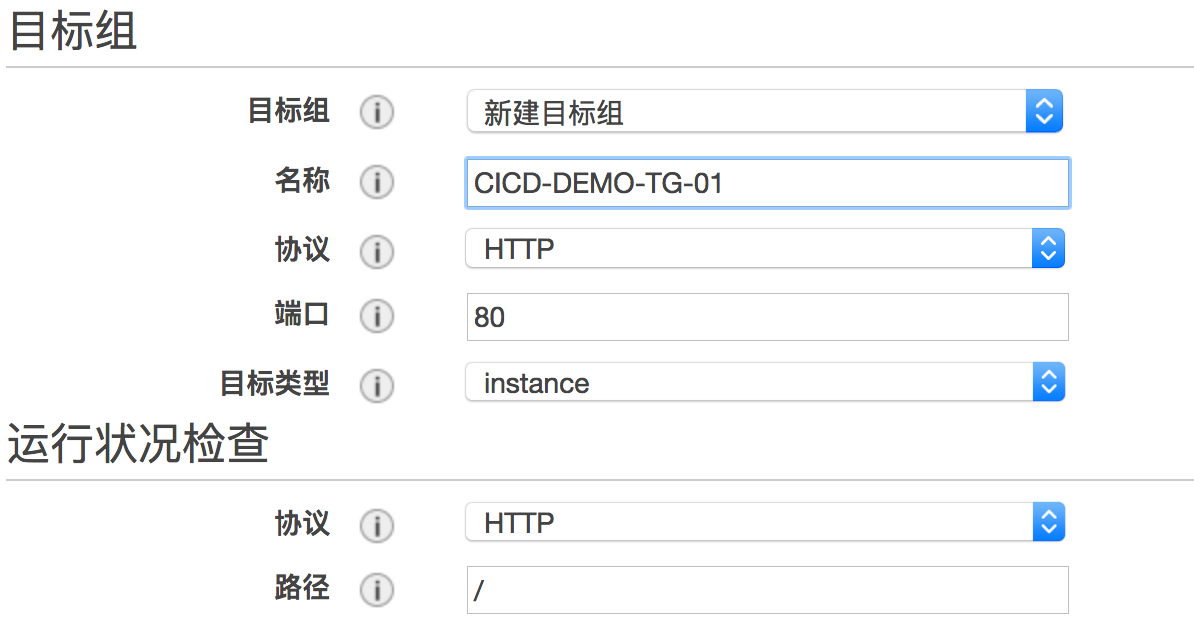
Do not register targets at this time; the cluster and corresponding ports will be registered when the ECS service is created.
Click Next to review and then Create.
3.1.3 ECS Host Cluster
On the ECS console, create a cluster.

Keep instance configurations default or select according to your needs; the example keeps defaults.
For networking configuration, select the created VPC and subnets. Create a Role that allows the ECS agent on the host to call ECS service APIs.
After creation, cluster information will be displayed at the bottom of the screen.
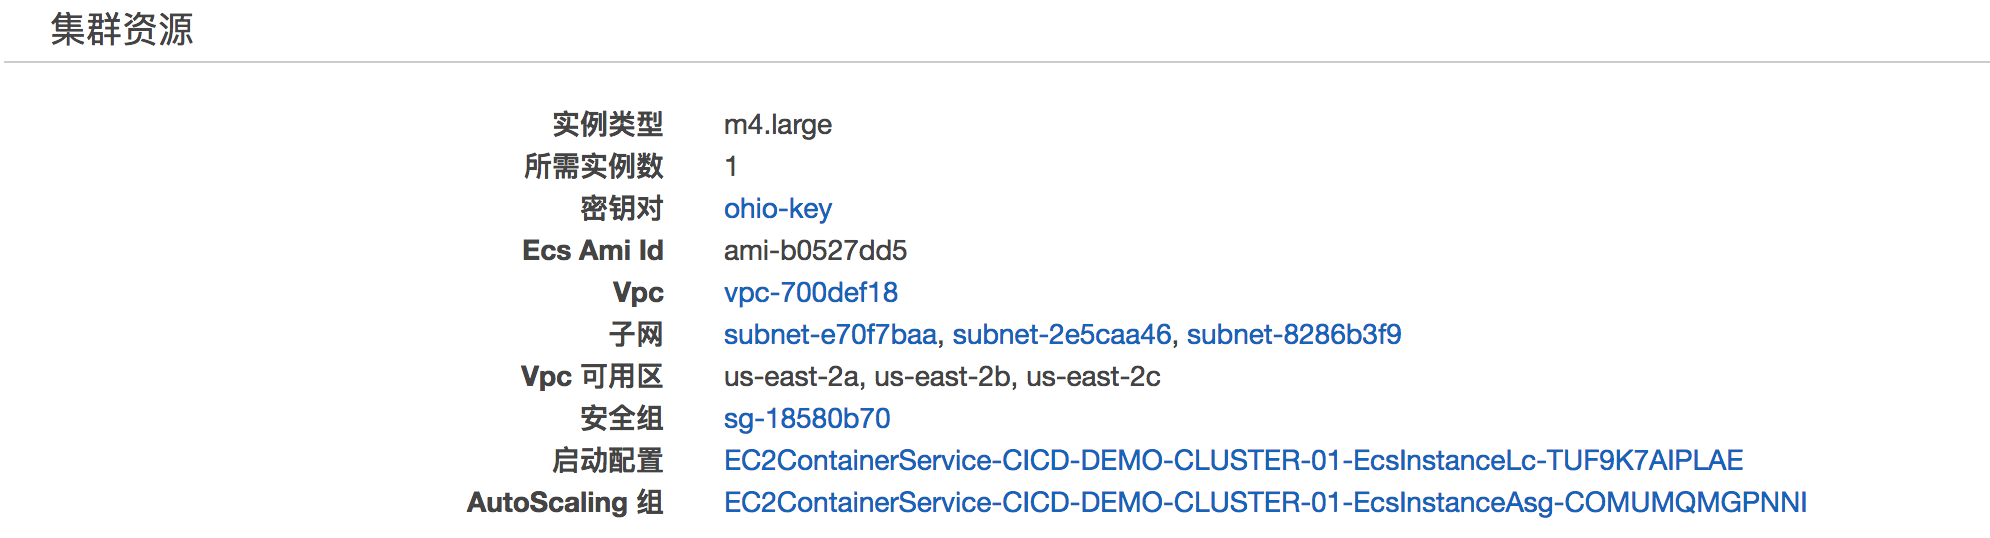
The cluster overview will show:

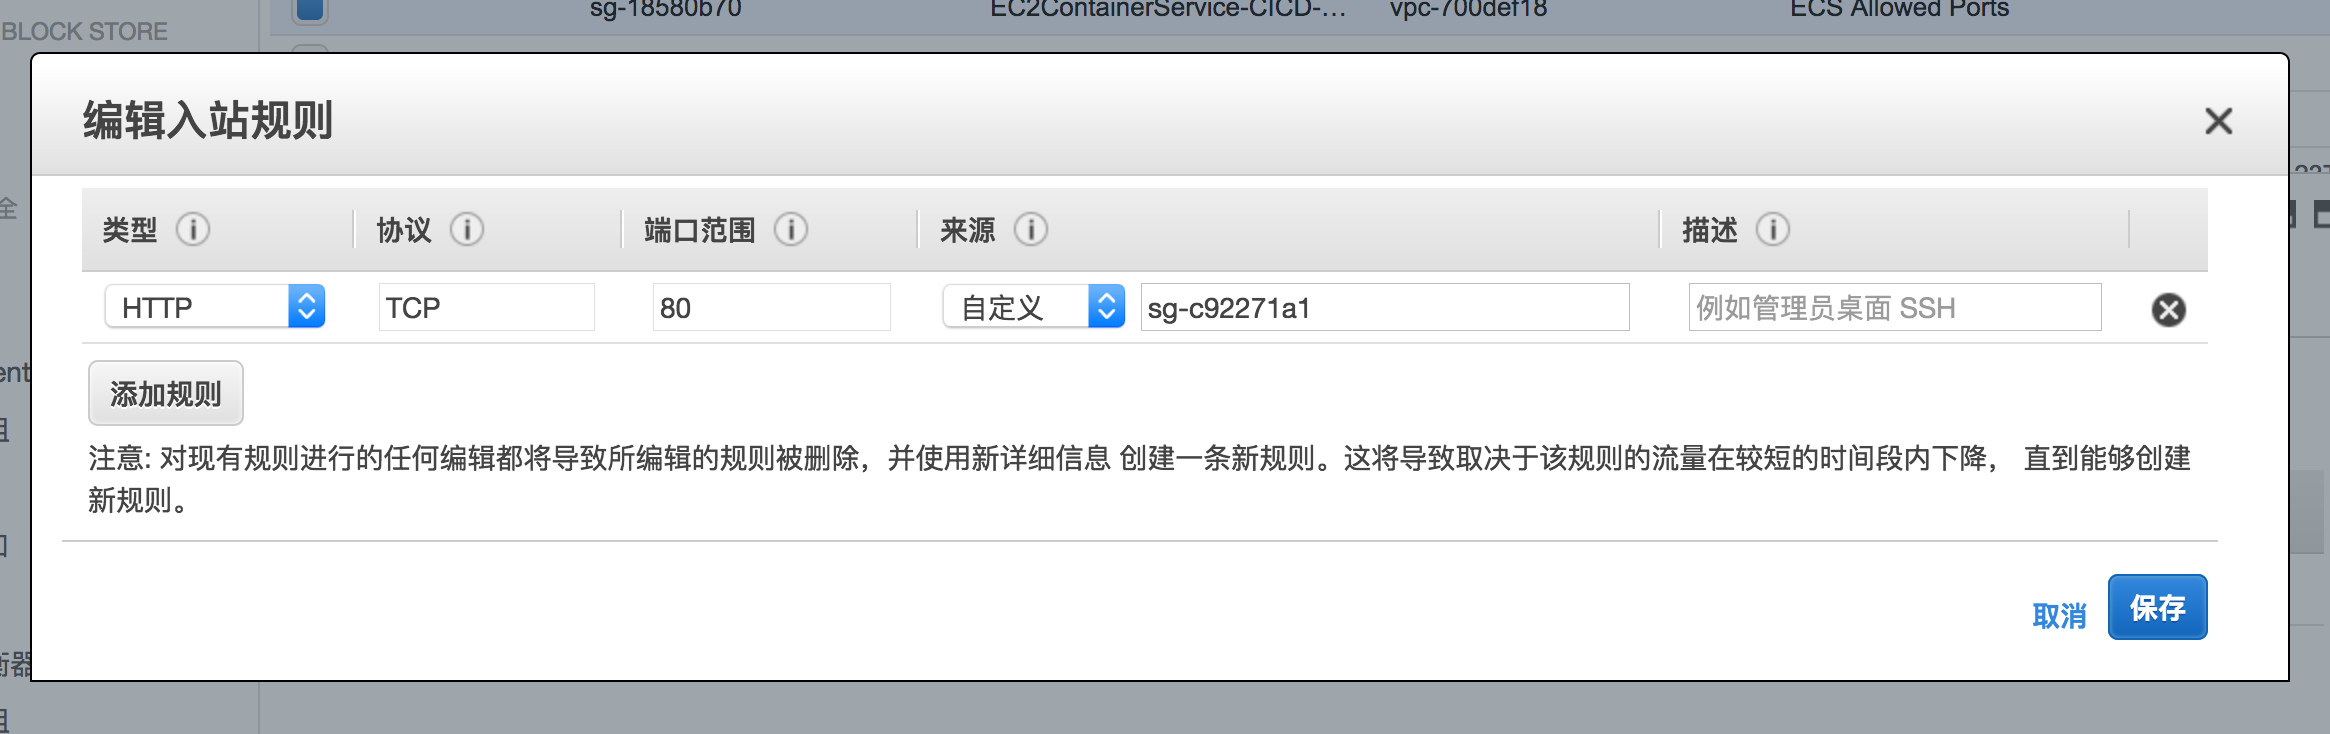
Modify the security group of the ECS host cluster. Set the inbound source to the Security Group ID of the application load balancer created earlier.
3.1.4 ECR Repository Creation
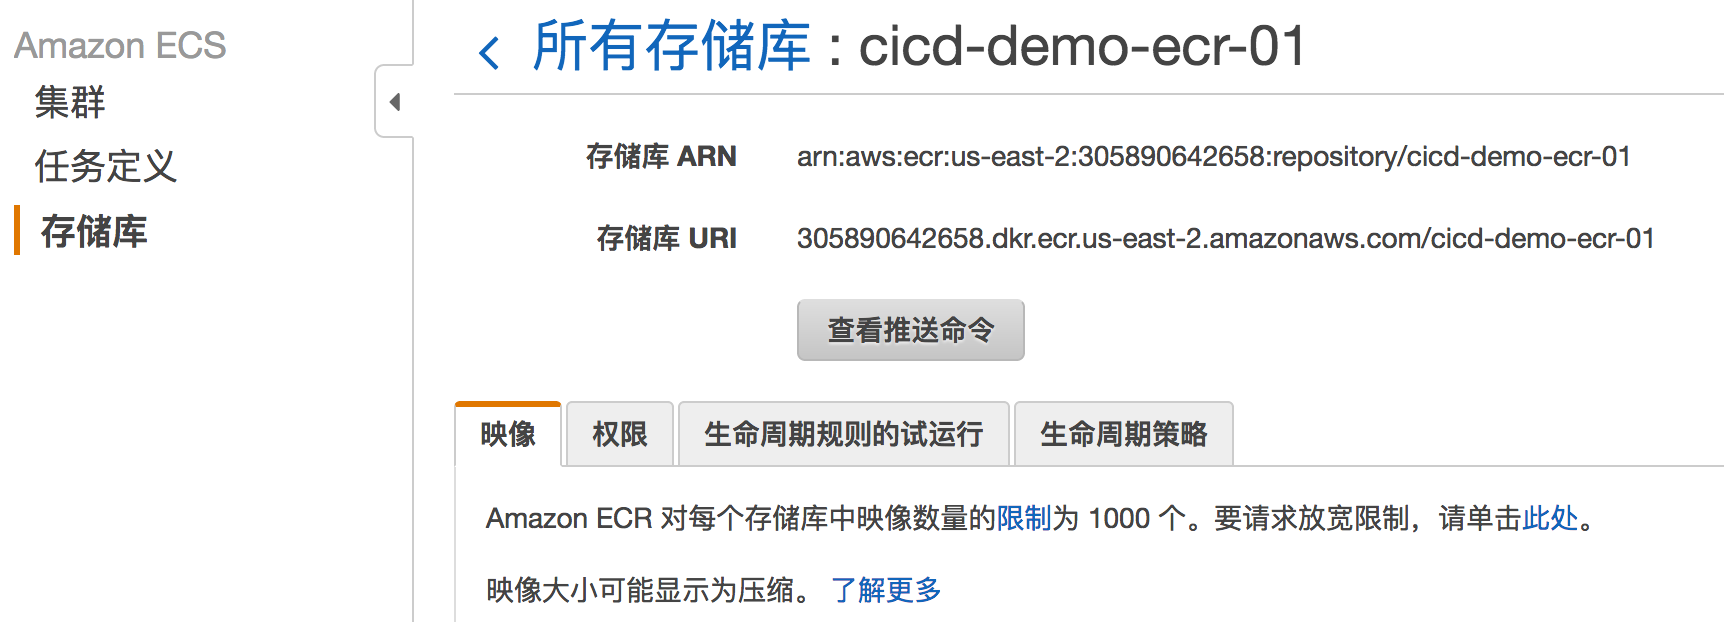
Create a repository to store Docker images of the software project during the Build phase.
On the ECS interface, create a repository. After creation, it will look like this:
3.1.5 S3 Bucket Creation
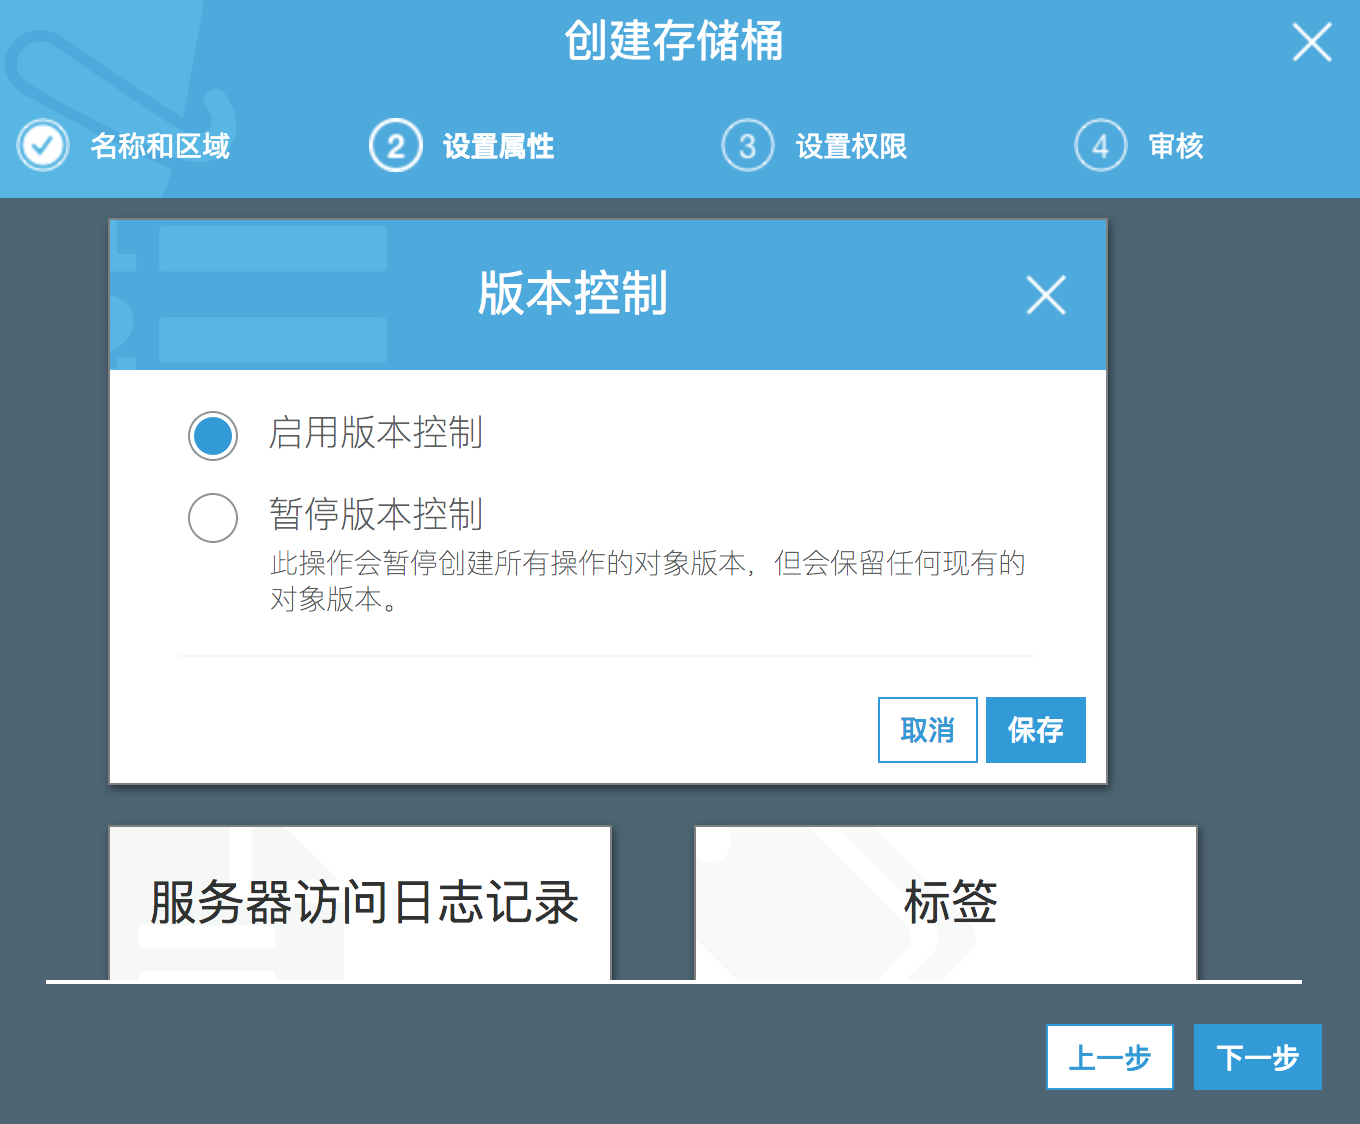
Create an S3 bucket to store the script templates used by CloudFormation during the Deploy phase. When creating the bucket, select the same Region as the other services and enable versioning for the bucket.
Compress the CloudFormation template into a zip file and upload it to the bucket.
In the example, the template file `service.yaml` is placed in a `templates` folder and compressed into `templates.zip`.
The content of `service.yaml` is as follows. Note the indentation:
This concludes the infrastructure setup.
3.2 Pipeline Setup
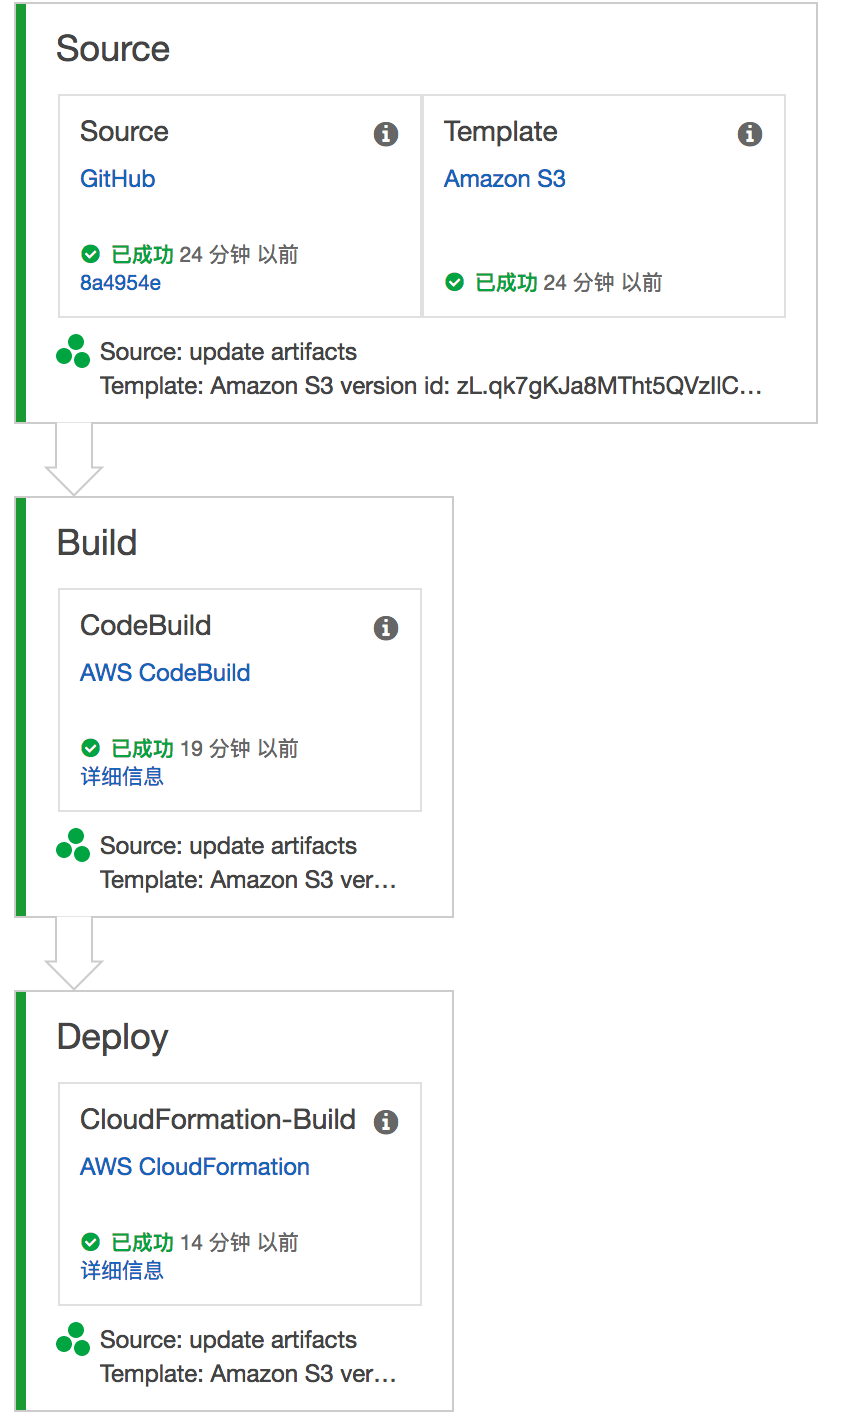
The pipeline consists of three stages: Source, Build, and Deploy.
In the Source stage, set the location of the software project on GitHub and specify the CloudFormation script template used in the Deploy stage to update the ECS service.
In the Build stage, use AWS CodeBuild to package the software project into a Docker image and upload it to ECR.
In the Deploy stage, use the CloudFormation script introduced in the Source stage to locate the corresponding host cluster, load balancer, and the Docker image uploaded to ECR, and then update the service.
The display after creating AWS CodePipeline looks like this, connecting the entire CI/CD flow:
Click “Create Pipeline” on the AWS CodePipeline console. You will see a basic workflow on the left side, from Source to Build to Deploy, along with role configurations. In actual applications, users can add new stages or operations after creation as needed or as the CI/CD process becomes more complex.
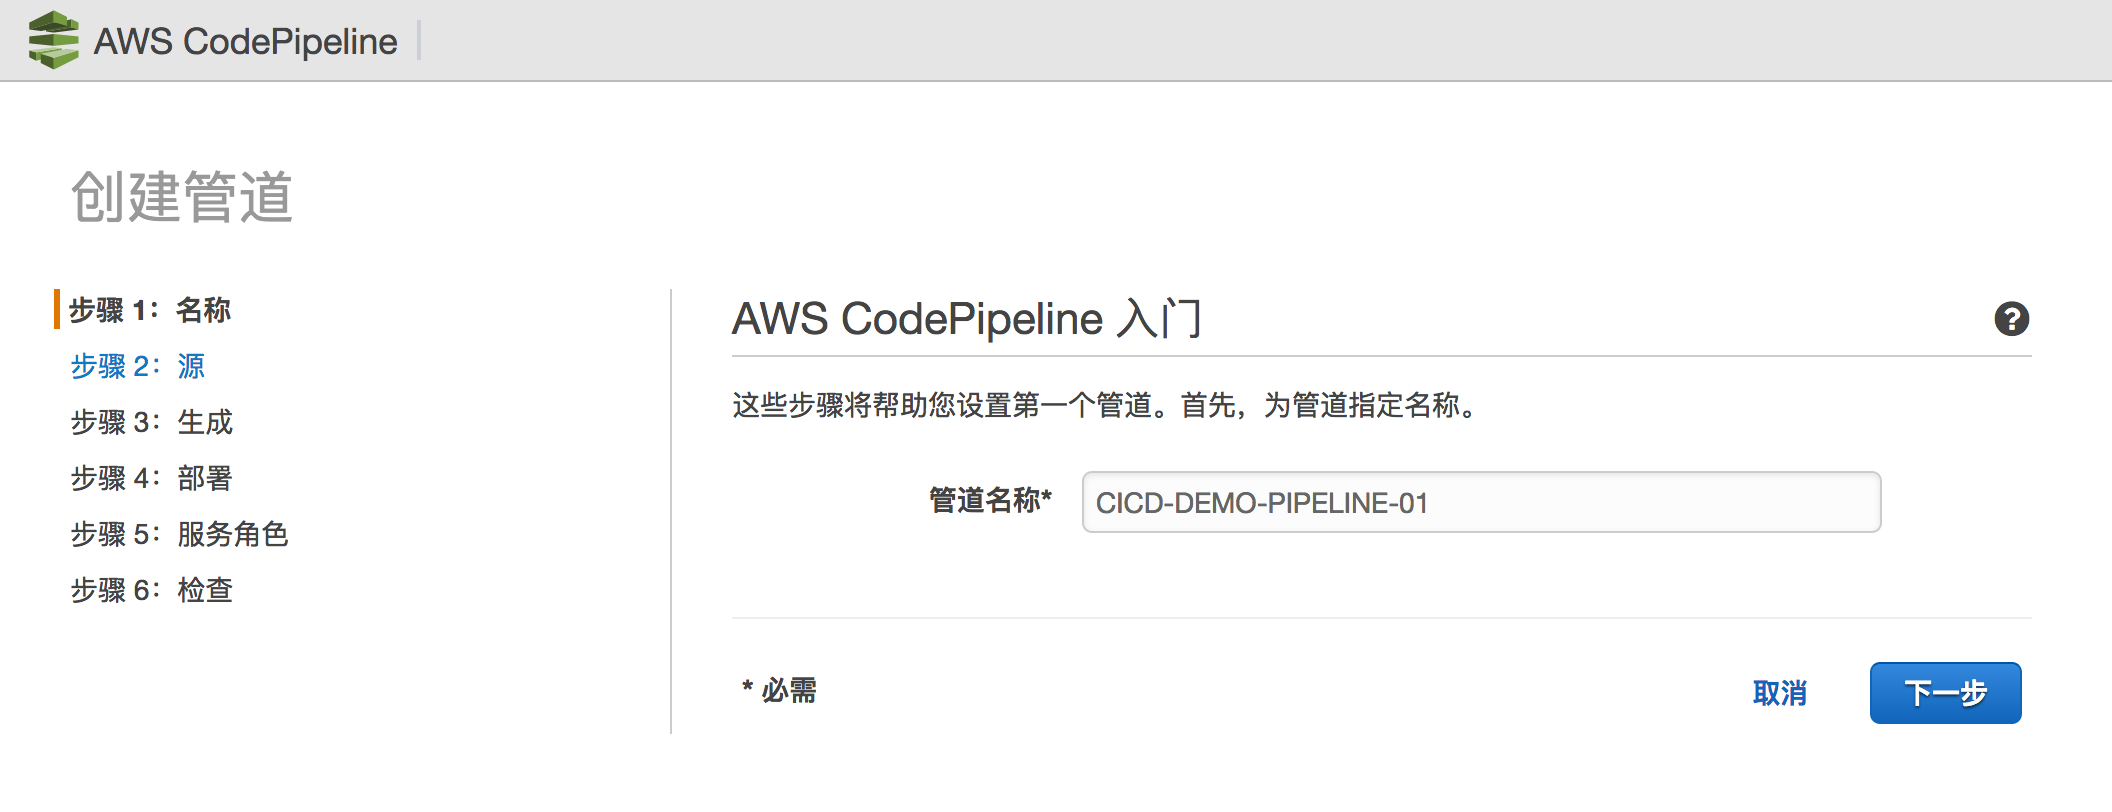
Click Next.
3.2.1 Source Stage Configuration
Select GitHub from the Source Provider dropdown menu.
Click “Connect to GitHub” to authorize access, allowing AWS CodePipeline to retrieve source content from GitHub. After authentication, select the location and branch of the software project on GitHub.
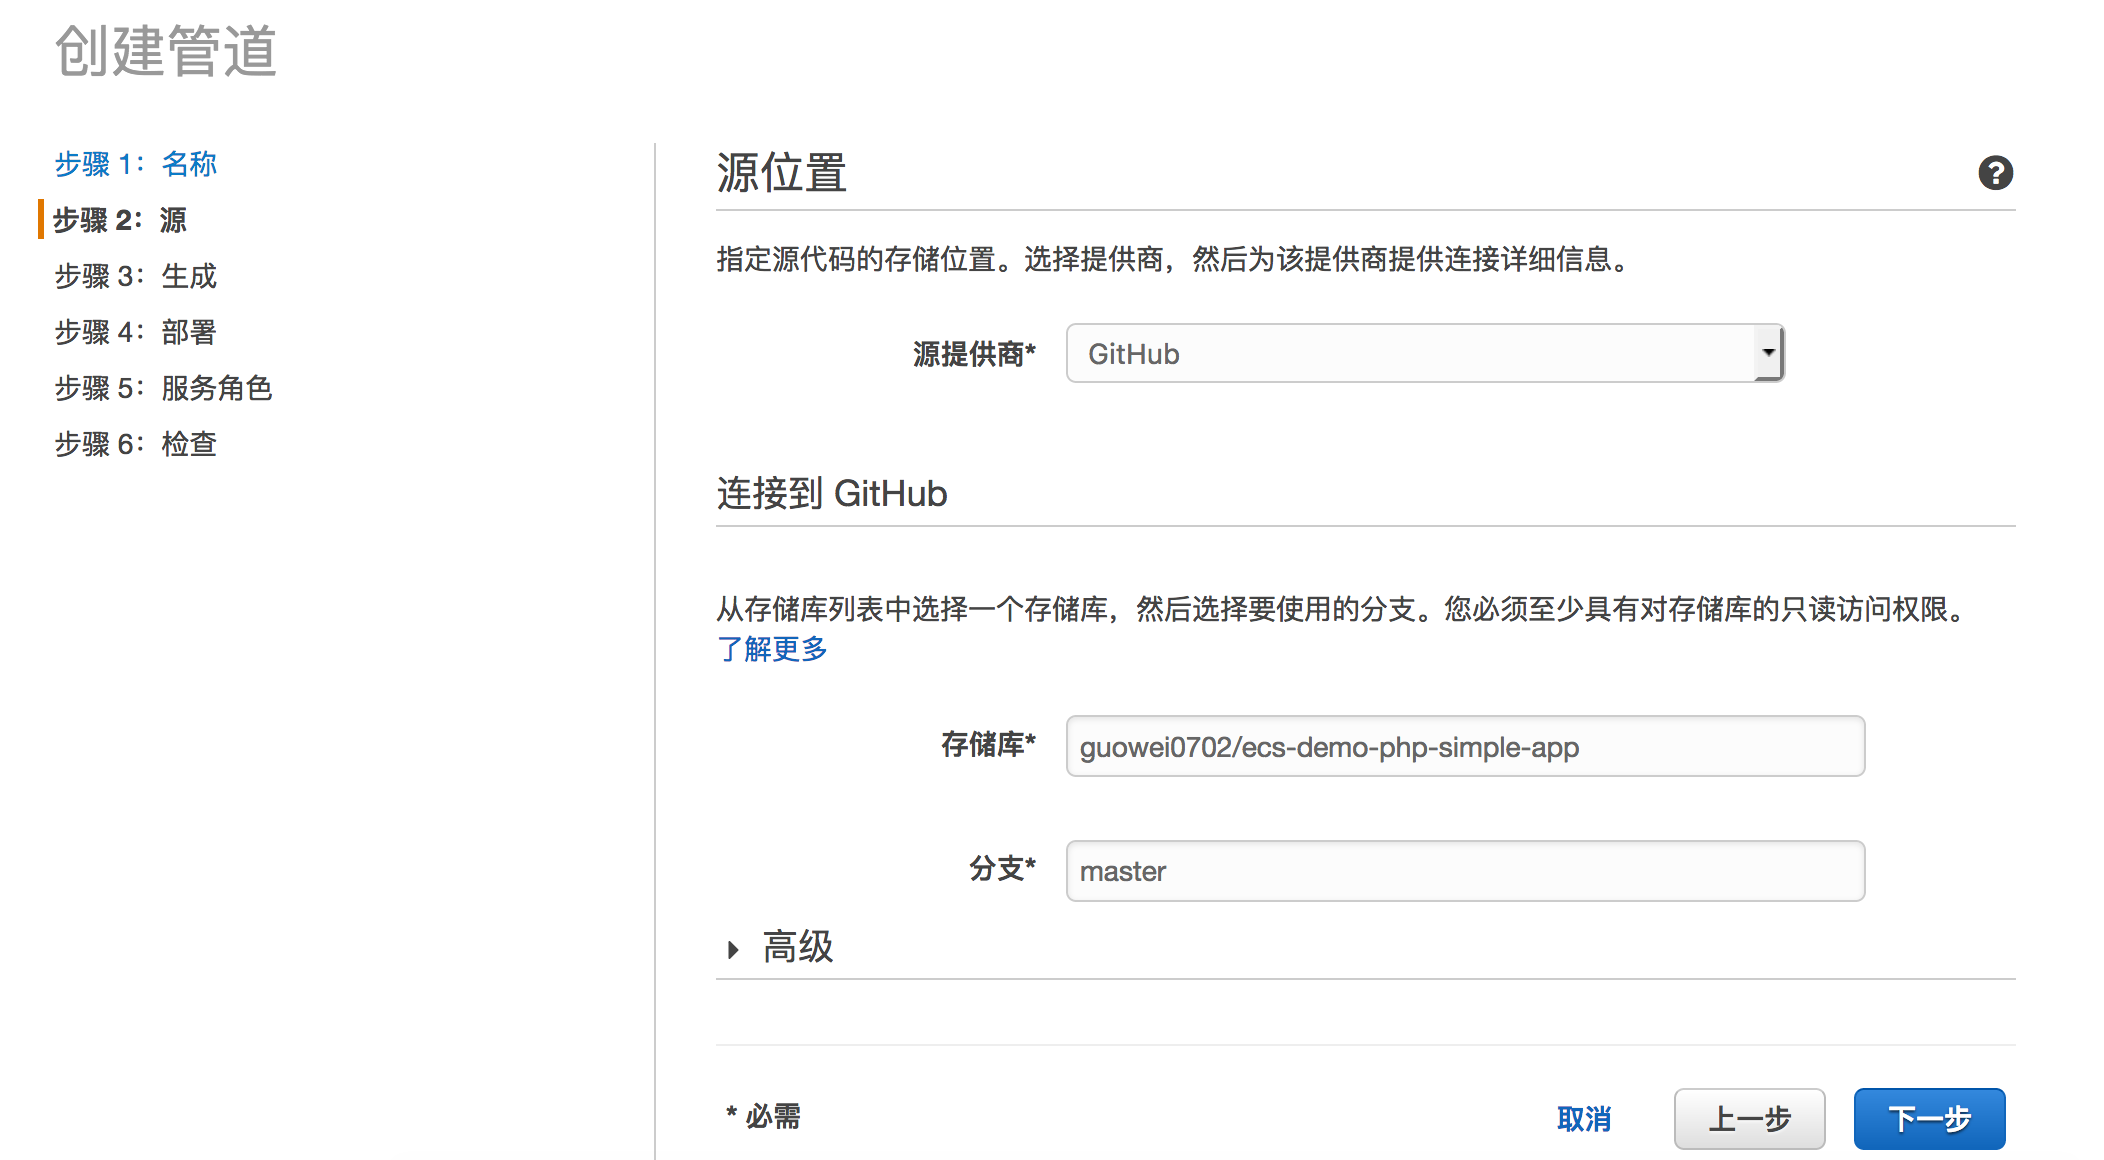
You can Fork the demo software project used in this instance from the following link:
https://github.com/awslabs/ecs-demo-php-simple-app
Click Next.
3.2.2 Build Stage Configuration
AWS CodePipeline supports engines including AWS CodeBuild and Jenkins in the Build stage. This solution uses the AWS-hosted CodeBuild service.
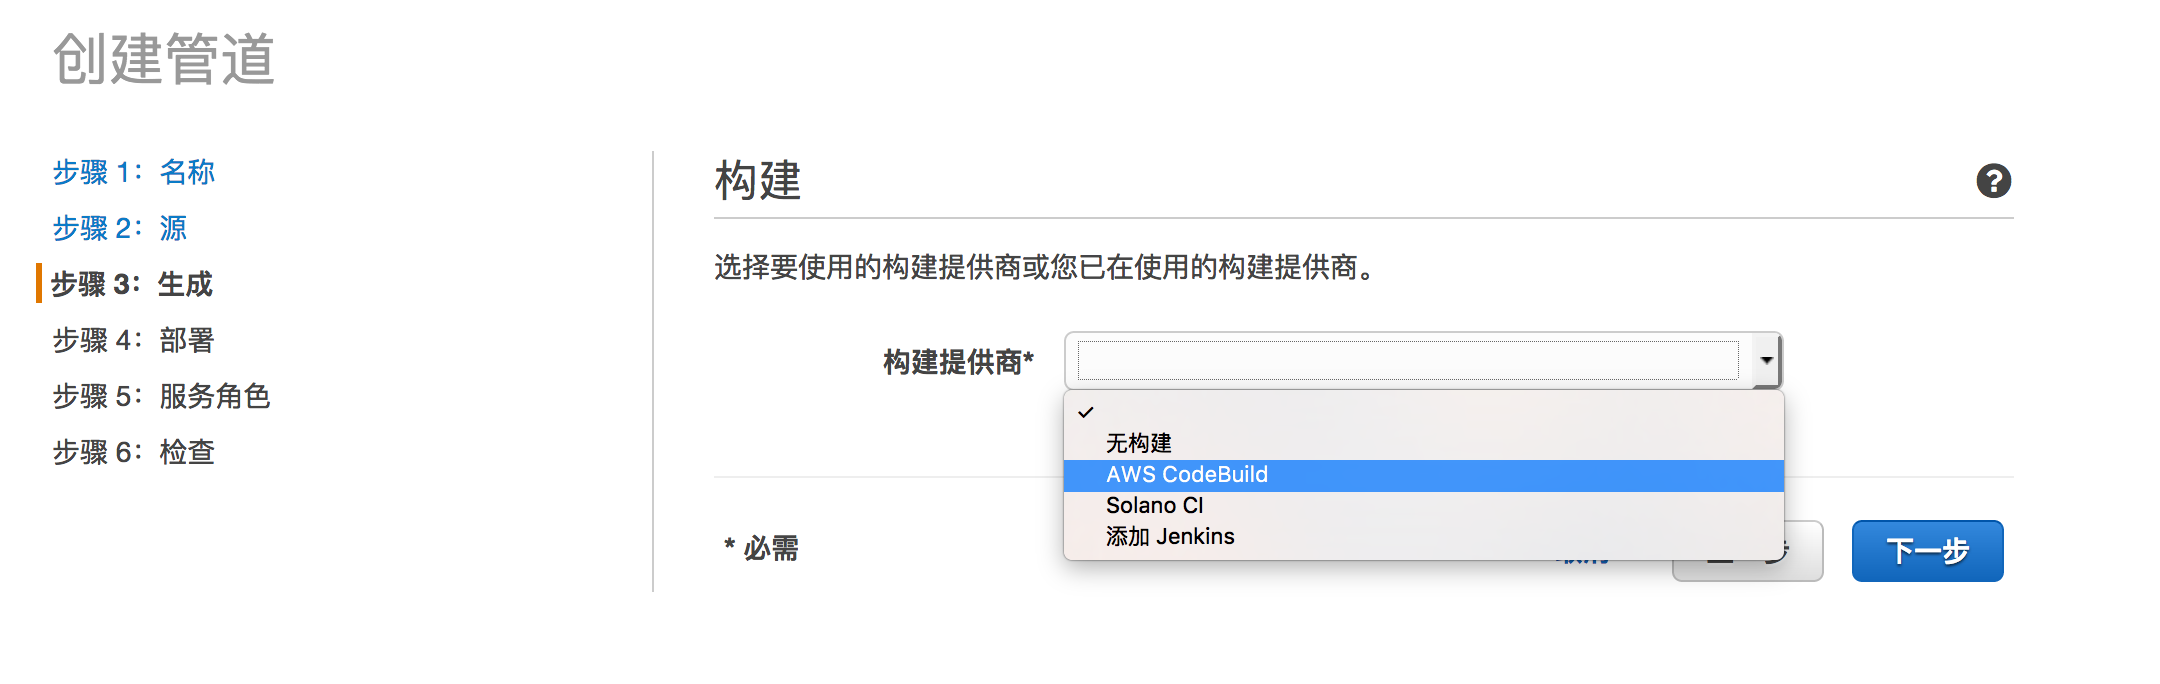
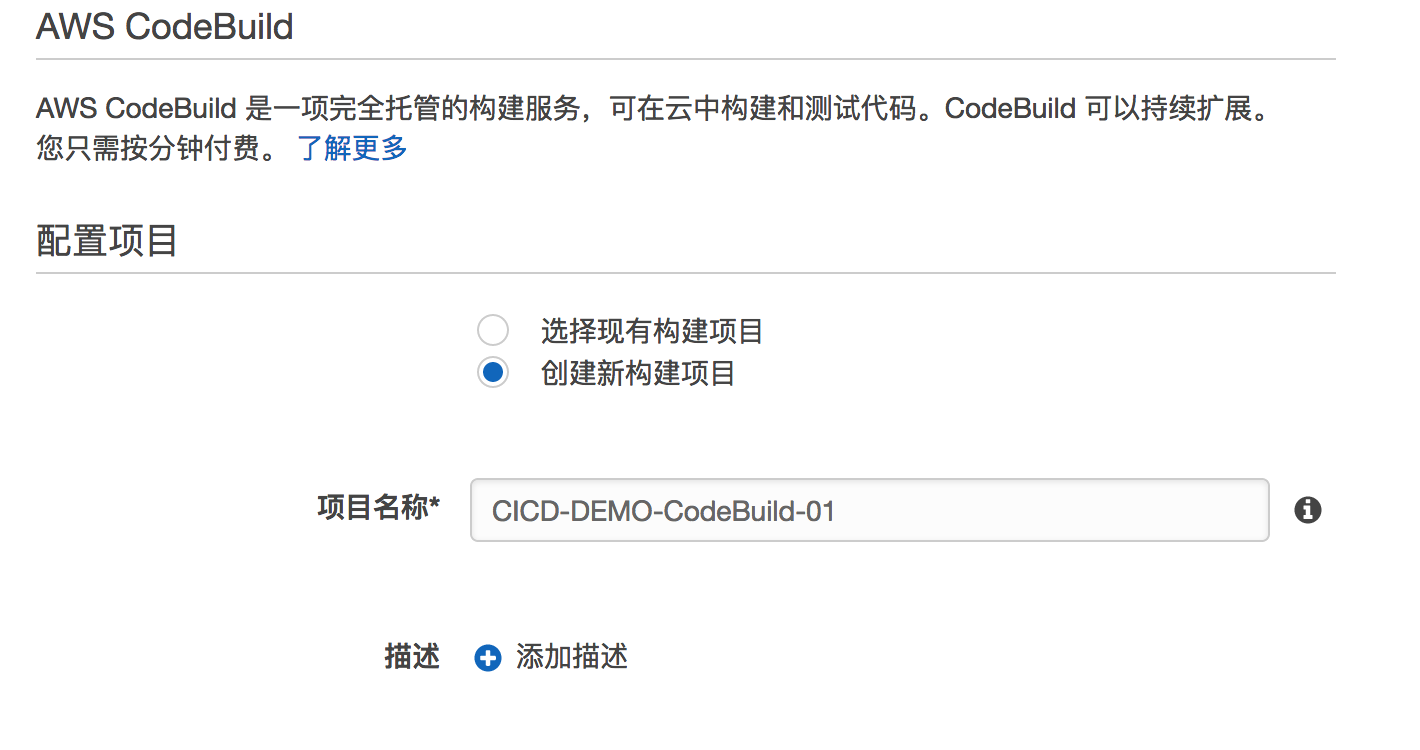
Select “Create a new build project”.
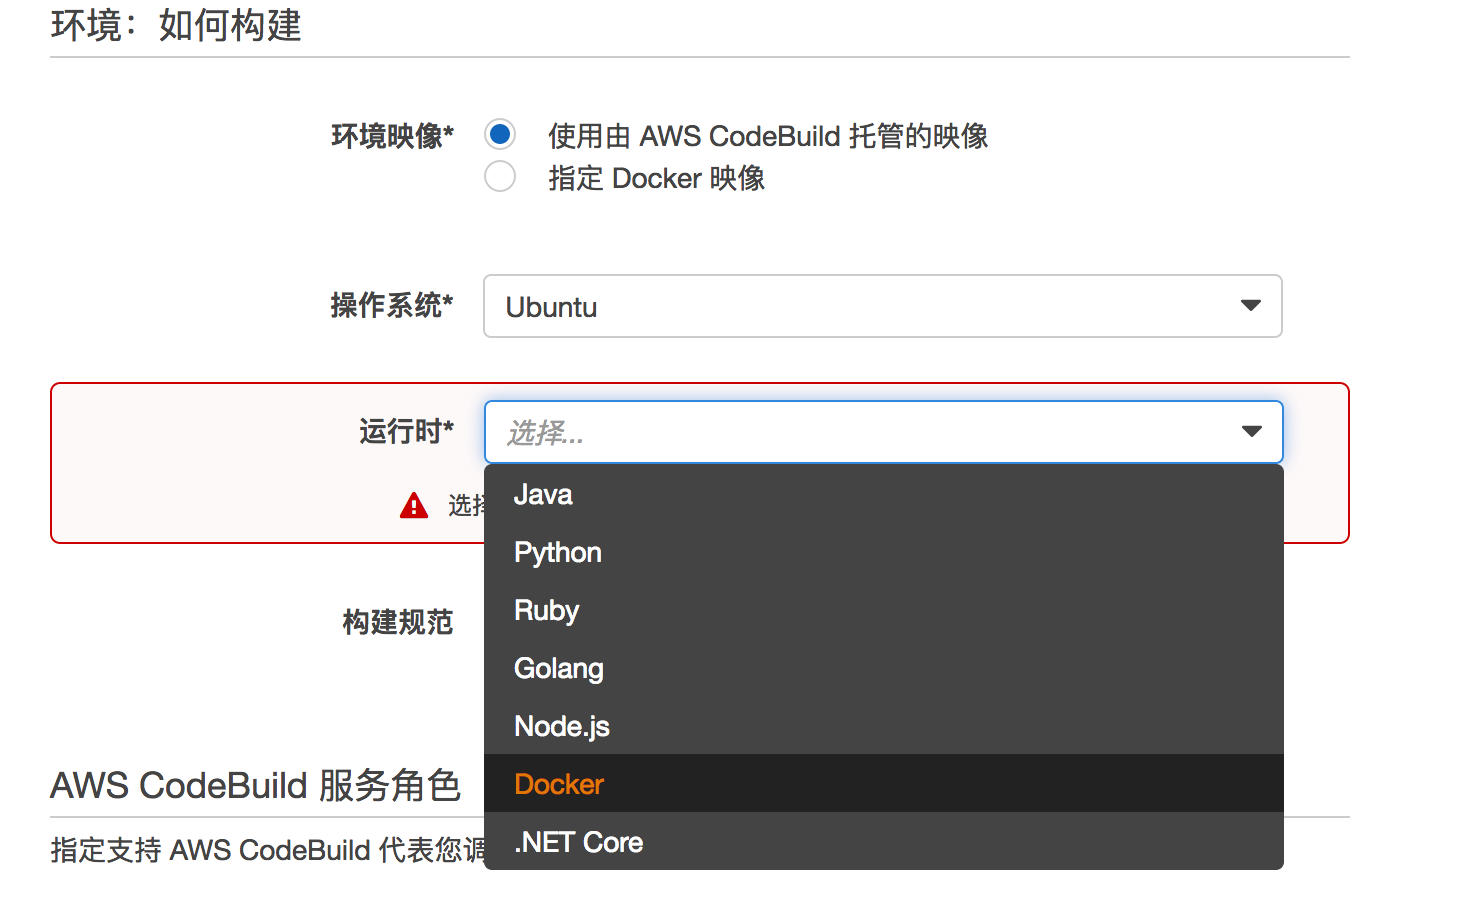
Select the image hosted by AWS CodeBuild. It supports Ubuntu systems and runtimes including Java, Python, Go, Node.js, Docker, etc. This solution uses Docker.
For build specifications, select `buildspec.yml`. This file predefines actions to be executed during the Build lifecycle of AWS CodeBuild, such as logging into ECR, packaging the Docker image, tagging the Docker image, and uploading the Docker image to the logged-in ECR repository.

Place `buildspec.yml` in the GitHub software project source directory. If copying and pasting, pay attention to YAML indentation.
Select Role.
Create a new Role. This Role allows AWS CodeBuild to call related AWS services. In this solution, it needs to call services including S3, ECR, and CloudWatch.
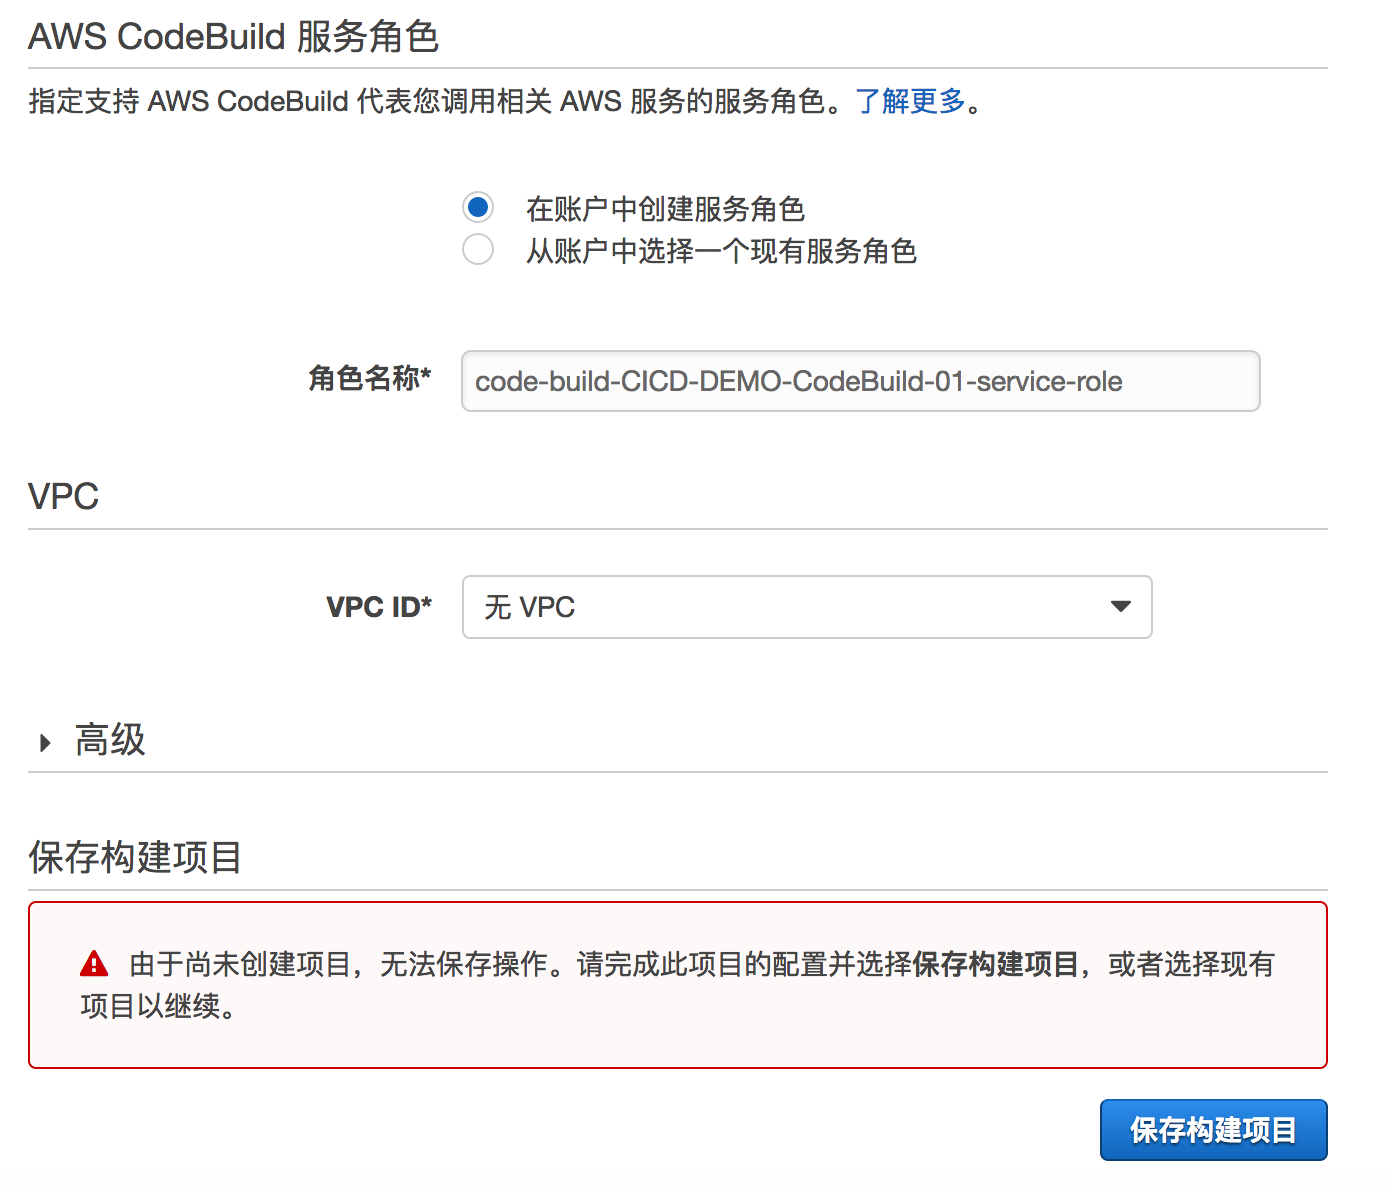
*The default created Role does not have permissions for ECR. After saving the build project, go to IAM, find the newly created Role, edit it, and add ECR permissions. Otherwise, errors will occur when the Pipeline execution reaches the Build stage.
Save the build project.
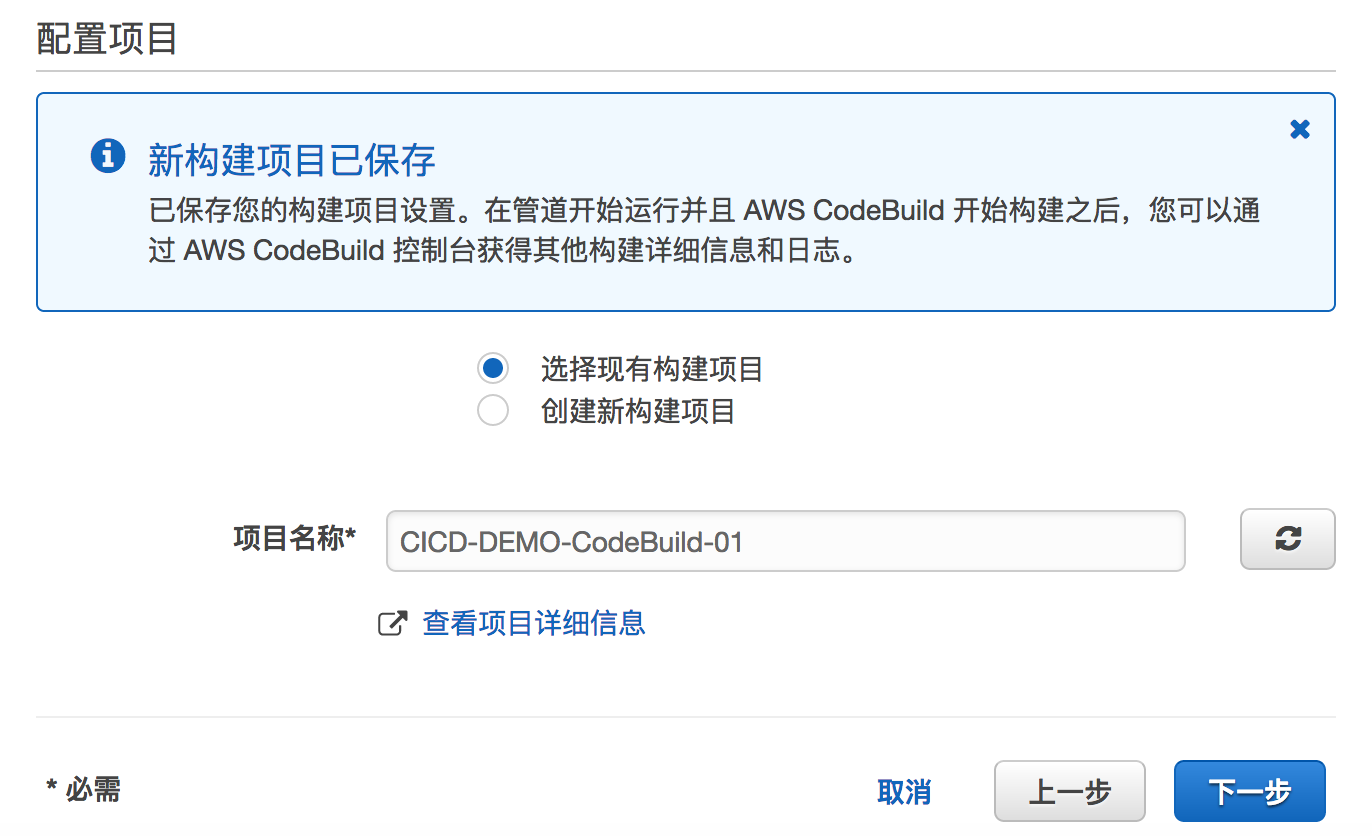
Click Next.
3.2.3 Deploy
The AWS CodePipeline Deploy stage supports service providers including AWS CloudFormation, AWS CodeDeploy, and AWS Elastic Beanstalk. This solution uses AWS CloudFormation to deploy ECS container services.
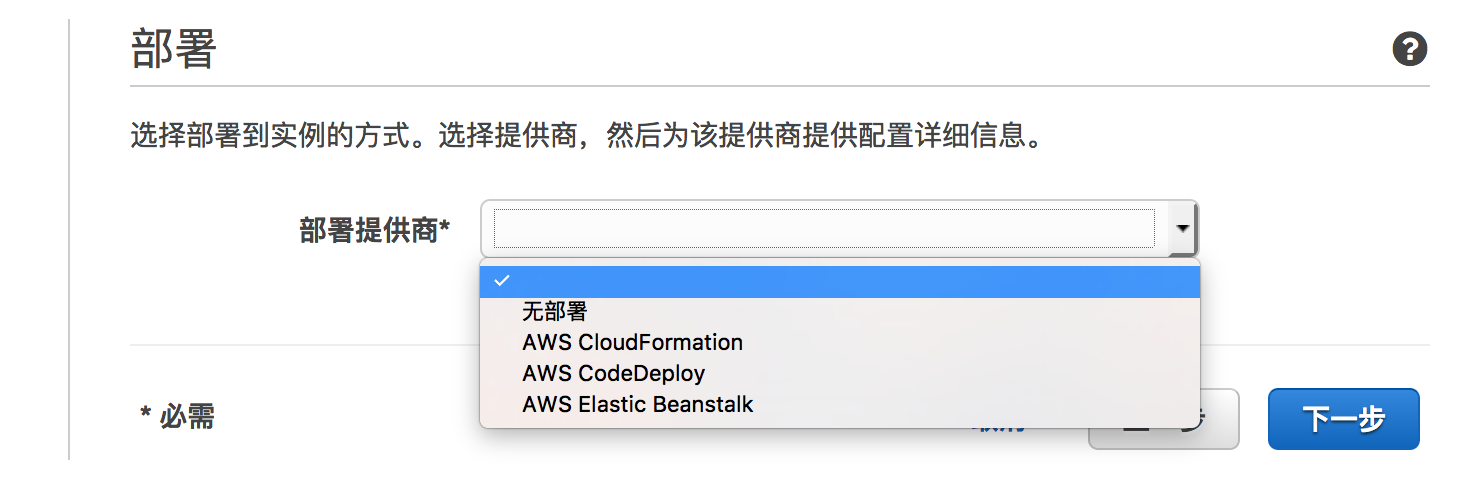
For now, select “No Deploy”. After the Pipeline is created, edit it to introduce the Deploy CloudFormation template source and configure it.
Click Next.
3.2.4 Role
Configure the permissions for AWS CodePipeline to call AWS services, including S3, AWS CodeBuild, AWS CloudFormation, IAM, etc. Click “Create Role” to go to the IAM interface and select the appropriate policies to create the role.
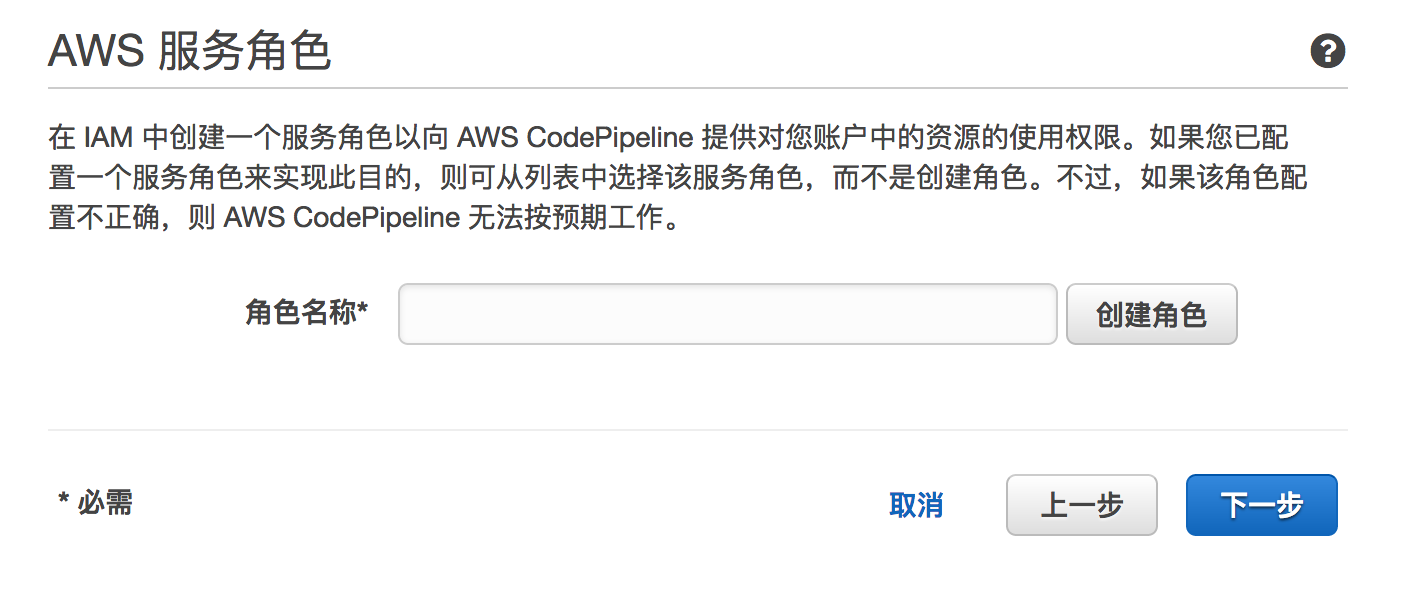
After creation, the screen returns to the Pipeline, and the Role created in IAM is displayed.
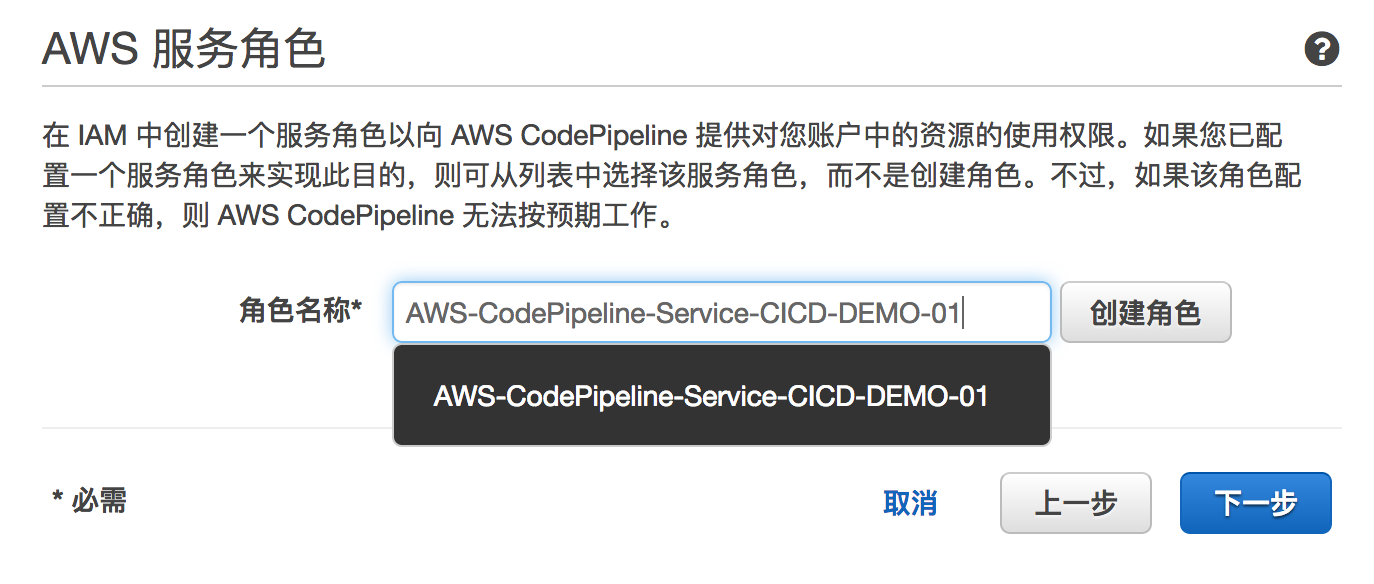
Click Next.
3.2.5 Review and Create Pipeline
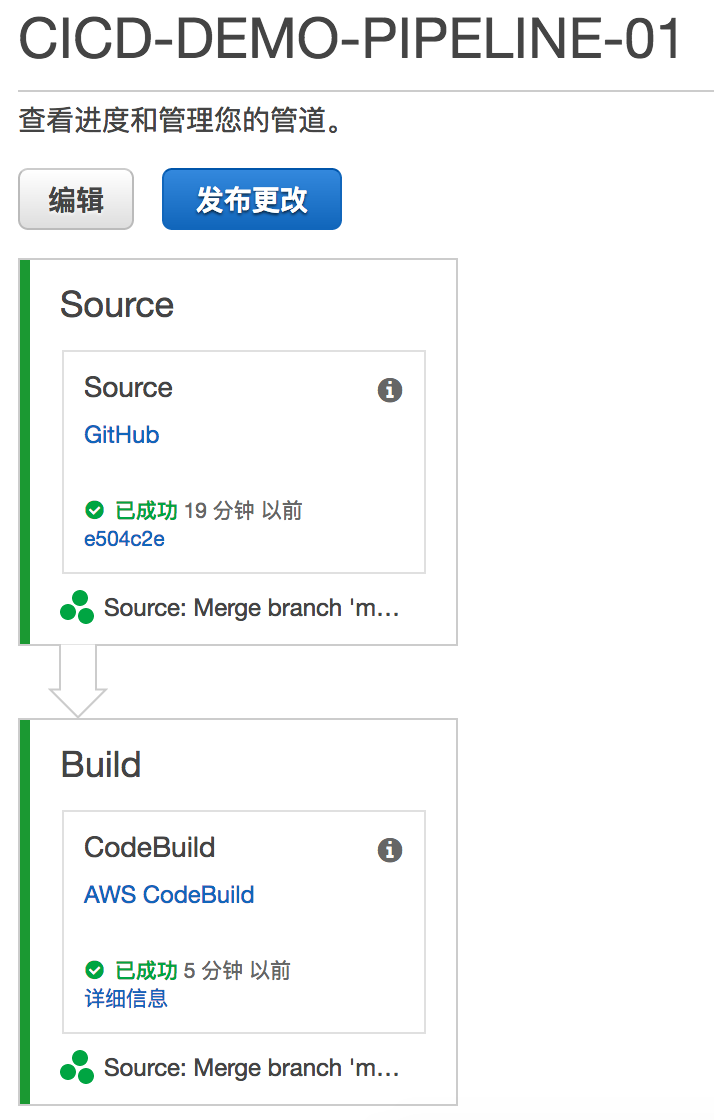
After the pipeline is created, it will run automatically. It currently fetches the project from the GitHub software project source, packages the Docker image, and pushes it to ECR. The interface displays as shown below:
3.2.6 Add Template Source for Deploy Stage and Configure Deploy Stage
Click Edit, then click the pencil icon in the top right corner of the Source stage.
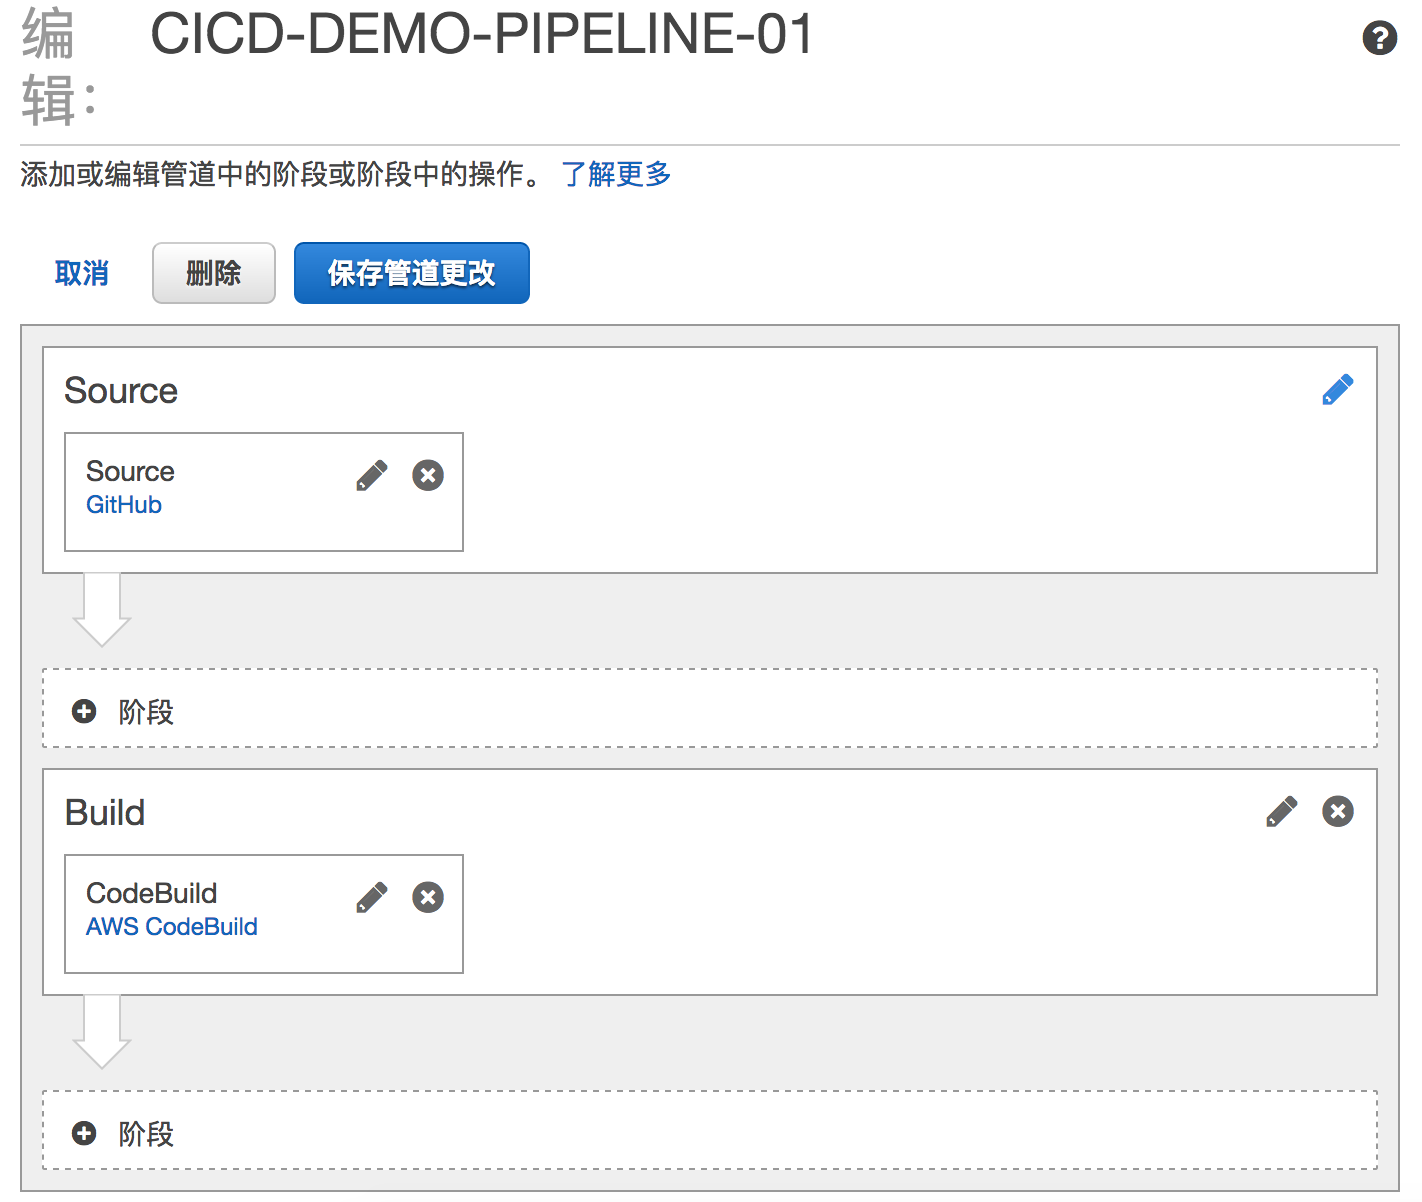
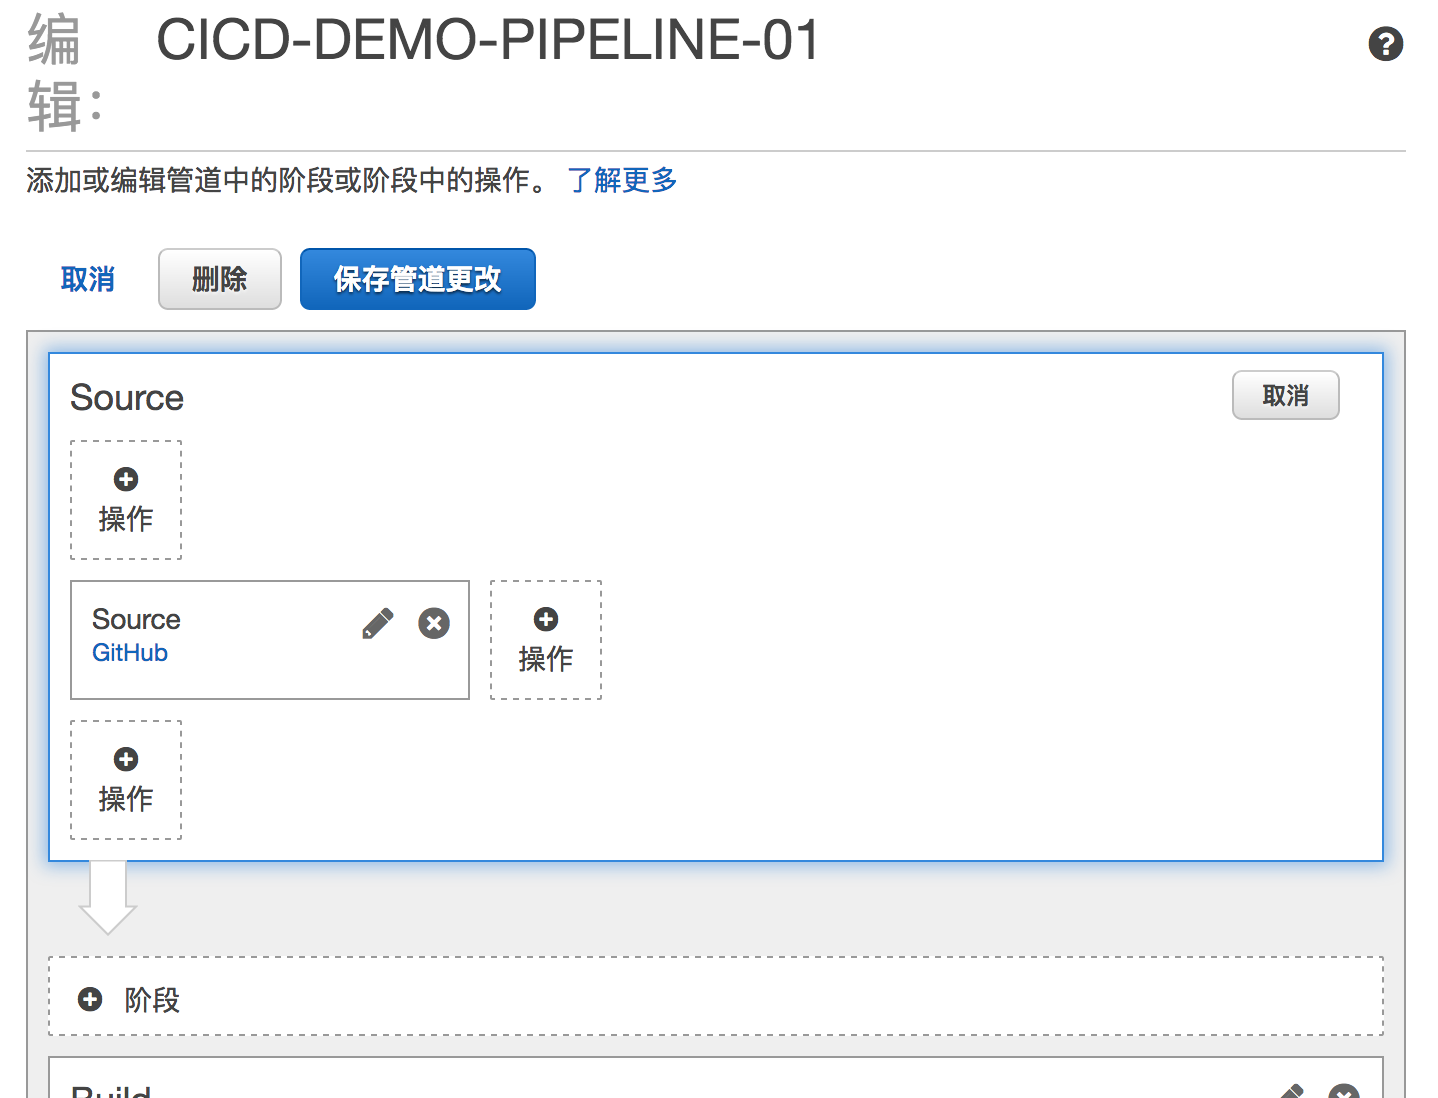
You can see that the AWS CodePipeline editing interface allows adding elements both vertically and horizontally.
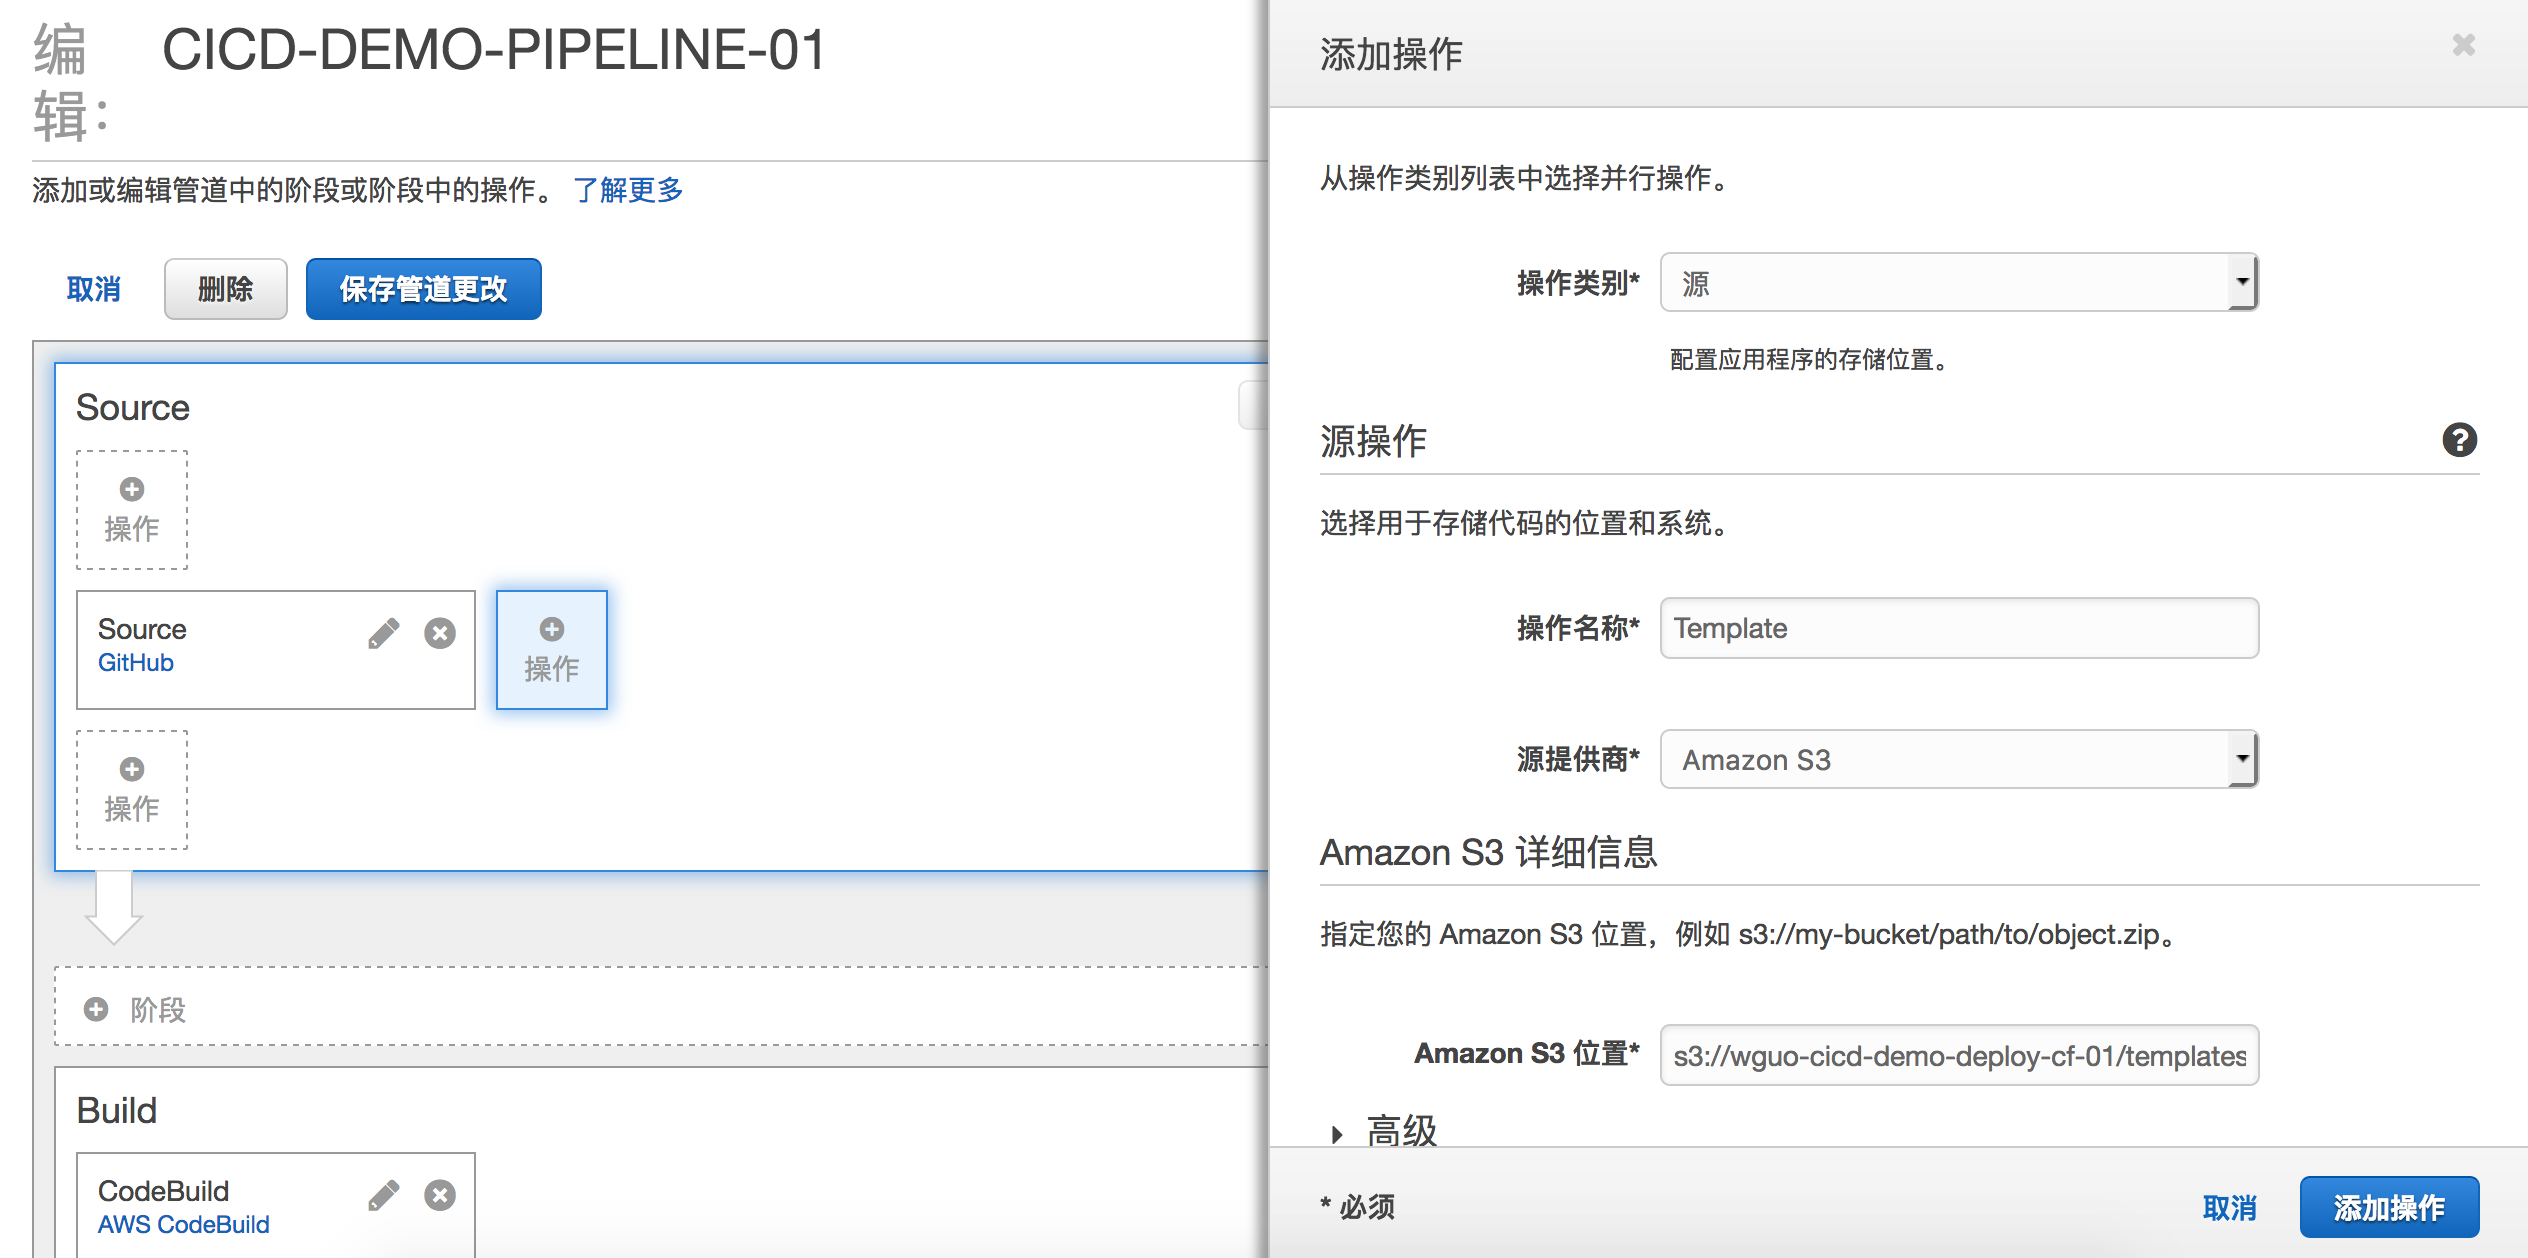
To the right of the GitHub Source, click “Add Action”, select Source, name the action “Template”, select S3, and enter the address of the created S3 bucket.
Scroll down. Note that in the Output Artifacts section, enter “Template”.
Data passing between stages in the Pipeline requires specifying vertical input/output. That is, the output “Template” from the S3 source in the Source stage connects to the input “Template” in the Deploy stage.
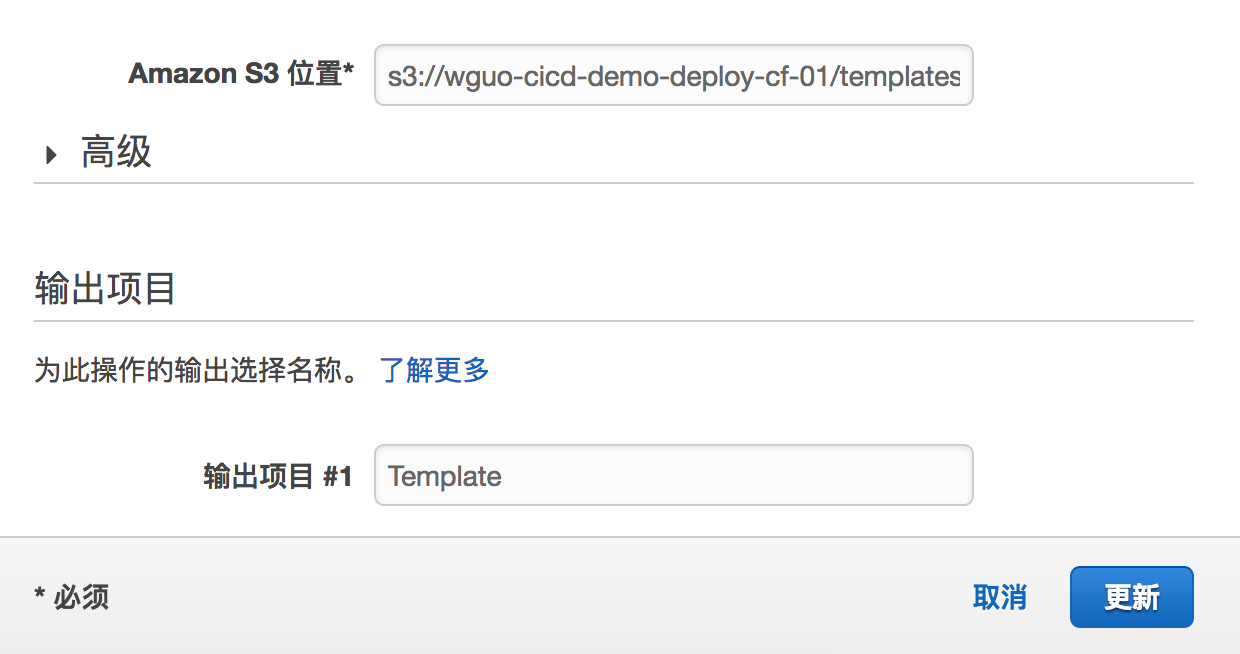
Click Update.
Click “Add Stage” below the Build stage. On the right side of the screen, select Deploy, and choose AWS CloudFormation.
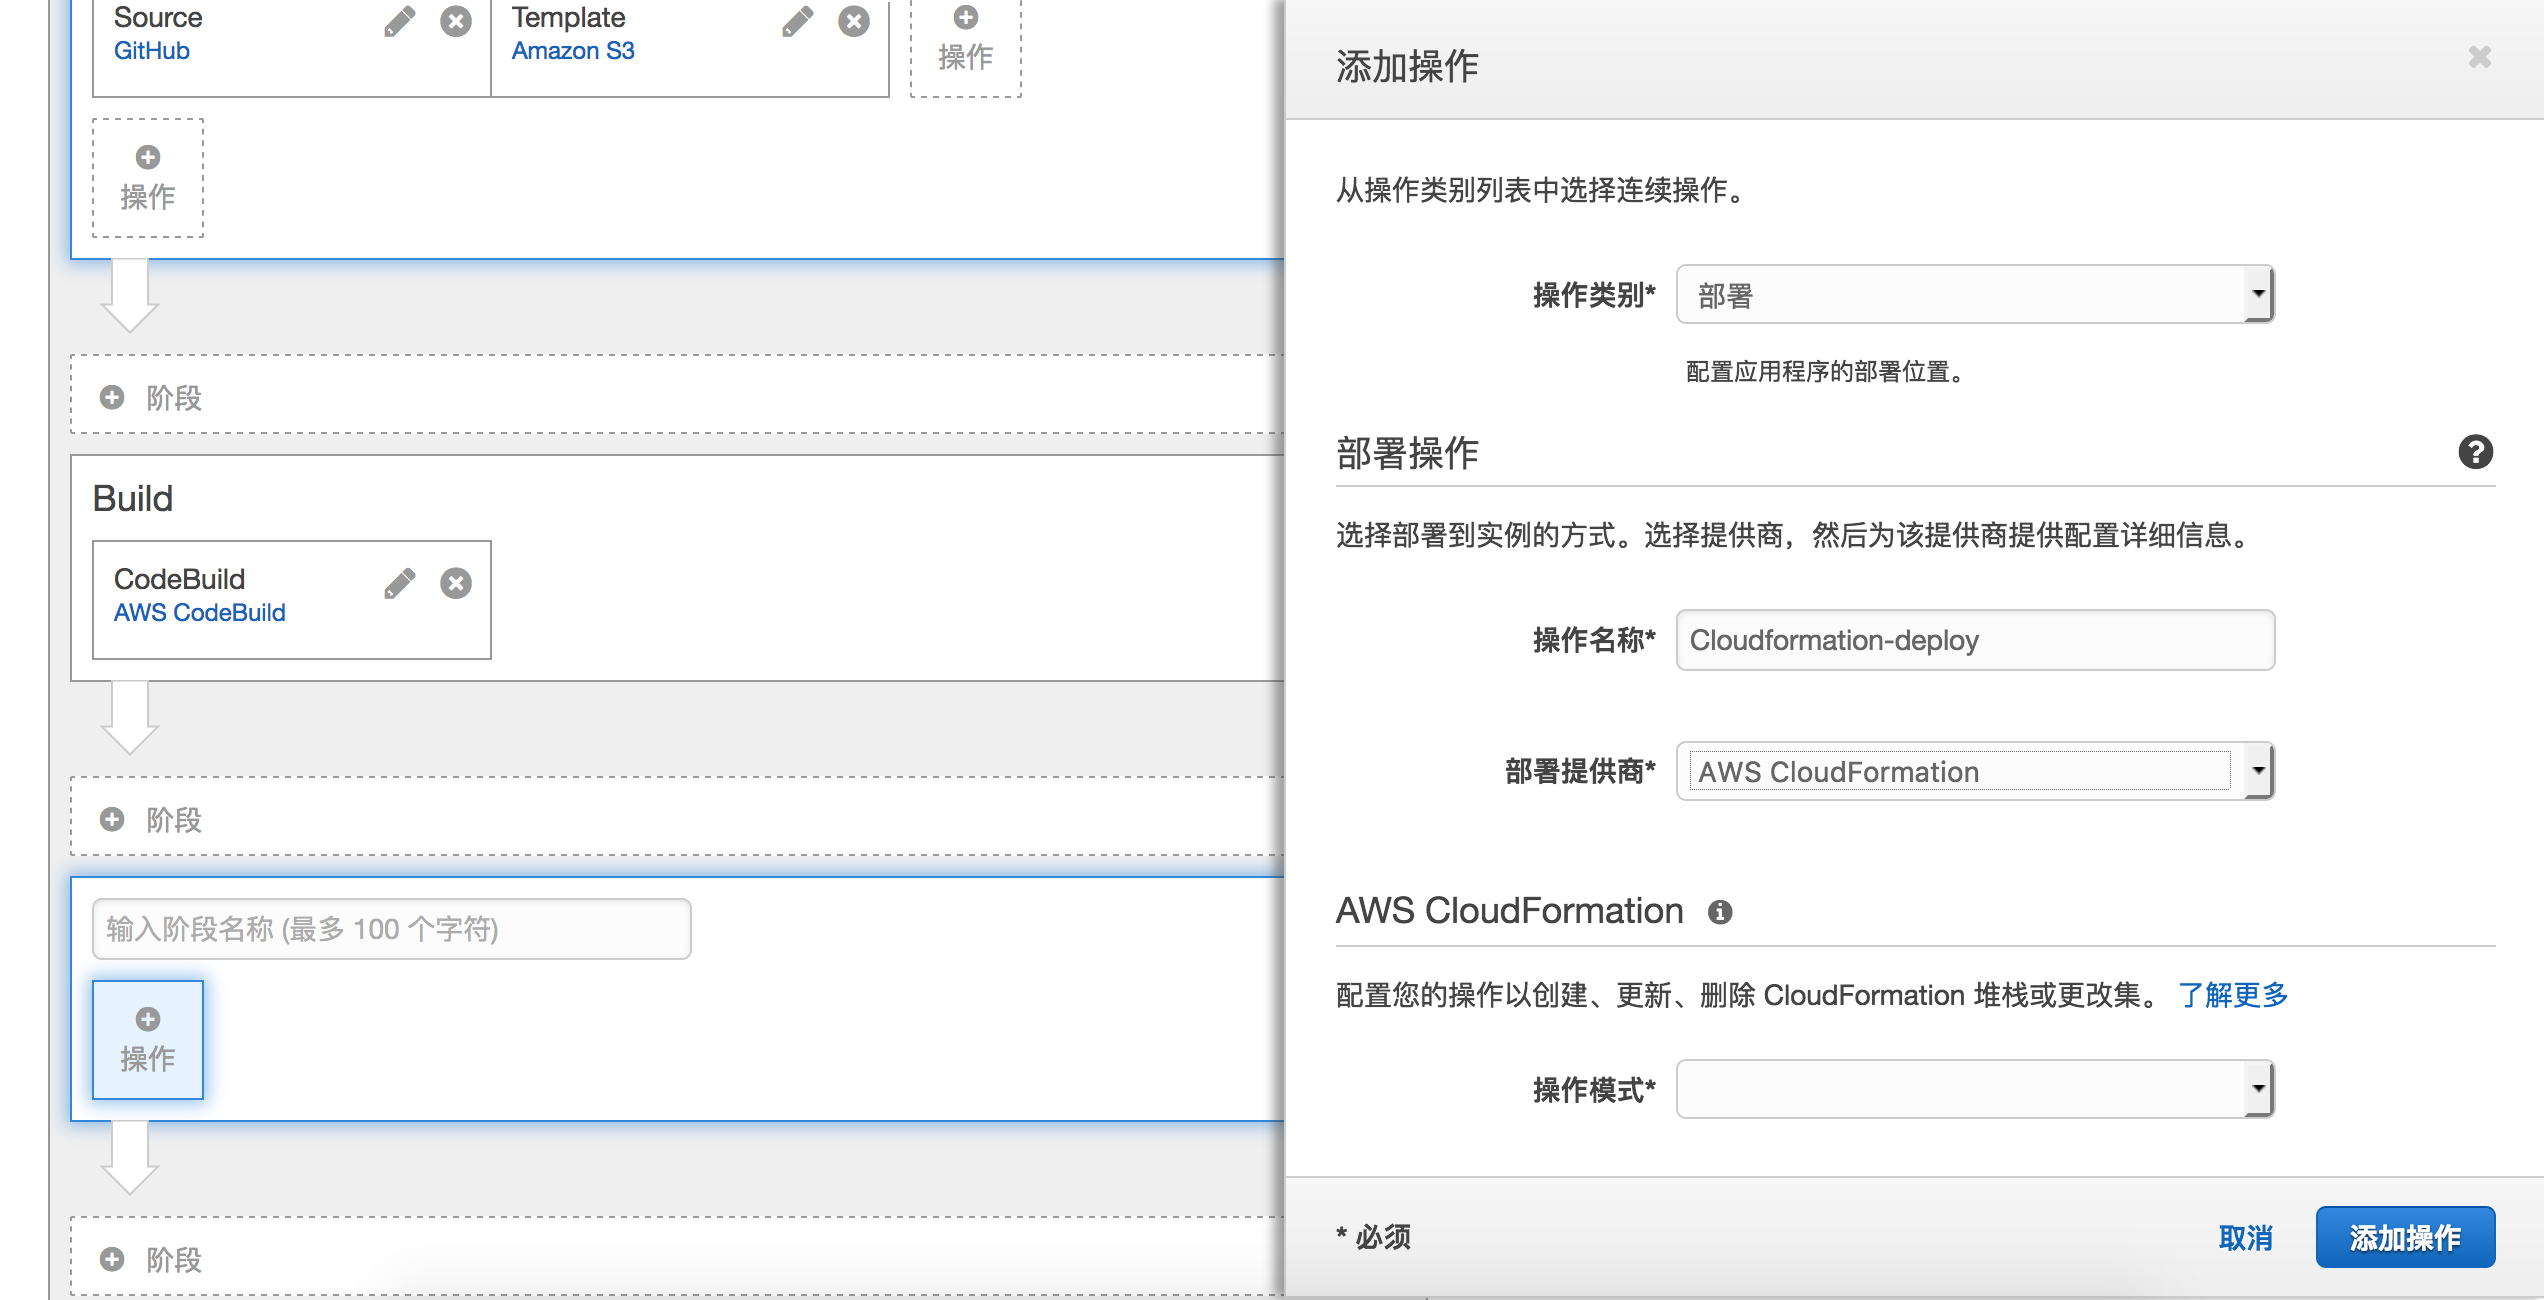
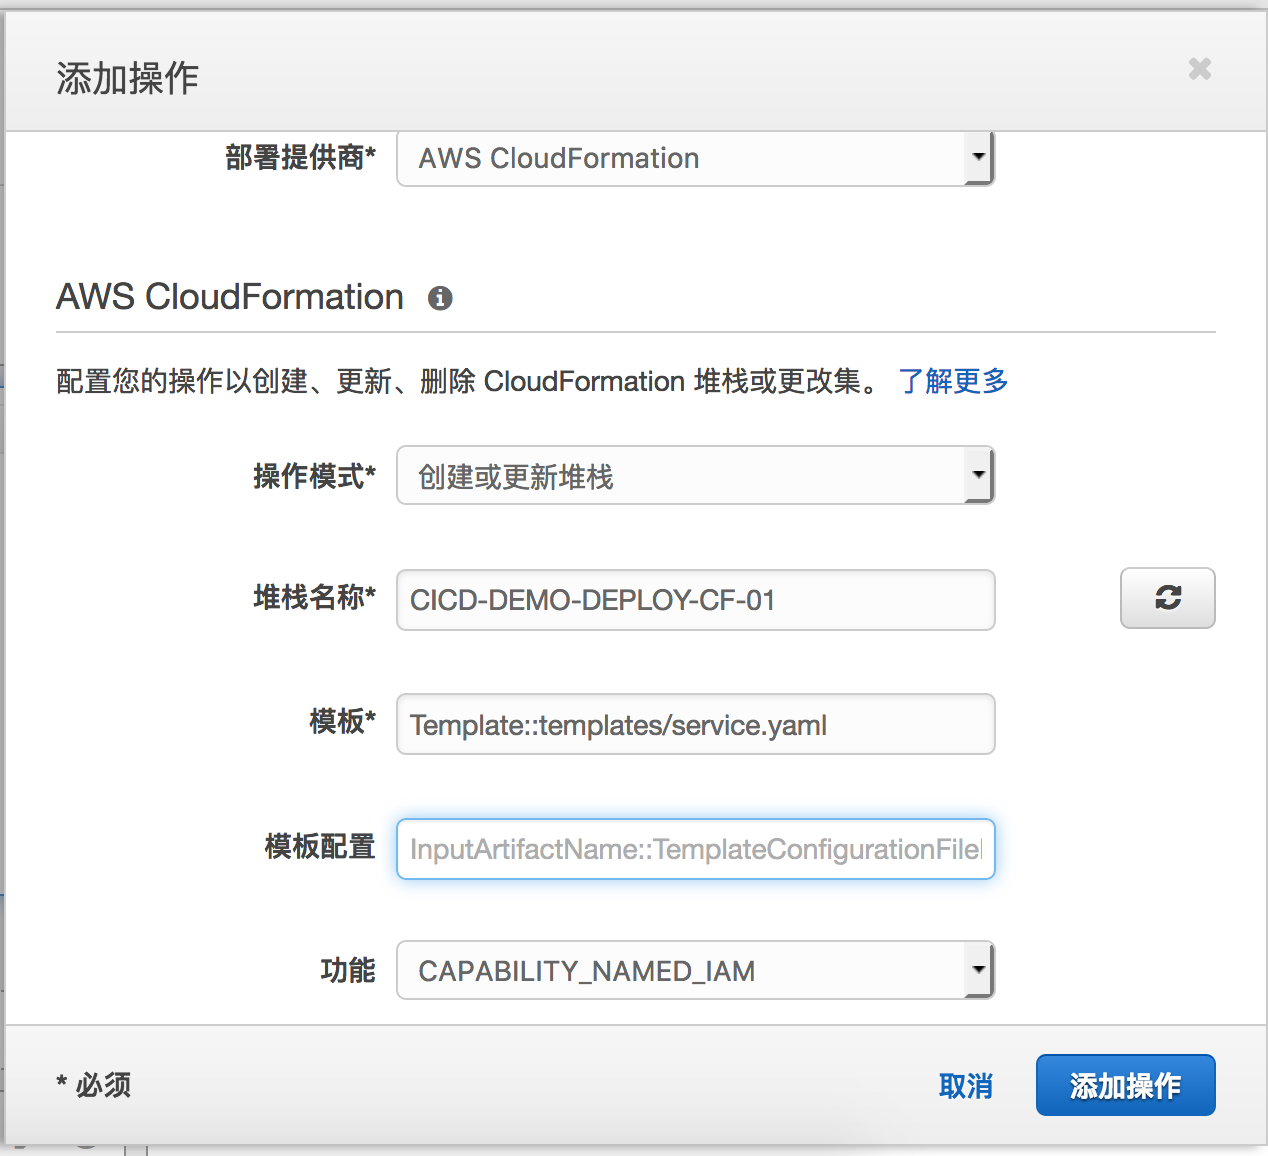
Select “Create or Update Stack” for Operation Mode. Enter the stack name. For the Template, enter `Template::templates/service.yaml`, meaning the input corresponds to the `service.yaml` file inside `templates.zip` in the S3 source bucket. Select capability `CAPABILITY_NAMED_IAM`.
You also need to create a Role to allow AWS CloudFormation to call AWS services including IAM, ECS, and ECR.
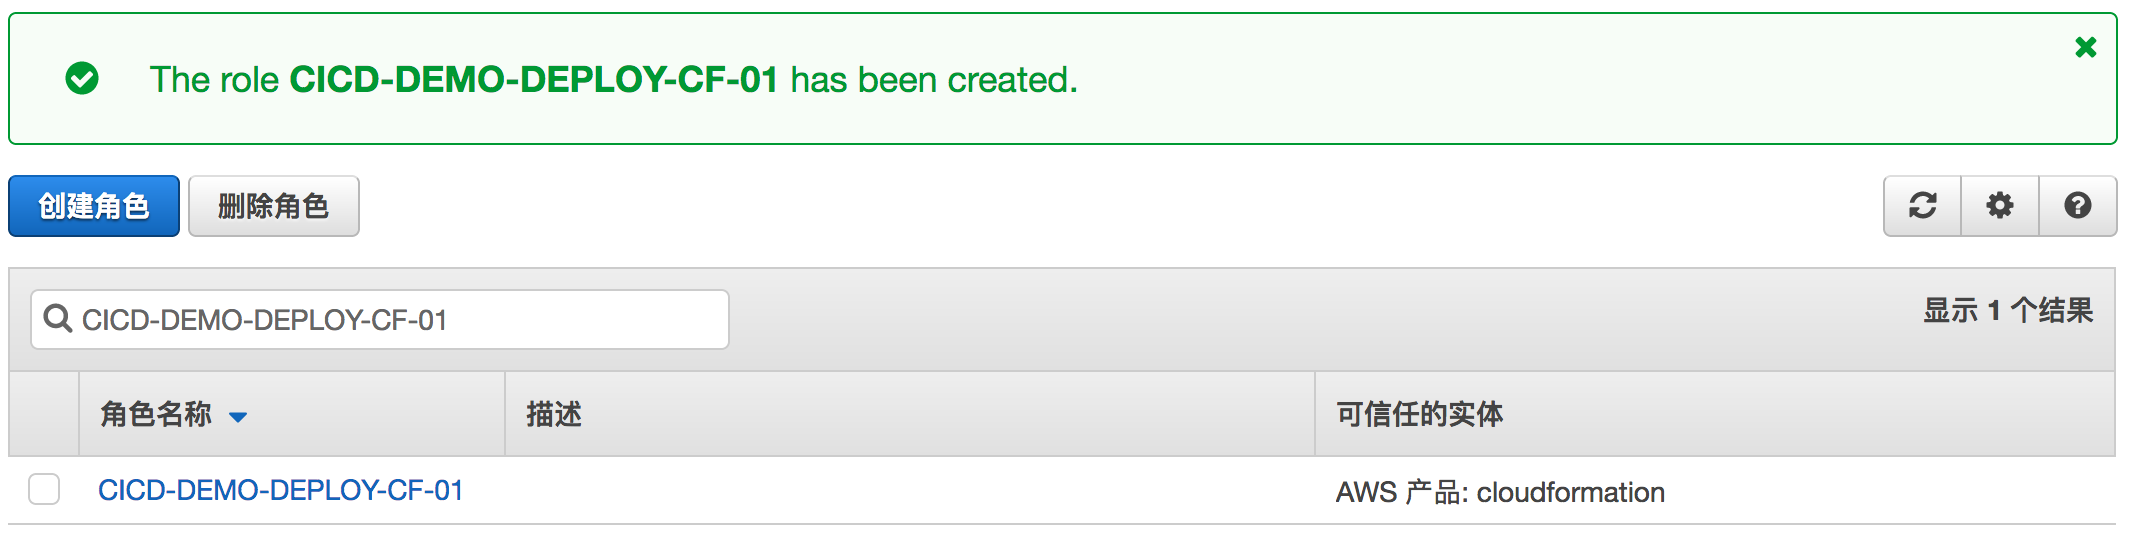
Select the Role after creating it in the IAM interface.
Expand Advanced.
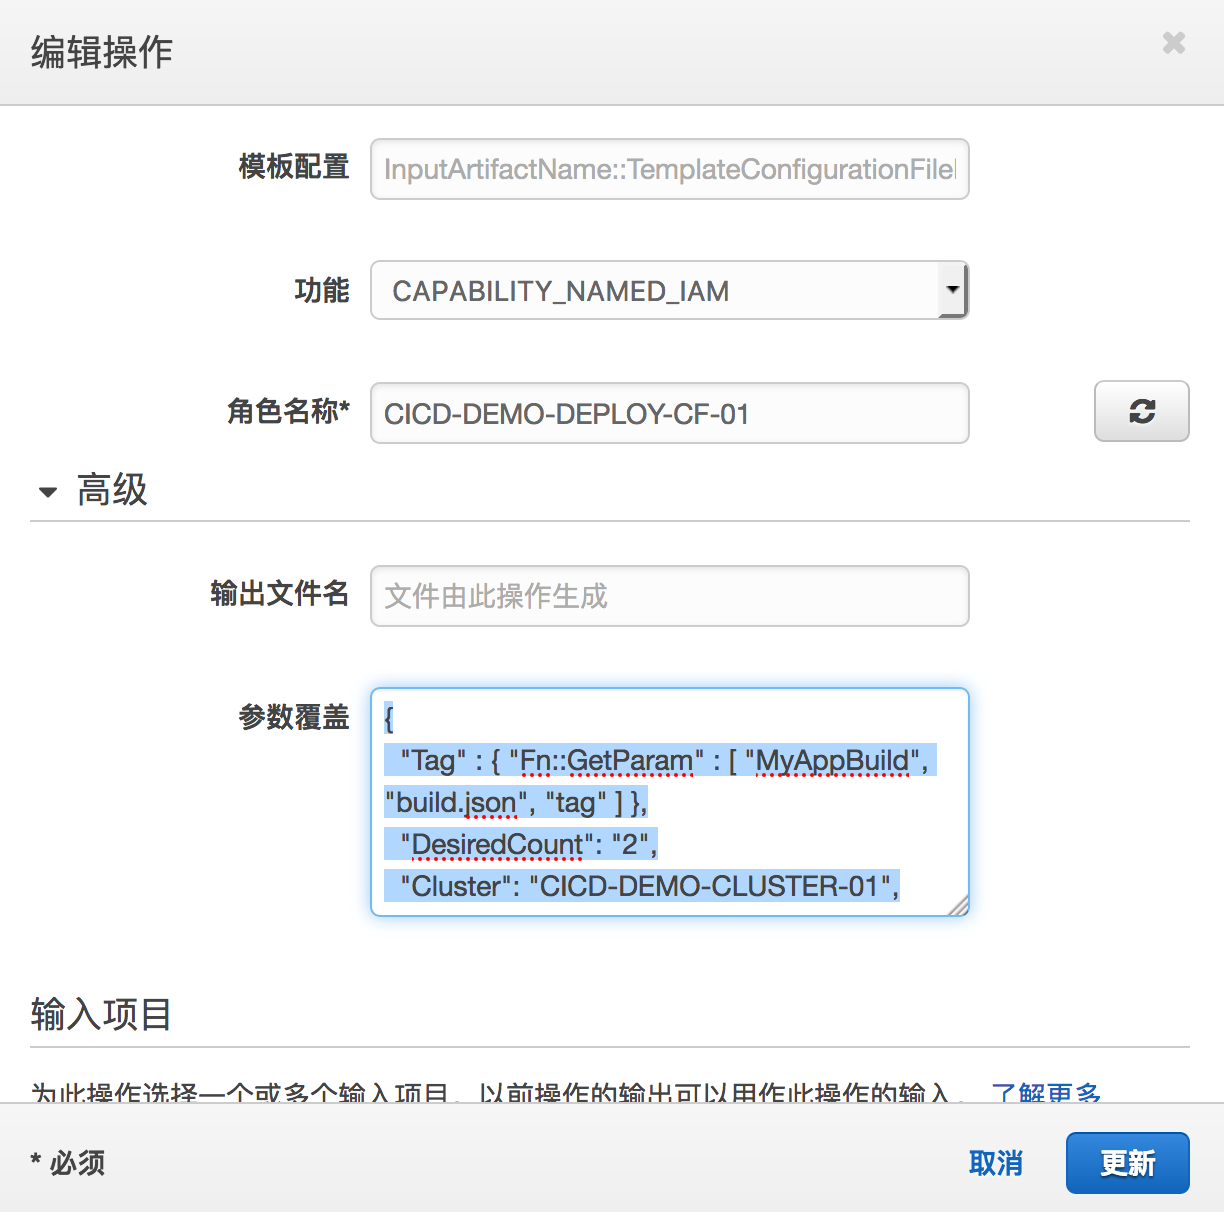
In Parameter Overrides, enter the parameters required by CloudFormation. Fixed parameters can also be defined directly in the S3 `service.yaml`.
Tag: The value of the Docker image Tag passed out from the Build stage, passed into CloudFormation to pull the corresponding version of the Docker image from ECR when building the Container in the Task Definition.
DesiredCount: The number of Tasks to create in the ECS Service.
Cluster: The name of the created host cluster.
TargetGroup: The ARN of the Application Load Balancer of the created host cluster.
Repository: The name of the created ECR repository.
In the Input Artifacts section, enter the outputs from the Build stage and the S3 template source.
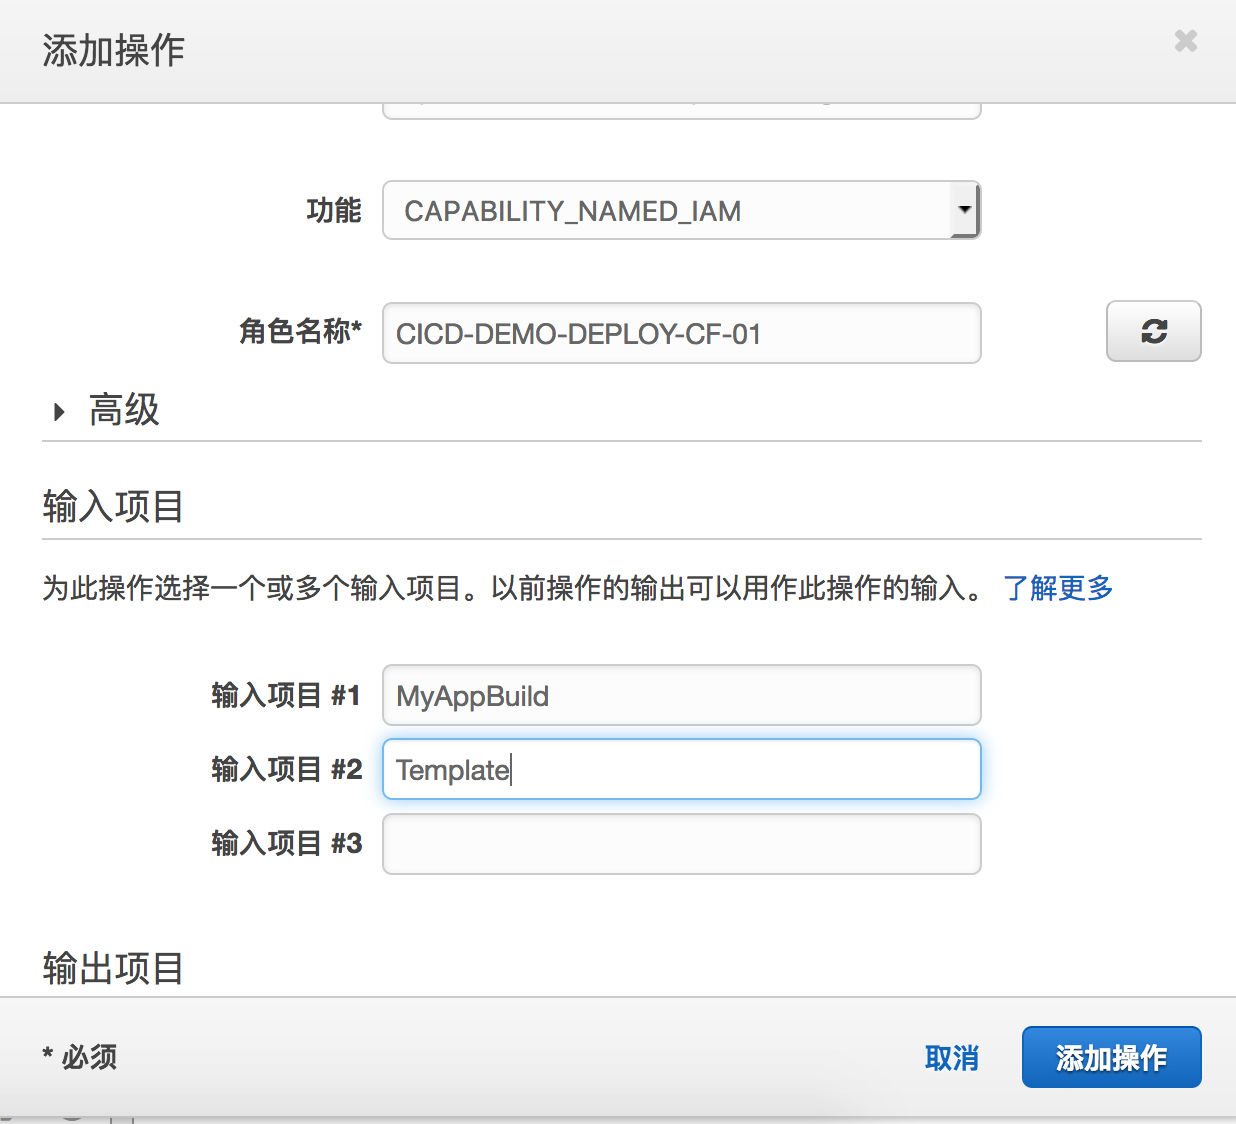
Click Add Action.
Save Pipeline changes.
4. Running and Simulating Version Updates
4.1 Running
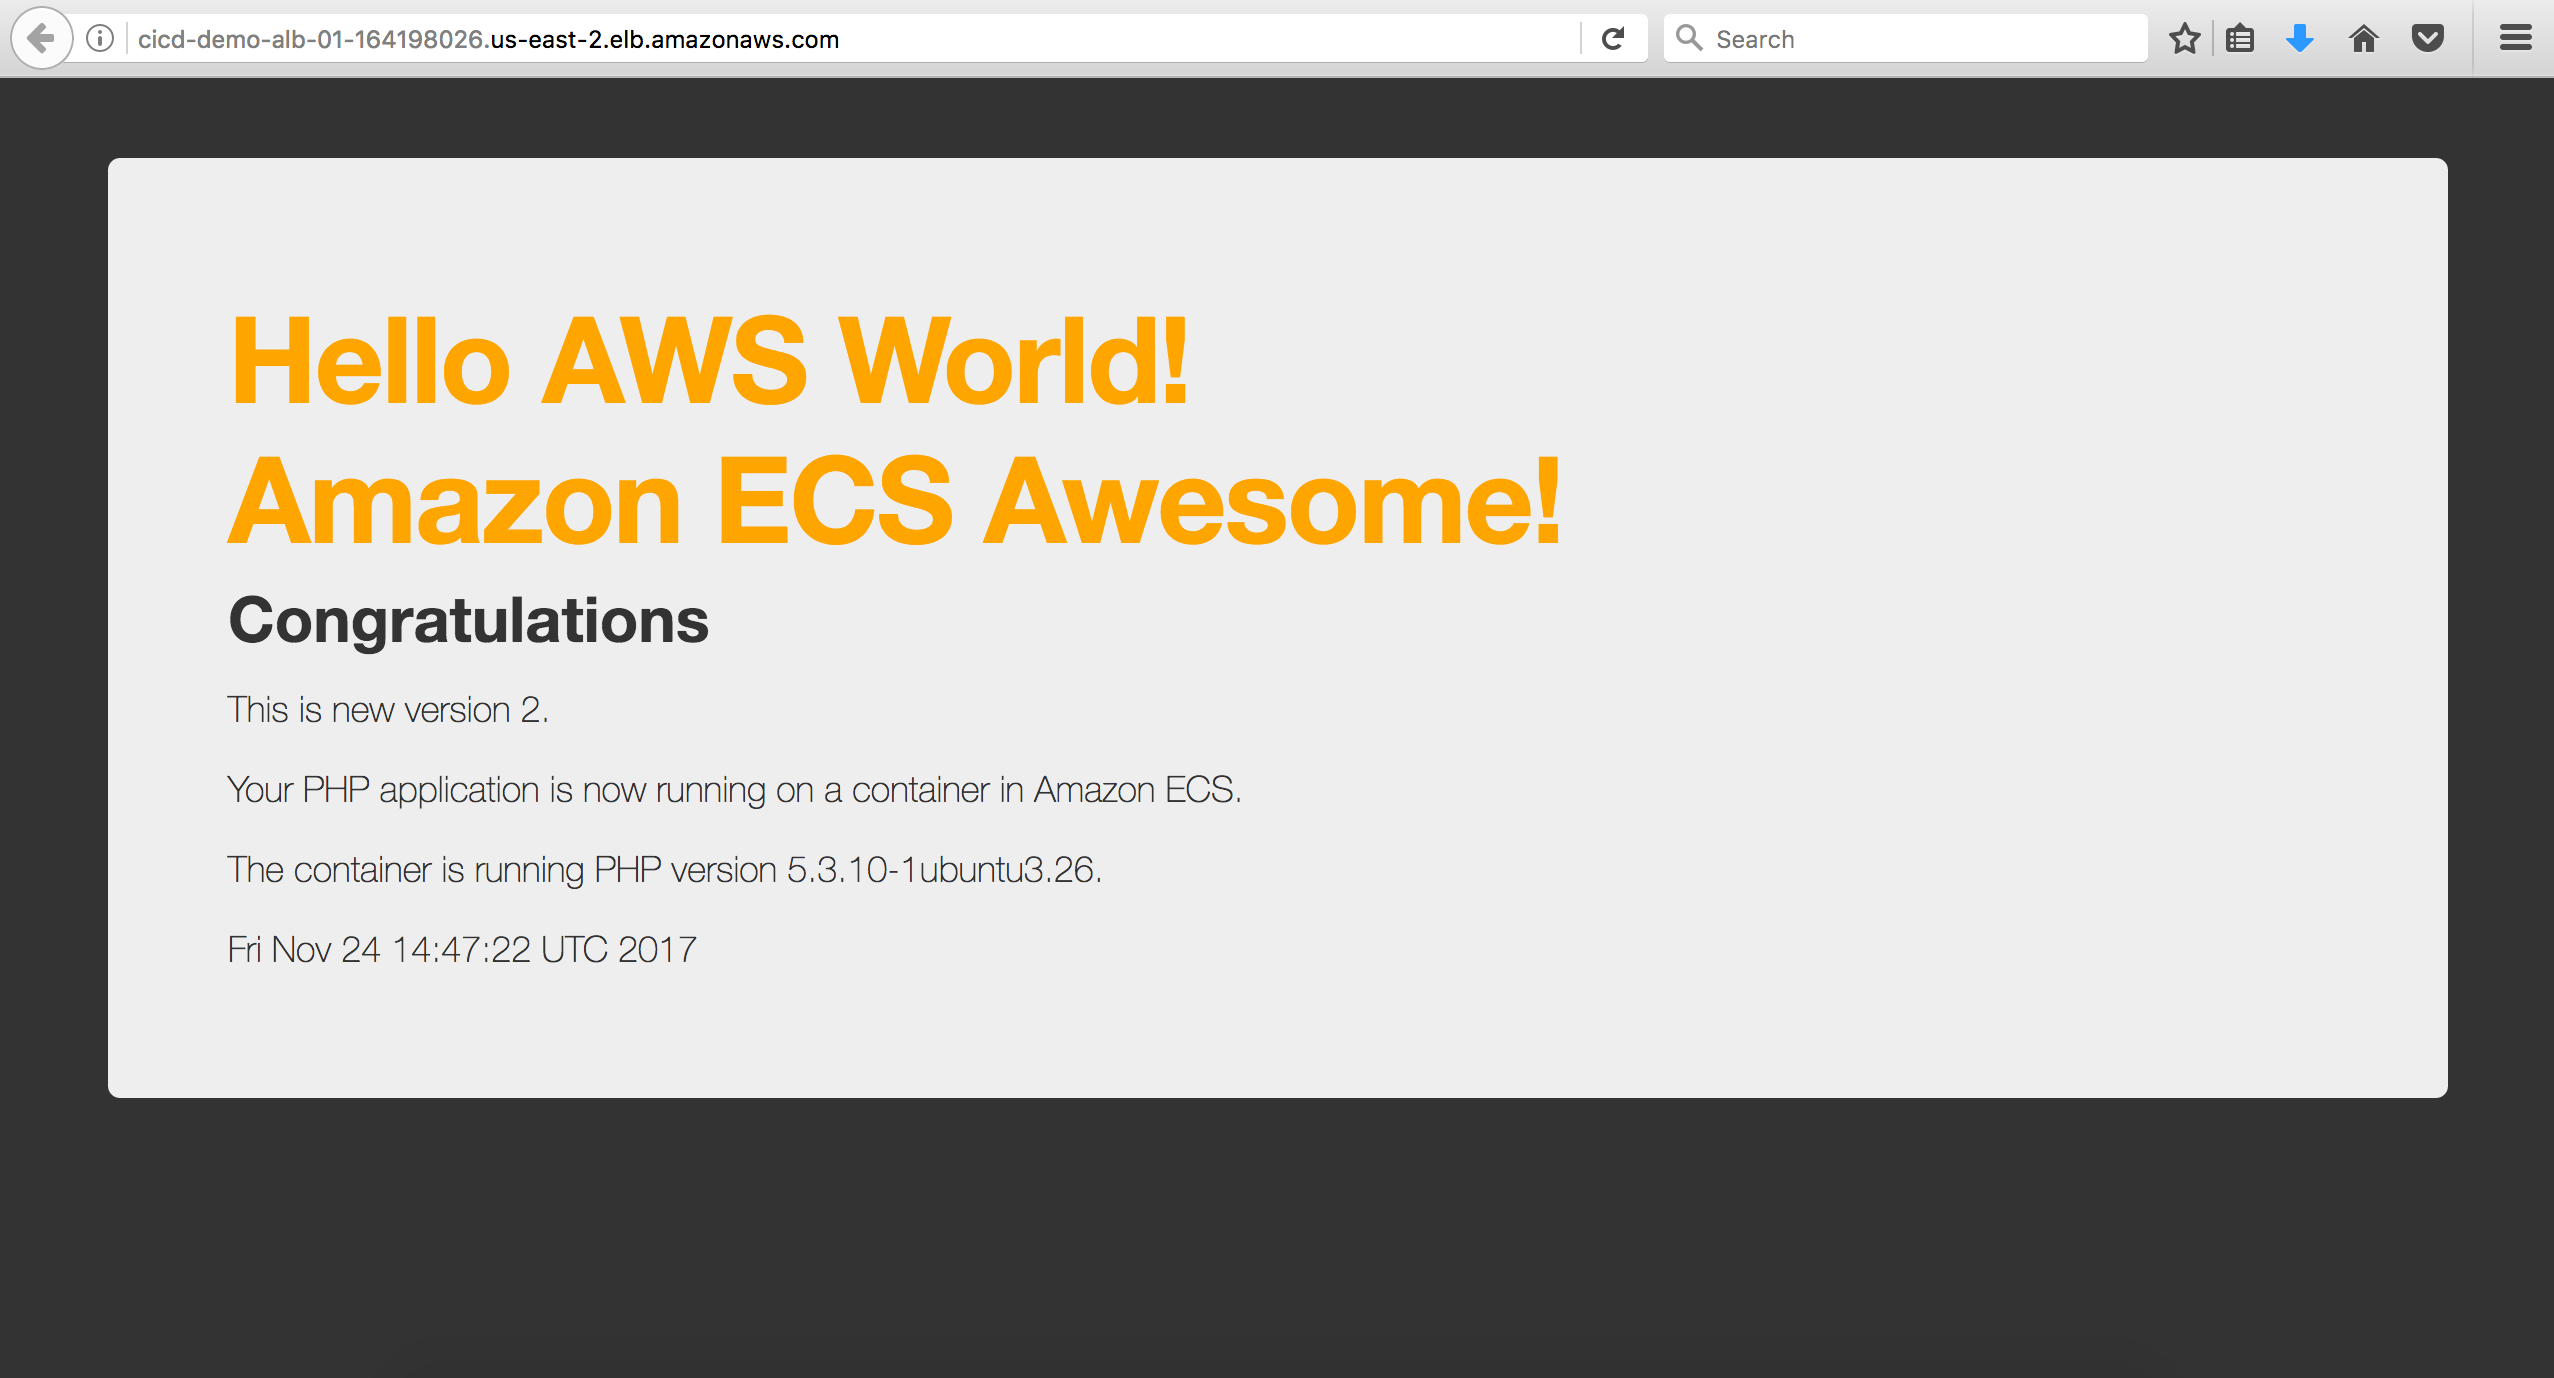
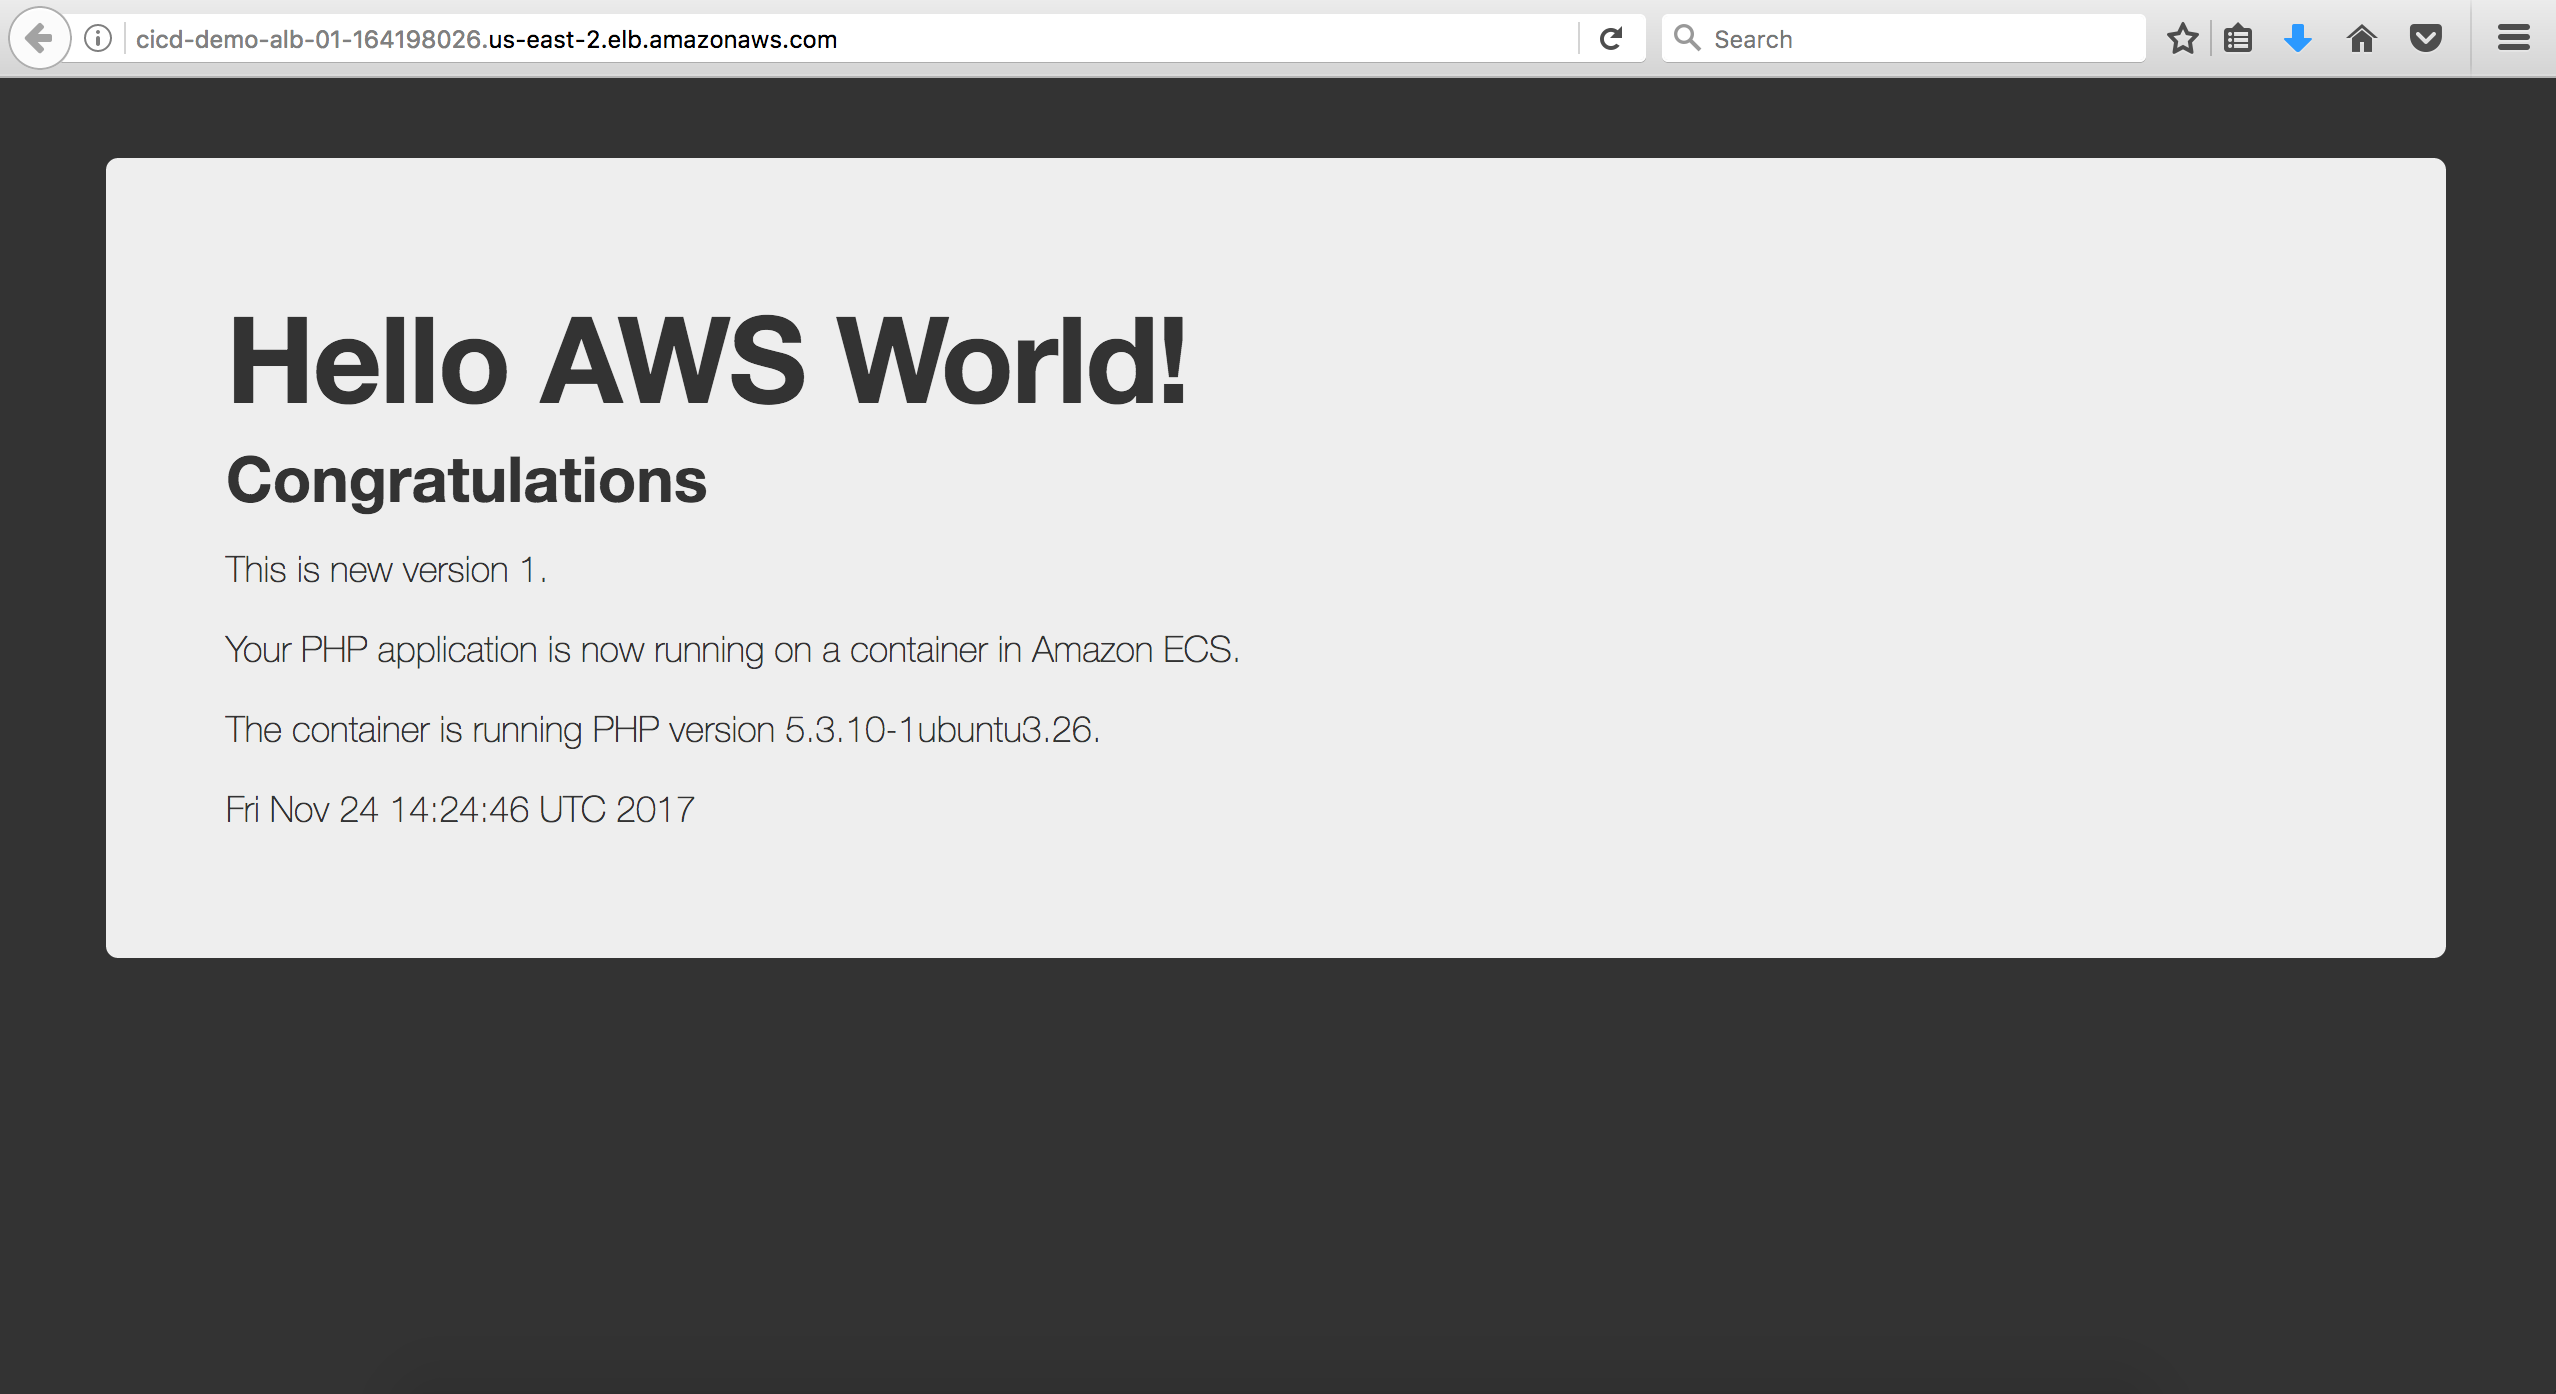
Access the DNS address of the load balancer to confirm that the service is running normally.
4.2 Simulating Version Updates
4.2.1 Modify Code
Update the code locally. In the example, add a line of text to `src/index.php`:
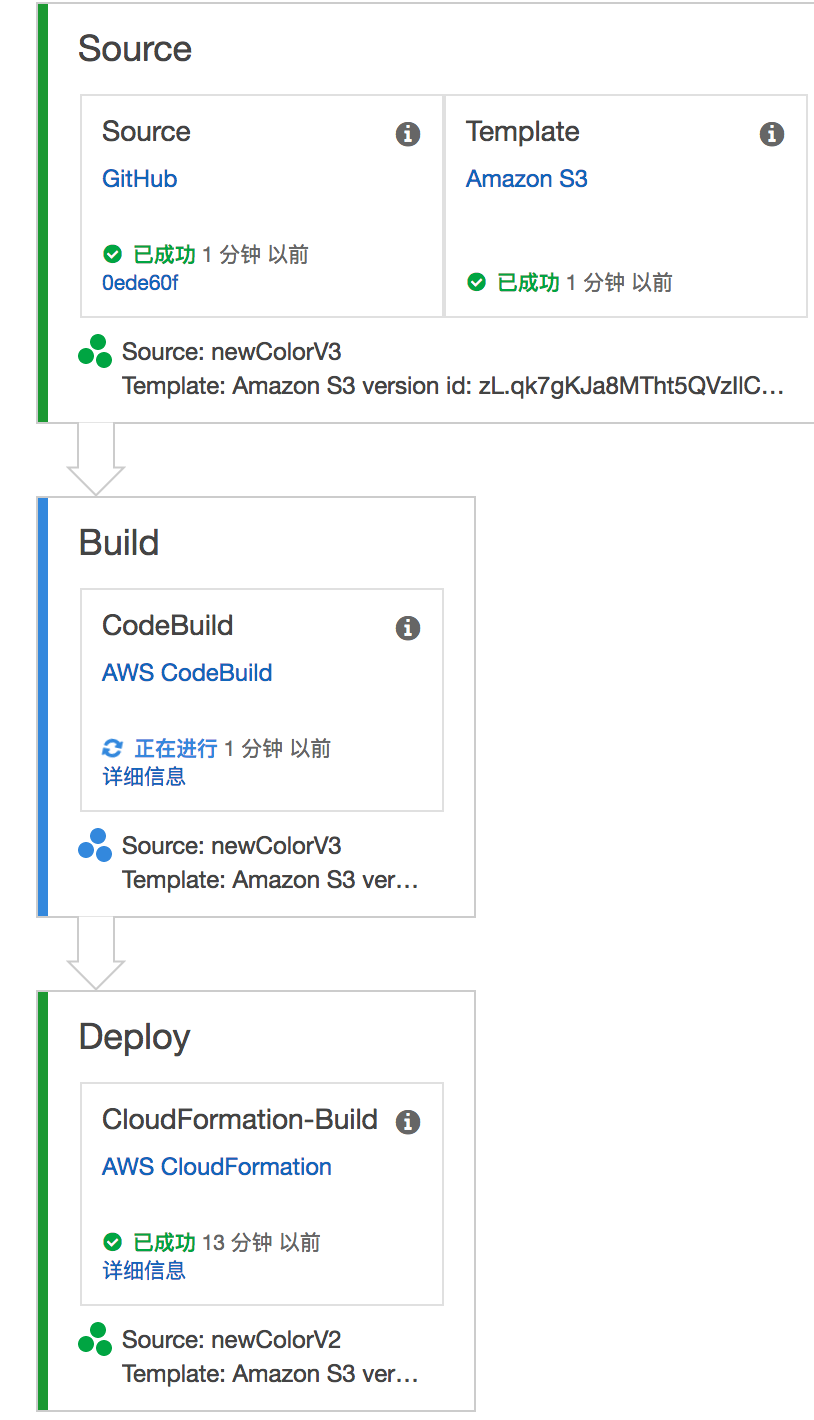
4.2.2 View Triggers for Each Stage in AWS CodePipeline After Committing New Version
4.2.3 Refresh Service to Confirm New Modifications Are Published