RDS (Relational Database Service) is a database service provided by Amazon Web Services.
This article primarily introduces how to create and connect to RDS.
Installing and Connecting to RDS
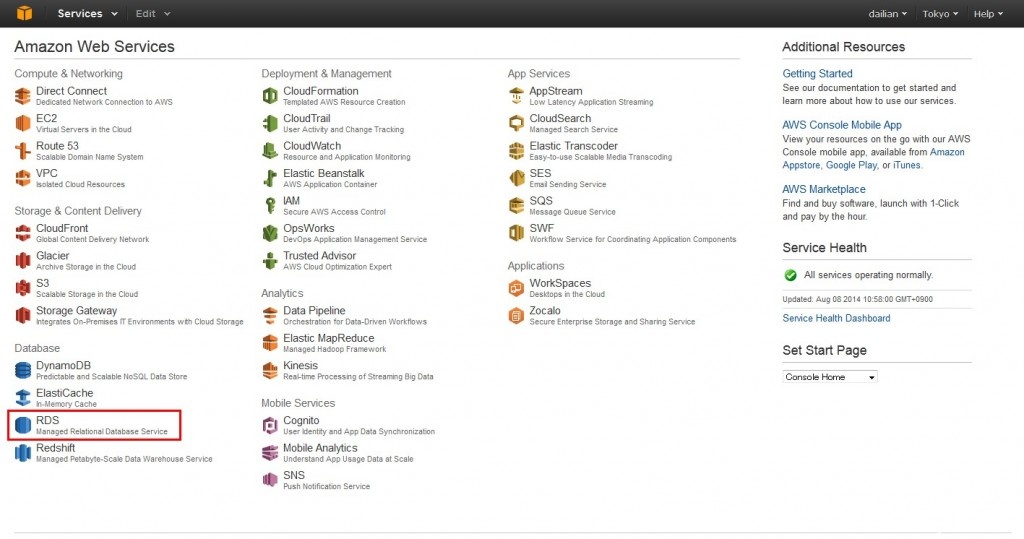
Step 1: Access the AWS Console and Click on RDS to Enter the RDS Console
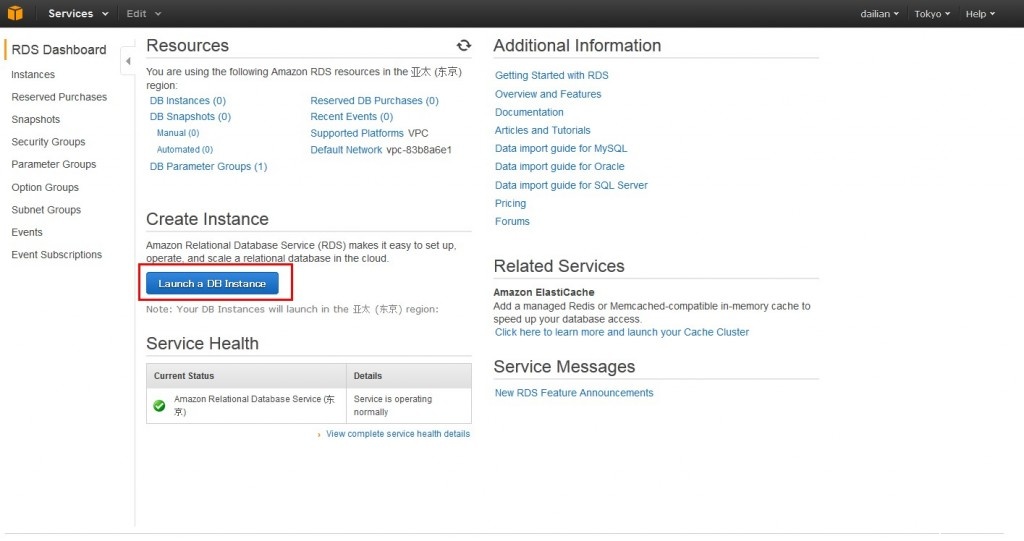
Step 2: Create an RDS Instance by Launching a DB Instance
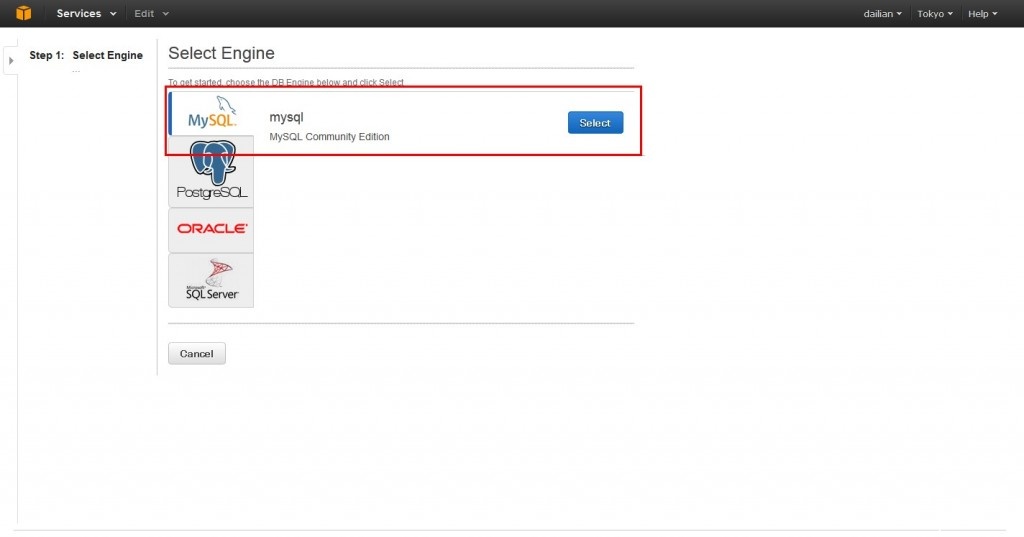
Step 3: Select the Database Engine Type. This Article Uses MySQL as an Example
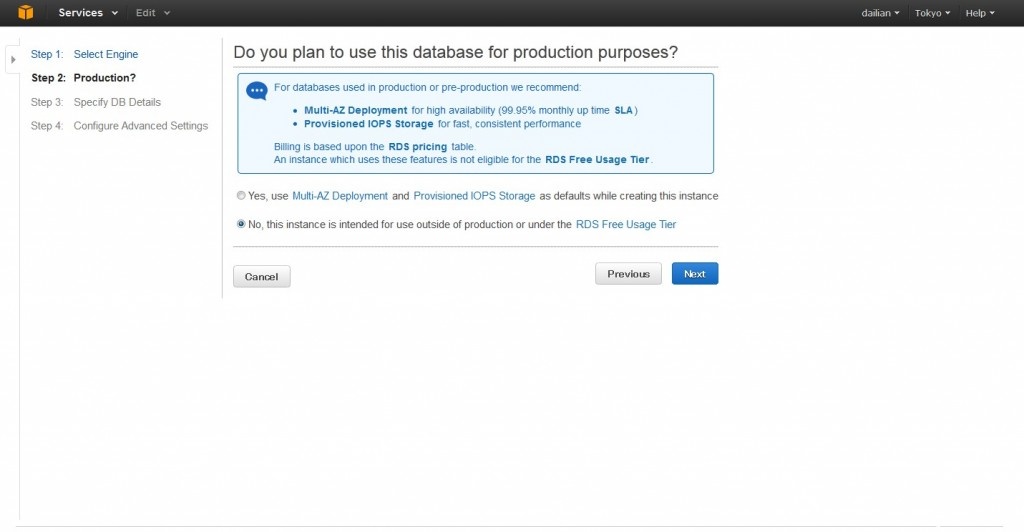
Step 4: Decide Whether to Enable Multi-AZ and Provisioned IOPS Features
Determine whether to use the Multi-AZ and Provisioned IOPS features.
Multi-AZ is mainly used for database primary-replica functionality, while Provisioned IOPS relates to RDS performance optimization.
For detailed information on these features, please refer to our previous articles.
No, this instance is intended for use outside of production or under the RDS Free Usage Tier.
Select No here.
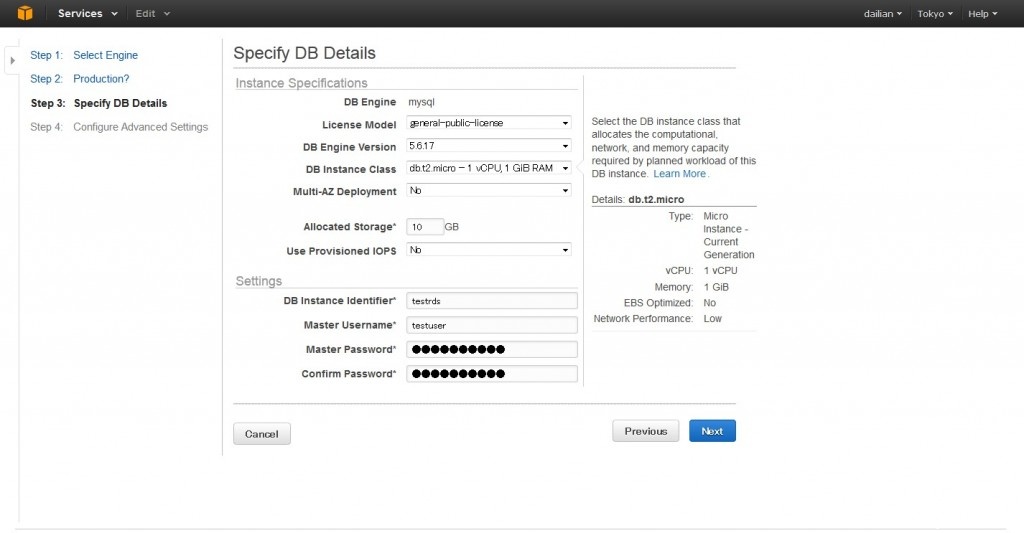
Step 5: Configure RDS Details
- DB Engine: mysql
- License Model: general-public-license
- DB Engine Version: Select the database version according to your needs
- DB Instance Class: Select the RDS instance type
- Multi-AZ Deployment: Choose No for whether to enable Multi-AZ
- Allocated Storage*: Select the RDS storage capacity. Note that Provisioned IOPS cannot be used for storage under 100GB; 100-333GB supports up to 1000 IOPS.
- Use Provisioned IOPS: Select No here for now
- DB Instance Identifier: Enter the RDS identifier
- Master Username: Database login username
- Master Password: Database password
- Confirm Password: Confirm the password
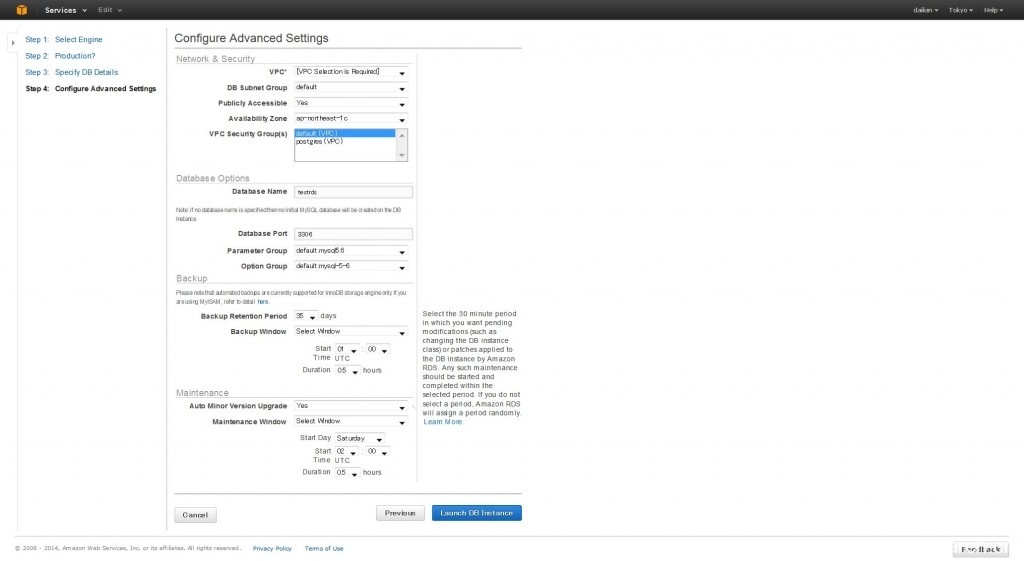
Step 6: Advanced RDS Configuration. If you have no special requirements, keep all settings at their defaults.
Pay special attention to the following two areas:
- Backup Retention Period: Set the duration for automatic backups
- Backup Window: Set the time window for backups
- Auto Minor Version Upgrade: Set the schedule for automatic minor version upgrades
- Maintenance Window: Set the maintenance schedule
Step 7: After successfully creating the RDS, you will see the information below. At this point, you need to record the RDS connection address.
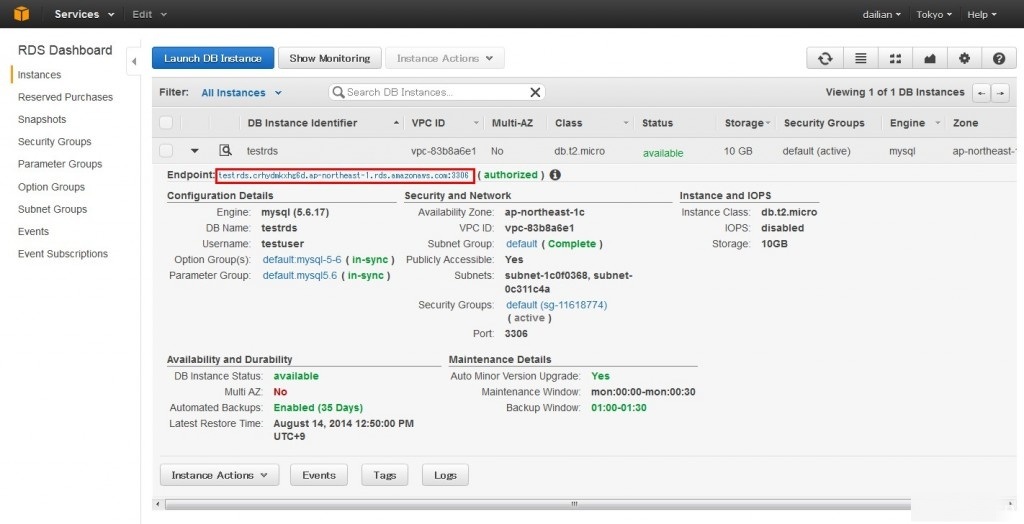
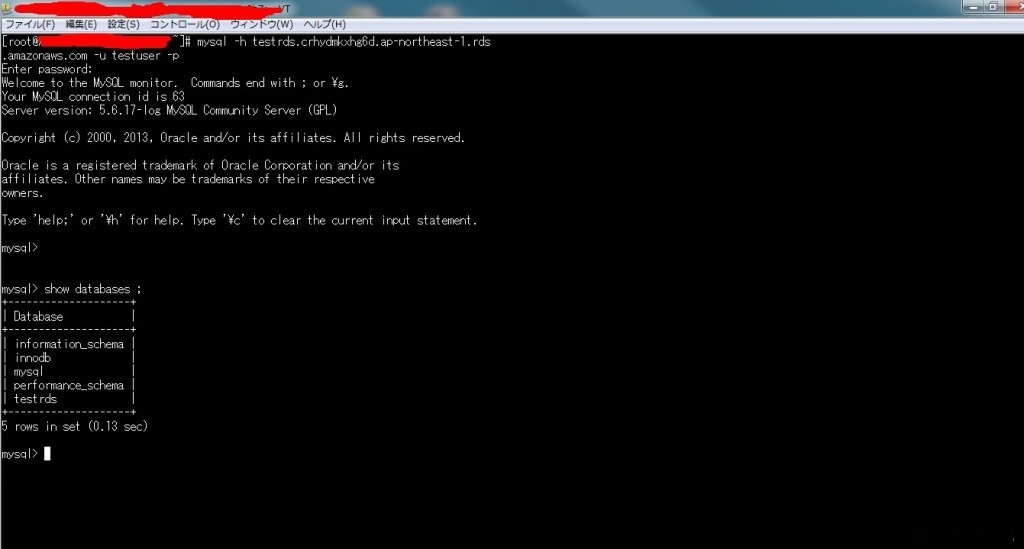
Step 8: After successfully creating the RDS, the next step is to learn how to log in or connect to it.
Note that the client must have the corresponding database type installed. For example, since we selected MySQL for the RDS database type, you need to install MySQL on the client to use it to log in to our RDS.
mysql -h[RDS_connection_address] -u[RDS_username] -p