What is the ELB Service?
Let’s introduce Elastic Load Balancing (ELB), a service provided by AWS.
Elastic Load Balancing primarily functions to automatically distribute incoming application traffic across multiple Amazon EC2 instances. This means it assigns external access to the most suitable server based on actual conditions. By using Elastic Load Balancing, you can effectively improve the fault tolerance of your applications while continuously providing the load balancing capacity required for incoming traffic. Additionally, Elastic Load Balancing can detect unhealthy instances within the pool and automatically reroute traffic to healthier instances until the issue is resolved.
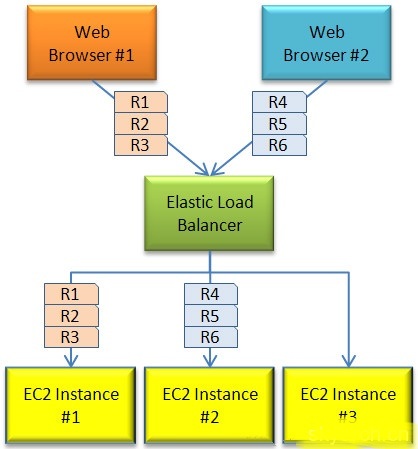
Below, we will configure an ELB service step by step:
Log in to the AWS Console, click Services in the top-left corner, select EC2 from the dropdown menu, as ELB is integrated into the EC2 service.
In the EC2 management page, select the ‘Load Balancers’ option and click ‘Create Load Balancer’.
Enter the ‘LB NAME’, choose ‘Create Internal LB’ or not, and configure ‘Listener Configuration’.
We start creating a new ELB service. Here, give the ELB a memorable name, then select the VPC (Virtual Private Cloud) associated with this ELB. Since we are creating an ELB facing the Internet, do not check ‘Create an internal load balancer’. Select the port you want to listen to or forward. If you wish to use port 443, you can configure the SSL certificate here, eliminating the need to configure certificates on the APP server again, which is very convenient. In the example below, we selected port 443; this time, we will not add any specific application settings.
Configure Health Checks
In this step, we set up health checks to allow the ELB to detect the response of backend APP services. We configure it to check port 80 and the index.php file in the Web root directory. You can also configure the response timeout and check interval. After completion, click Next.
Configure ELB Security Groups
We need to set the security group for the ELB. Since the APP servers are already in a created security group, select the current security group where the APP instances reside here. Confirm and proceed to the next step.
Add Instances to the ELB
In this step, we select the two previously created EC2 servers for load balancing. Ensure that ‘Enable Cross-Zone Load Balancing’ and ‘Enable Connection Draining’ are checked. The default settings are fine. Click Next.
Configure ELB Tags
Create tags for the ELB, mainly used to view cost usage in billing statements, allowing clear visibility. Here, we leave it blank and keep the default setting to continue to the next step.
Review Project Configuration
The last page displays all our previous settings. We can verify if there are any errors. There is an edit button behind each field. Once confirmed, proceed to the next step.
Configuration Complete
The appearance of this page indicates that you have successfully completed the creation of the Load Balancer. Go ahead and try it out.
Conclusion
As a service provided by AWS, ELB significantly reduces the configuration and maintenance burden for operations personnel. It eliminates single points of failure, so there is no need to worry. The operation is simple and flexible, making it very easy to get started.