Original English link: http://blogs.aws.amazon.com/security/post/Tx71TWXXJ3UI14
In our use of AWS, AWS IAM is often the first service we encounter. It offers powerful features that allow you to flexibly and precisely control access and permissions to AWS services and resources by managing users, groups, policies, roles, certificates, keys, and more within AWS IAM. Additionally, many enterprises have already deployed their own user management and authorization systems. Integrating AWS user management and authorization into existing systems has become a key objective for these organizations. This article introduces how to integrate an enterprise’s Windows Active Directory (AD) with AWS using ADFS (Active Directory Federation Services), thereby enabling the management of user access and authorization for AWS services and resources directly through Active Directory.
AWS IAM supports SAML, a feature that allows federation with identity providers compliant with this standard to achieve Single Sign-On (SSO). For many enterprises using Microsoft Active Directory, we can use the built-in Windows ADFS to integrate with AWS IAM.
Working Principle:
Before diving into the detailed configuration, let’s first look at the working principle:
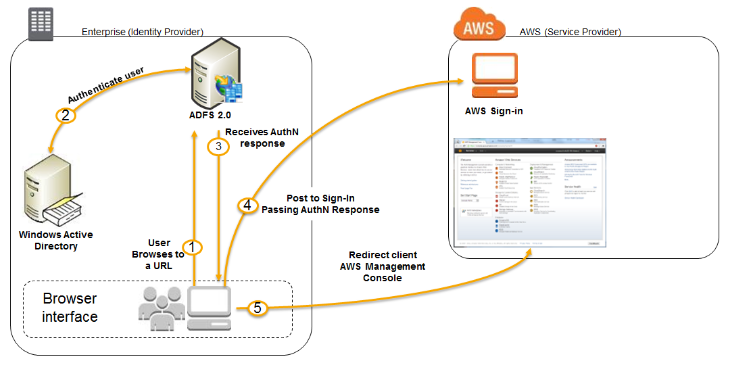
- The user accesses the ADFS site integrated with AWS (https://ADFS/adfs/ls/IdpInitiatedSignOn.aspx).
- The user enters their username and password on the login page. Upon submission, ADFS contacts AD to verify the user credentials.
- The user’s browser receives the SAML assertion returned by ADFS.
- The user’s browser posts the user assertion to AWS’s Sign-in SAML endpoint (https://signin.amazonaws.cn/saml). The sign-in process calls the AssumeRoleWithSAML API to request temporary security credentials and uses them to construct the management console login link.
- The user’s browser redirects to the constructed login link to log in.
Configure Active Directory:
- Create a user named
adfsuserin Active Directory, setting the email address toadfsuser@example.com. - Create two groups in Active Directory:
AWSBJS-AdminandAWSBJS-ReadOnly. These groups will be mapped to roles created in AWS. - Add the user
adfsuserto both theAWSBJS-AdminandAWSBJS-ReadOnlygroups.
Install and Deploy Active Directory Federation Services
You can refer to the following documentation to deploy the ADFS service:
https://technet.microsoft.com/en-us/library/dn486775.aspx
Export SAML Metadata Document
Access the ADFS server and export the SAML Metadata Document (replace “ADFS” with your actual ADFS server name):
https://ADFS/FederationMetadata/2007-06/FederationMetadata.xml
Configure AWS
- Log in to the AWS Management Console: https://console.amazonaws.cn/
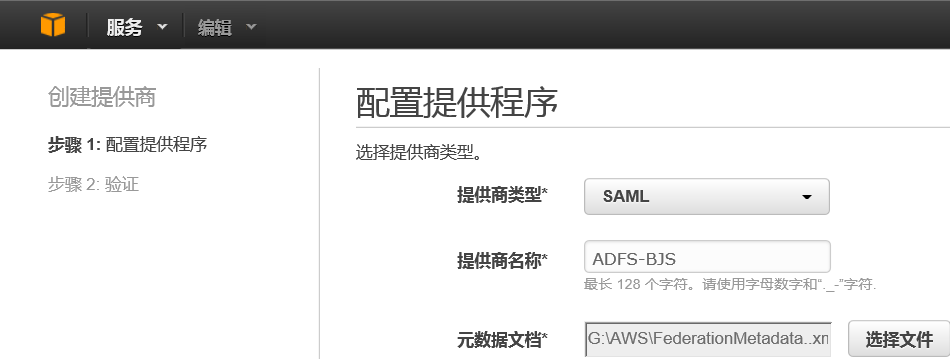
- In the IAM service, click on Identity Providers, select SAML, and import the SAML Metadata exported from the ADFS server.
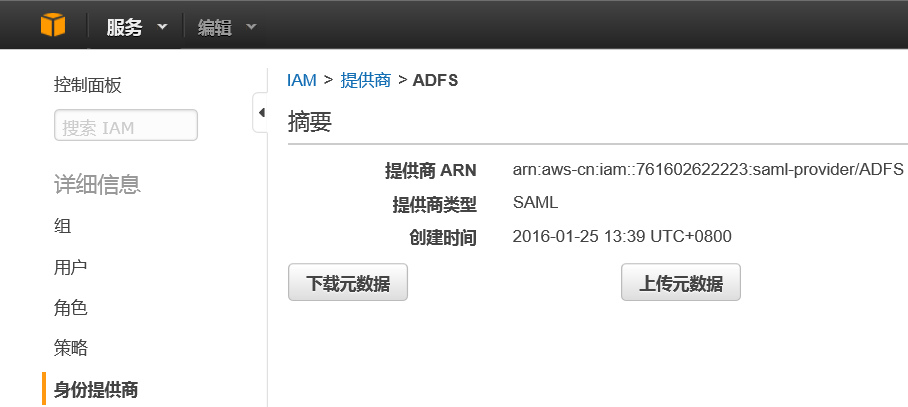
- Note down the Provider ARN.
- Create new IAM roles:
ADFSBJS-AdminandADFSBJS-ReadOnly. [Note: Select “Grant SAML Provider Web Single Sign-On (Web SSO) access”. These two roles correspond to the newly created AD groupsAWSBJS-AdminandAWSBJS-ReadOnly.]
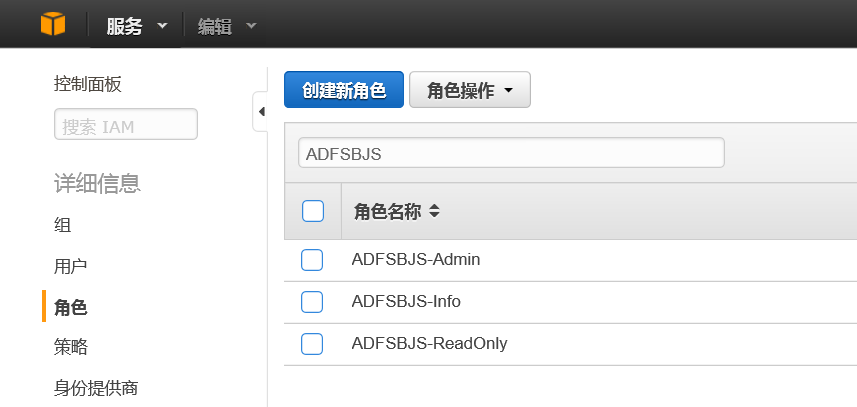
- Note down the ARN for each role.
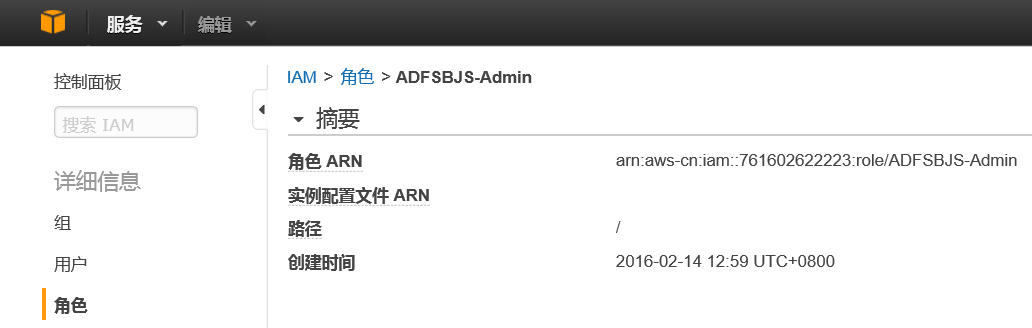
Configure ADFS to Trust AWS as a Relying Party
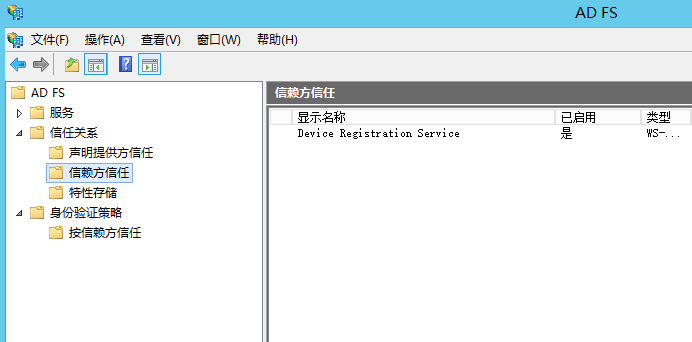
- Open the ADFS management interface, select Trust Relationships > Relying Party Trusts.
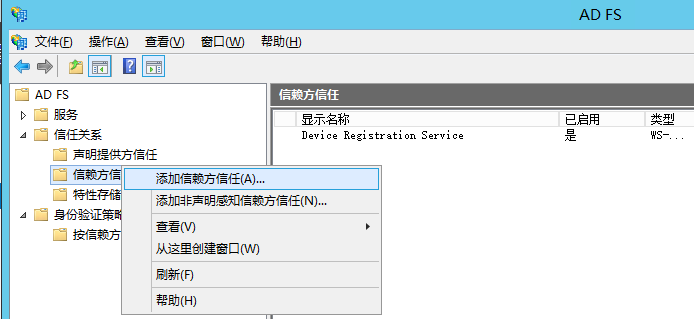
- Right-click on Relying Party Trusts and select Add Relying Party Trust.
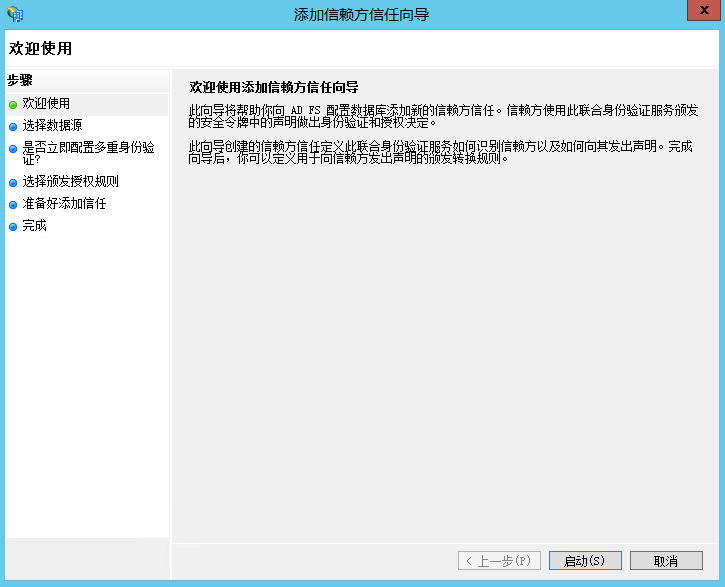
- Click Start.
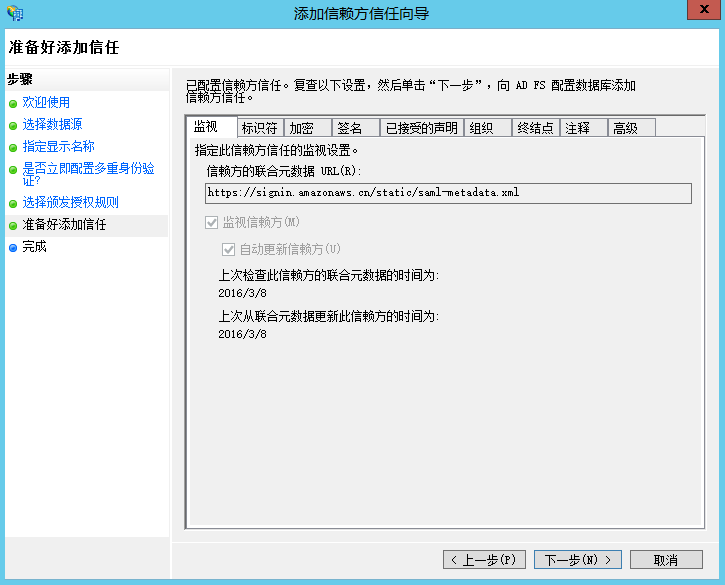
- Select “Import data about the relying party published online or on a local network.” Enter the following address in the Federation Metadata Address field and click Next.
https://signin.amazonaws.cn/static/saml-metadata.xml
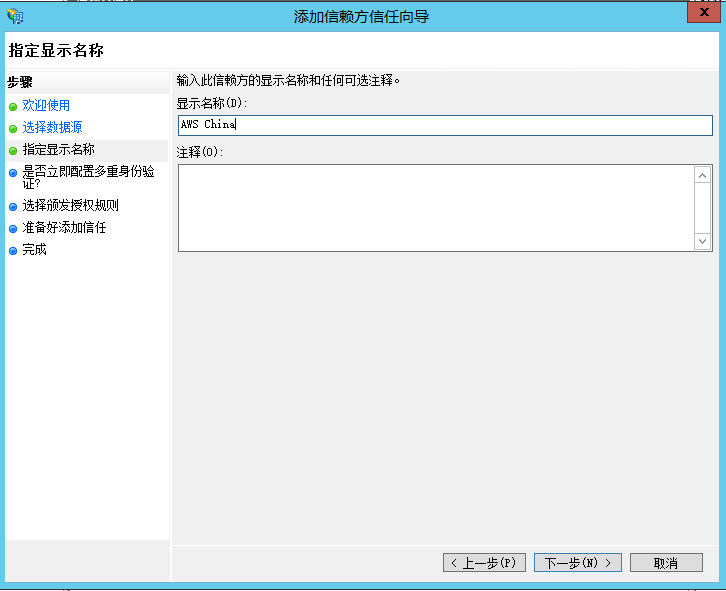
- Enter “AWS China” in the Display Name field and then click Next.
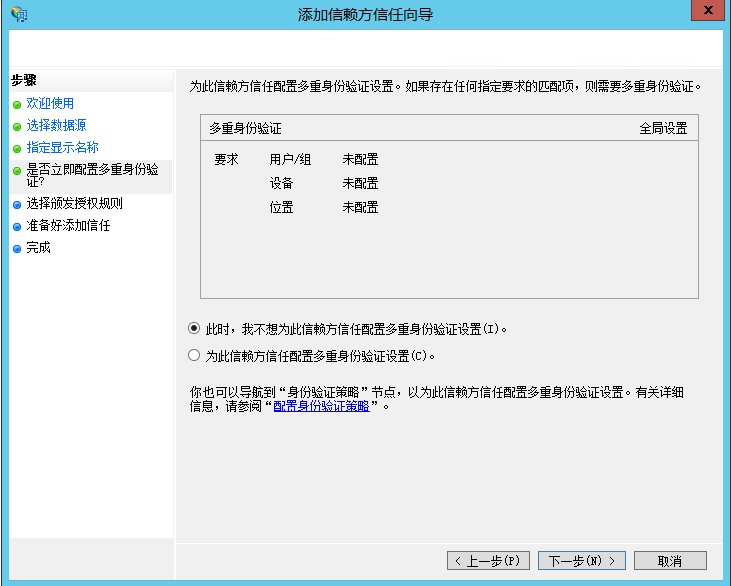
- Select “Do not require multi-factor authentication” and click Next.
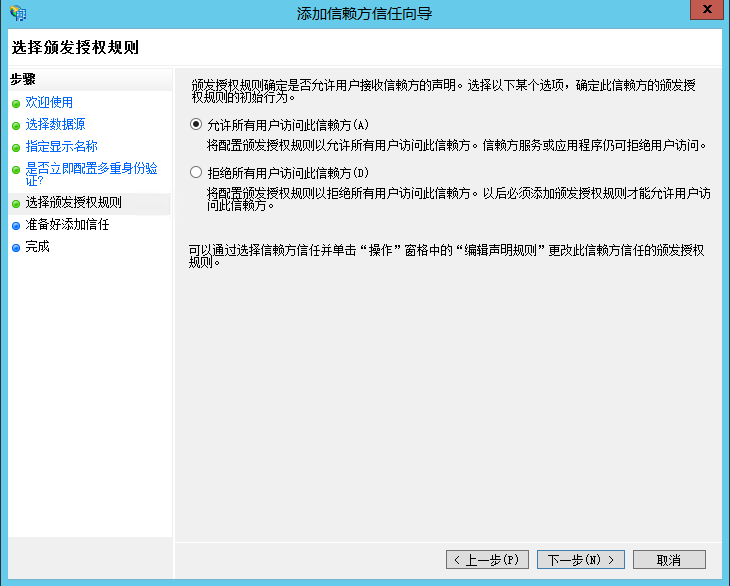
- Select “Enable support for this profile” (Allow all users to access this relying party) and click Next.
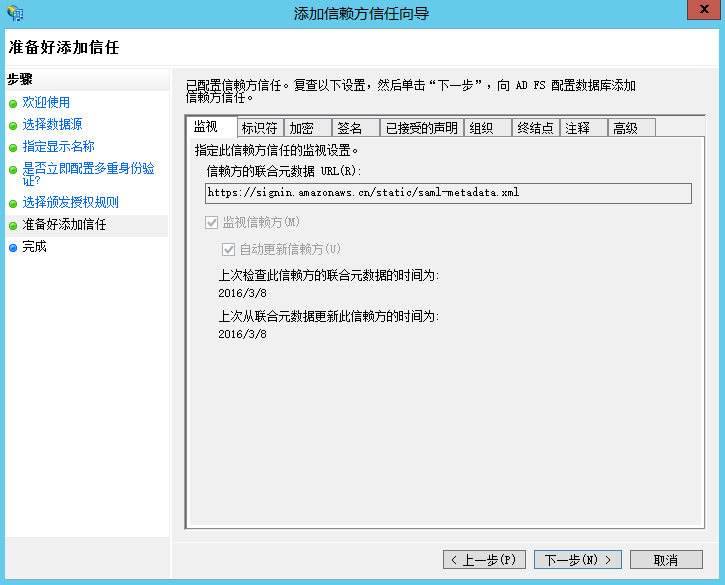
- Click Next.
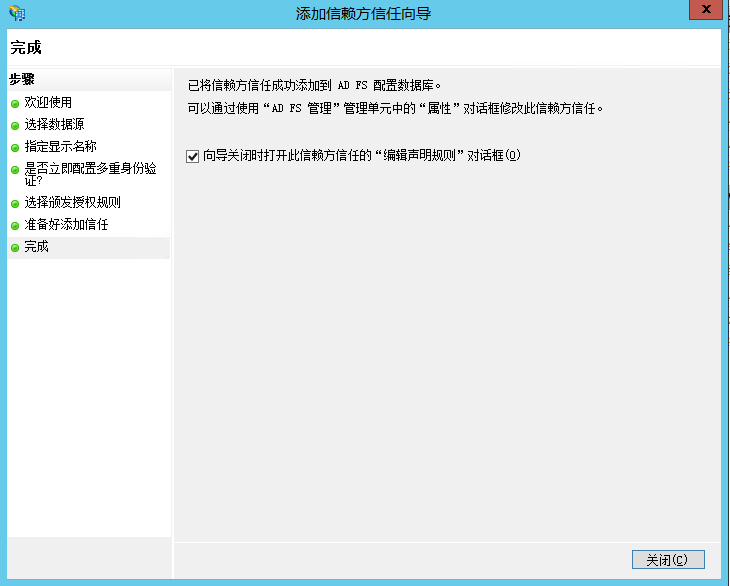
- Click Close.
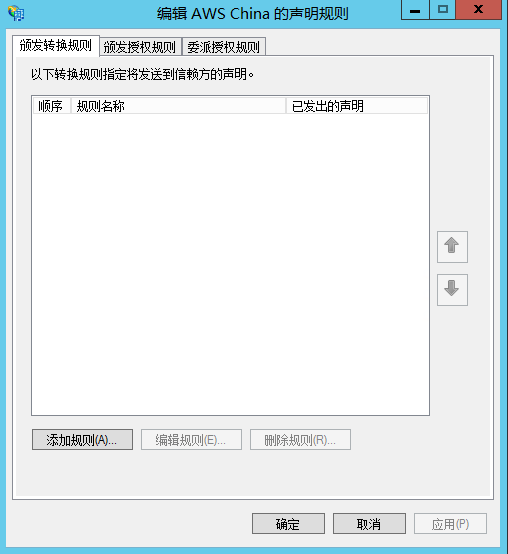
- Click Close again, and then open Edit Claim Rules.
Create Claim Rules for the AWS Relying Party Trust
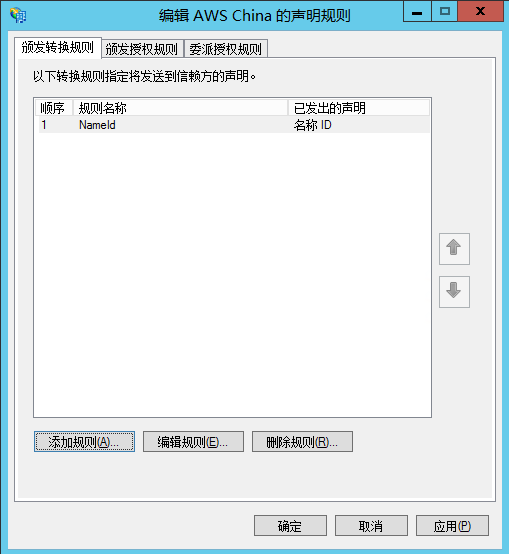
- In Edit Claim Rules, click Add Rule.
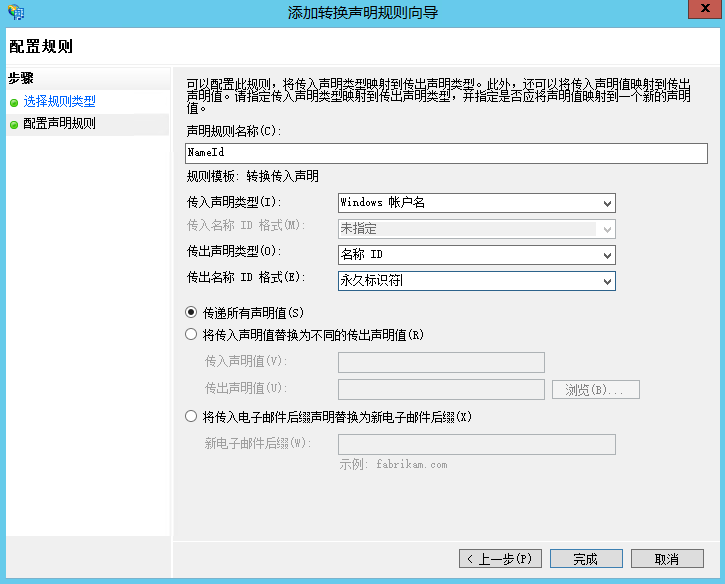
- Select “Transform an Incoming Claim” and click Next.
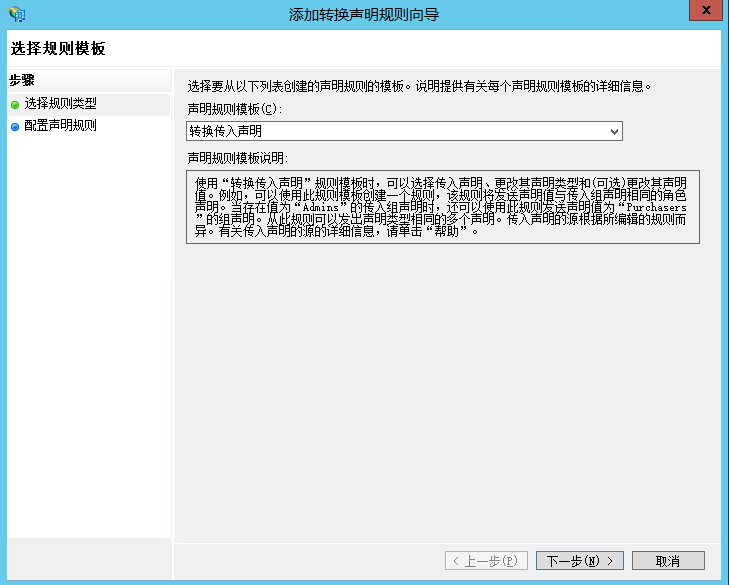
- Set the Claim rule name to
NameId. For Incoming claim type, selectWindows account name. For Outgoing claim type, selectName ID. For Outgoing name ID format, selectPersistent Identifier, and click Finish.
- Click Add Rule again.
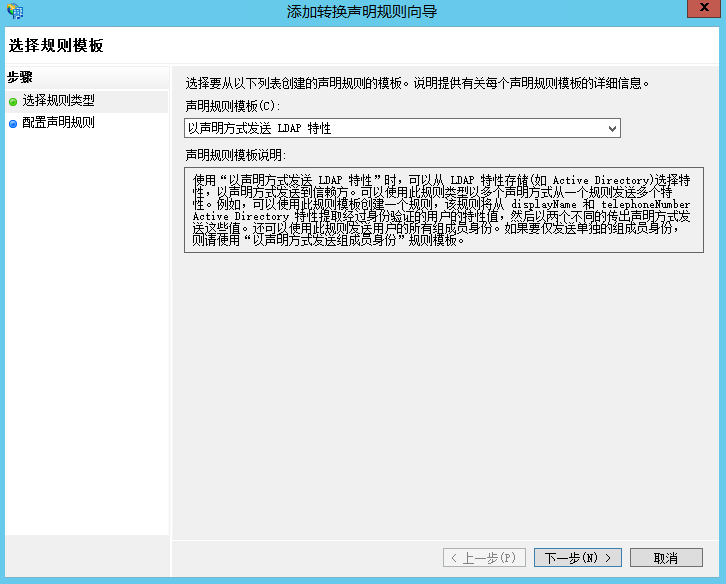
- Select “Send LDAP Attributes as Claims” and click Next.
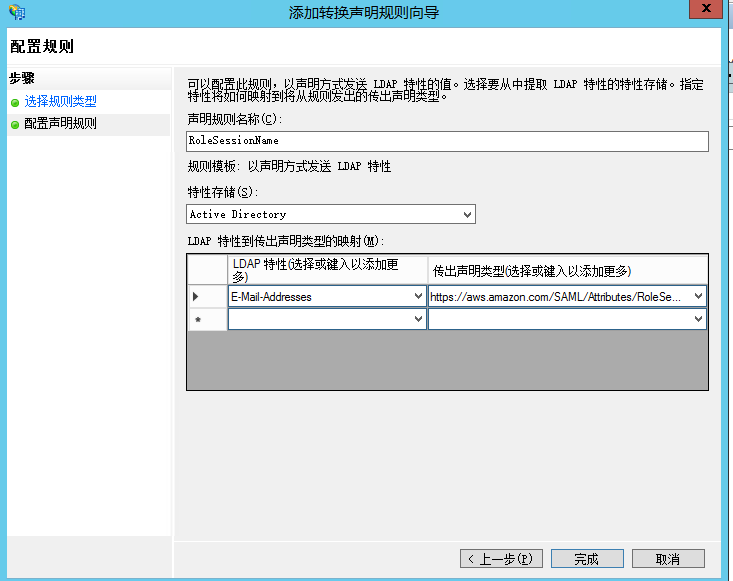
- For Claim rule name, enter
RoleSessionName. For Attribute store, selectActive Directory. For LDAP attribute, selectE-Mail-Address. For Outgoing claim type, enter https://aws.amazon.com/SAML/Attributes/RoleSessionName, and click Finish.
- Click Add Rule again.
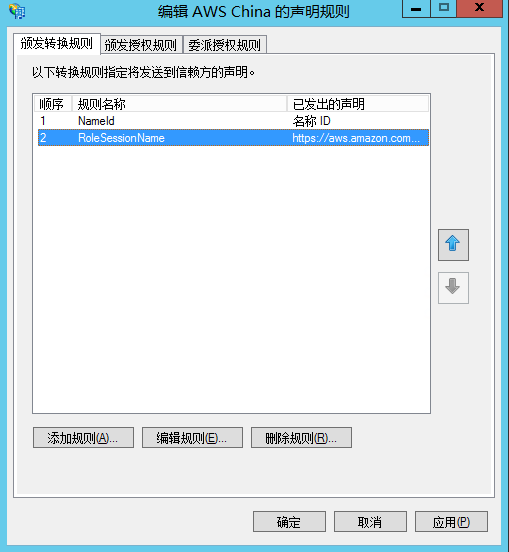
- Select “Send Claims Using a Custom Rule” and click Next.
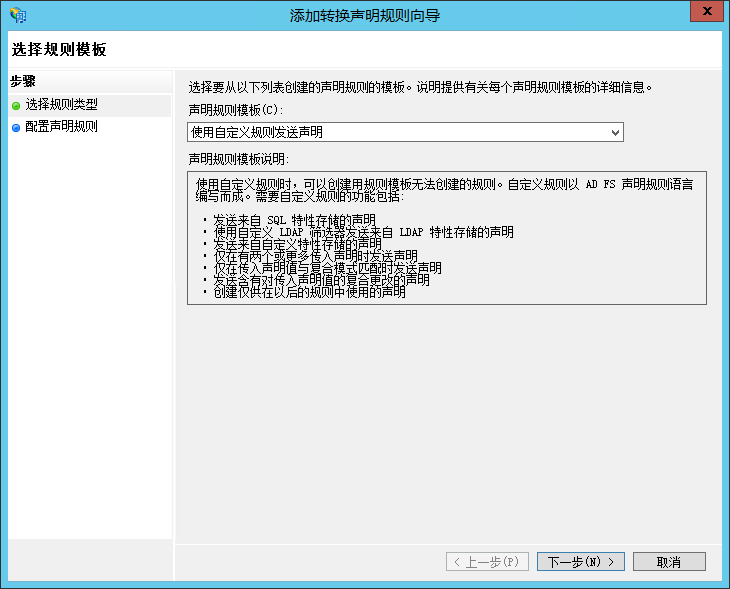
- Enter
Get AD Groupsas the Claim rule name. Enter the following text in the Custom rule field. (This step retrieves the AD user groups the logged-in user belongs to and passes them to the temporary variablehttp://temp/variable.) Click Finish.
c:[Type == "http://schemas.microsoft.com/ws/2008/06/identity/claims/windowsaccountname", Issuer == "AD AUTHORITY"]
=> add(store = "Active Directory", types = ("http://temp/variable"), query = ";tokenGroups;{0}", param = c.Value);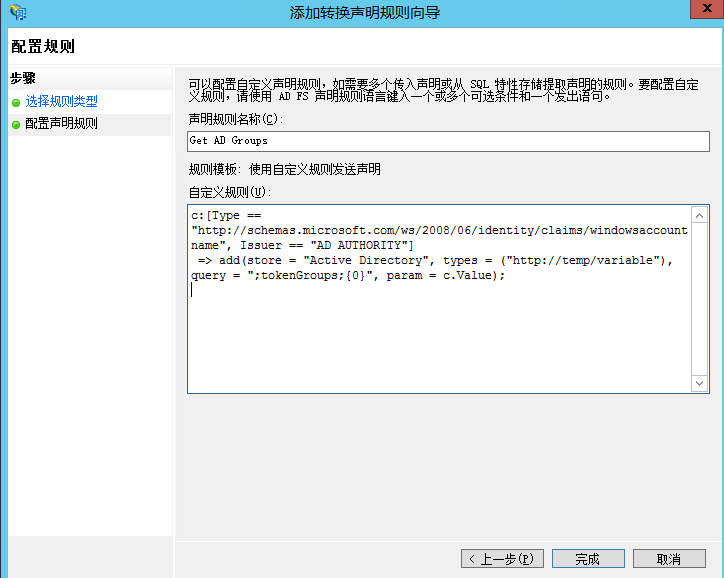
- Click Add Rule again.
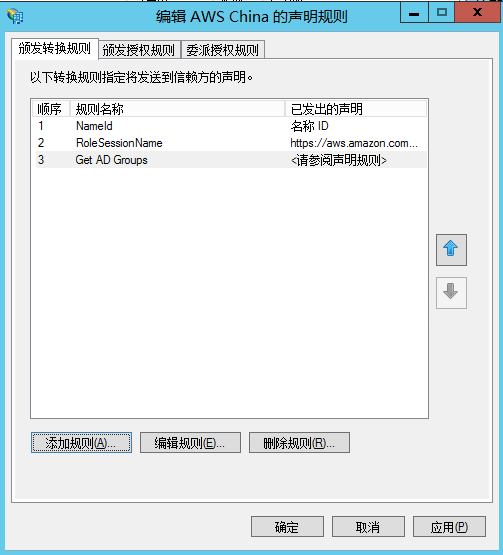
- Select “Send Claims Using a Custom Rule” and click Next.
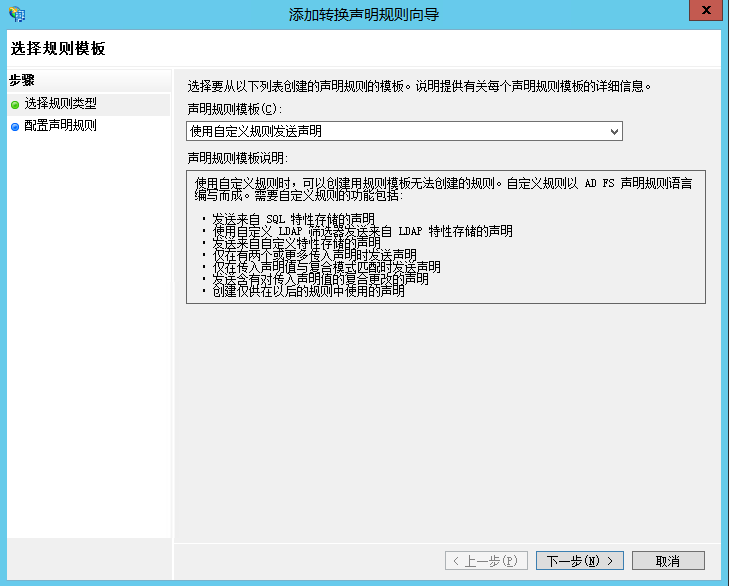
- Enter
Rolesas the Claim rule name. Enter the following text in the Custom rule field. (This part mainly maps AD user groups to AWS roles. The red parts need to be adjusted according to the AD group names created earlier, as well as the Identity Provider ARN and Role ARNs.) Click Finish.
c:[Type == "http://temp/variable", Value =~ "(?i)^AWSBJS-"]
=> issue(Type = "https://aws.amazon.com/SAML/Attributes/Role", Value = RegExReplace(c.Value, "AWSBJS-", "arn:aws-cn:iam::761602622223:saml-provider/ADFS,arn:aws-cn:iam::761602622223:role/ADFSBJS-"));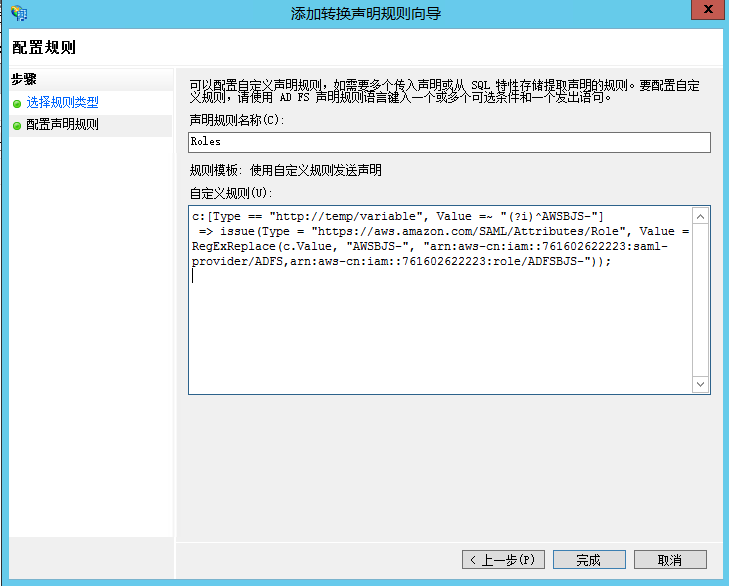
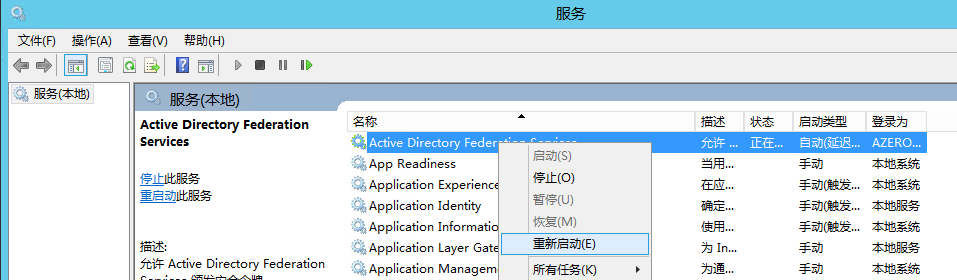
- Restart Active Directory Federation Service.
Test the Configuration
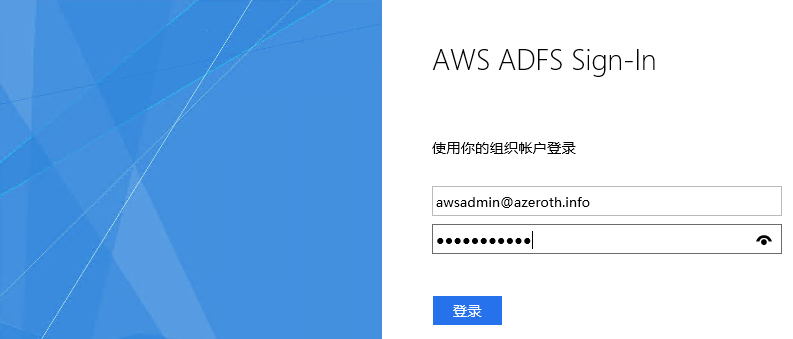
- Visit https://ADFS/adfs/ls/IdpInitiatedSignOn.aspx (replace “ADFS” with your ADFS server name).
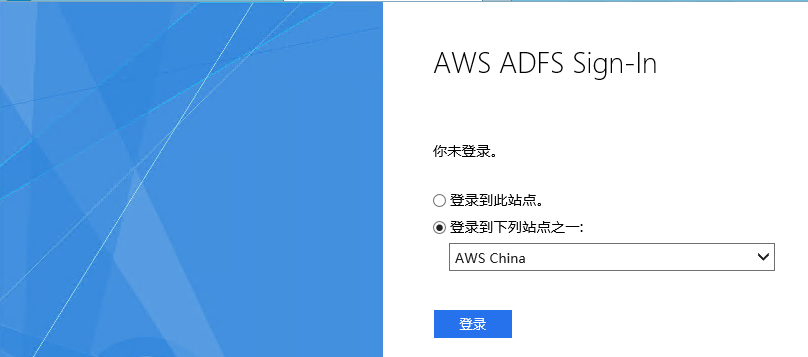
- Enter the username and password.
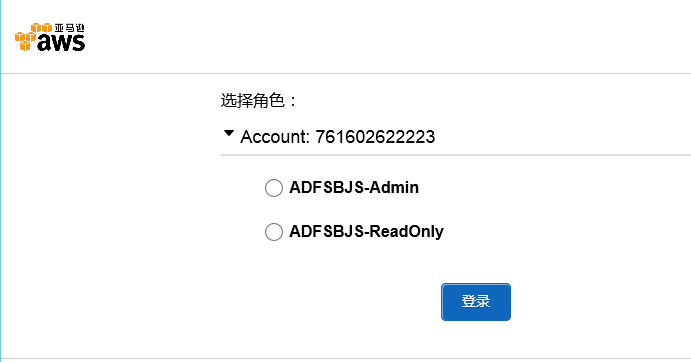
- After verification, the server will return the roles associated with the user’s group. Users can select different roles to obtain the corresponding permissions.
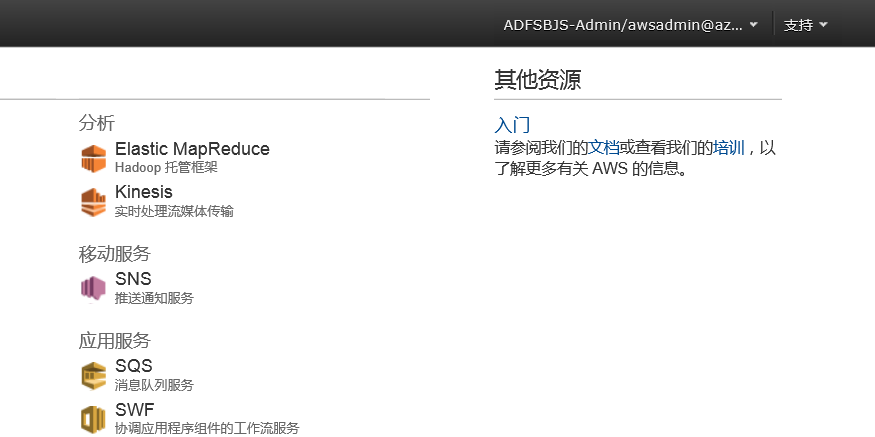
- After logging in, you can see the current user and the role being used in the top-right corner.
Summary:
The above steps detail the process of integrating ADFS with the AWS Management Console to enable login access using AD accounts. Additionally, you can adjust ADFS’s own authentication policies to implement features such as multi-factor authentication.