DevOps: Continuous Integration & Continuous Delivery (Docker, CircleCI, AWS)

This article will guide you step-by-step through implementing a Continuous Integration and Continuous Delivery workflow using Docker, GitHub Flow, CircleCI, AWS Elastic Beanstalk, and Slack.
Introduction
What are Continuous Integration & Continuous Delivery?
Continuous Integration & Continuous Delivery (CI & CD). For detailed definitions, please refer to the article “Sam’s Definition of Continuous Integration, Continuous Deployment, and Continuous Delivery“.
In simple terms, it aims to minimize manual effort by automating routine tasks such as environment setup, unit testing, logging, and product deployment.
Tools Used
- Git – Version Control
- GitHub – Code Hosting & Review
- CircleCI – Automated Build, Test, & Deployment
- Docker – Portable, Lightweight Execution Environment
- AWS Elastic Beanstalk – Cloud Platform
- Slack – Team Communication, Logging, & Notifications
What You Will Learn from This Article
- Understand the GitHub workflow (GitHub Flow), utilizing Pull Requests and branches to facilitate code reviews (Code Review) and environment configuration, such as: development, testing/QA, staging, and production.
- Use Docker to standardize the execution environment for developers, testers, and production.
- Use EB CLI to deploy applications to the AWS Elastic Beanstalk platform.
- Automate all of the above tasks using CircleCI. Detect code updates on GitHub branches; if changes are found, trigger: building the Docker environment, running unit tests, and automatically deploying the new version to AWS EB.
- Use Slack so that team members can receive real-time notifications for every action taken by GitHub and CircleCI.

Table of Contents
- Node.js
- Running Node.js locally
- Testing Node.js locally
- GitHub
- CircleCI
- Testing Node.js on CircleCI
- Code Review with GitHub Flow
- Docker
- Running Node.js in Docker
- Testing Docker on CircleCI
- AWS Elastic Beanstalk
- Deploying AWS locally
- Deploying AWS via CircleCI
- Slack
Node.js

Installation:
- node: 0.10
This article uses a Node.js application as an example, but this workflow applies equally to other languages such as Ruby on Rails, Python, and PHP.
Create a New Project
- Create a project folder (using
hello-ci-workflowas an example here):
$ mkdir hello-ci-workflow
$ cd hello-ci-workflow
Run Node.js Locally
- Initialize the Node.js environment by providing some information; this will generate a
package.jsonfile in the directory:
$ npm init
- Install a Node.js web framework; for example, using Express:
$ npm install express --save
--save: Writes the dependency topackage.json.
- After completion, your
package.jsonshould look something like this:
// package.json
{
  "name": "hello-ci-workflow",
  "main": "index.js",
  "dependencies": {
    "express": "^4.12.3"
  },
  "scripts": {
    "start": "node index.js"
  }
}
- Write a simple Hello World! program in
index.js:
// index.js
var express = require('express');
var app = express();

app.get('/', function (req, res) {
  res.send('Hello World!');
});

var server = app.listen(3000, function () {

  var host = server.address().address;
  var port = server.address().port;

  console.log('Example app listening at http://%s:%s', host, port);

});
- Run
npm startornode index.js:
$ npm start
- Open your browser to
http://localhost:3000to see the result:

Testing Node.js Locally
- Install unit testing for Node.js, using Mocha as an example:
$ npm install mocha --save-dev
--save-dev: Writes to thedevDependenciesinpackage.json; these will not be installed in the production environment.
// package.json
{
  "name": "hello-ci-workflow",
  "main": "index.js",
  "dependencies": {
    "express": "^4.12.3"
  },
  "devDependencies": {
    "mocha": "^2.2.4"
  },
  "scripts": {
    "start": "node index.js"
  }
}
- Create a
testfolder in the root directory and add a test script namedtest.js:
$ mkdir test
$ cd test
$ touch test.js
- Add an intentionally failing test case:
assert.equal(1, [1,2,3].indexOf(0)):
// test/test.js
var assert = require("assert")
describe('Array', function(){
  describe('#indexOf()', function(){
    it('should return -1 when the value is not present', function(){
      assert.equal(1, [1,2,3].indexOf(0));
    })
  })
})
- Run the mocha tests:
$ ./node_modules/.bin/mocha


  Array
    #indexOf()
      1) should return -1 when the value is not present


  0 passing (9ms)
  1 failing
The output shows 1 failing, indicating that the test did not pass because the return value of [1,2,3].indexOf(0) does not equal -1.
- Fix the test in
test.js:
// test/test.js
assert.equal(-1, [1,2,3].indexOf(0));
- Run the mocha tests again:
$ ./node_modules/.bin/mocha


  Array
    #indexOf()
      ✓ should return -1 when the value is not present


  1 passing (6ms)
The output shows 1 passing, indicating that the test passed.
GitHub

Installation:
- git: 2.3
Account:
- Initialize the git environment:
$ git init .
- Running
git statuswill display which files have been modified:
$ git status
On branch master

Initial commit

Untracked files:
  (use "git add <file>..." to include in what will be committed)

  index.js
  node_modules/
  package.json
  test/
- Add
node_modulesto the.gitignoreblacklist, as this folder is automatically generated bynpm installand does not need to be pushed to GitHub:
# .gitignore

# Dependency directory
# https://www.npmjs.org/doc/misc/npm-faq.html#should-i-check-my-node_modules-folder-into-git
node_modules
- Commit the changes:
$ git add .
$ git commit -m "first commit"
- Go to GitHub and create a new repository:

- Enter the repository name; for example, use
hello-ci-workflow:

- Add the newly created GitHub repository to your remotes using
git remote add:
$ git remote add origin https://github.com/<USER_NAME>/hello-ci-workflow.git
Replace
<USER_NAME>with your own username.
- Push the code to GitHub using
git push:
$ git push -u origin master
After the upload is successful, navigate to https://github.com/<USER_NAME>/hello-ci-workflow to view the files you just uploaded:

CircleCI

Account:
Add GitHub repository
- Click the
Add Projectsbutton in the left sidebar:

- Select your GitHub account:

- Search for the GitHub repository to add, then click the
Build projectbutton. For example, usinghello-ci-workflow:

- Once completed, CircleCI will automatically execute the first build. However, since no test scripts have been added yet, the build result will show “no test”:

Testing Node.js on CircleCI
- Create a
circle.ymlfile in the project root directory and add the mocha test:
# circle.yml
machine:
  node:
    version: 0.10

test:
  override:
    - ./node_modules/.bin/mocha
- After completing the changes, push the files to GitHub:
$ git add circle.yml
$ git commit "add circle.yml"
$ git push
- Once the push is successful, CircleCI will automatically trigger the build and tests:

- Tests passed, build successful:

Code Review with GitHub Flow
Currently, the two most commonly used workflows in development are Git flow and GitHub flow. You can refer to the following articles for more information:
Git flow:
GitHub flow:
Here we use the GitHub flow, whose core principles are:
- All code on the master branch must be tested and ready for deployment.
- To develop features, fix bugs, or perform any other task, create a new branch from master.
- Commit and push your code to GitHub at any time to discuss with others.
- When a feature is complete, use a pull request to facilitate code review.
- Only after confirmation that everything is correct can you merge back into master and deploy the new version online.
Create a Branch
- To ensure that the code on the main master line remains stable, it is recommended that developers create separate branches for different features. Here, we use
test-github-flowas an example. Usegit branchto create the branch and thengit checkoutto switch to it:
$ git branch test-github-flow
$ git checkout test-github-flow
Add Commits
- Add a failing test case
assert.equal(3, [1,2,3].indexOf(5))intest.js:
// test/test.js
// ...
assert.equal(3, [1,2,3].indexOf(5));
$ git add test/test.js
$ git commit -m "add a error test case"
Create a Pull Request
- Push to the test-github-flow branch on GitHub:
$ git push -u origin test-github-flow
- After opening GitHub, you will see the pushed commits for the
test-github-flowbranch. Click theCompare & pull requestbutton next to it:

- Clicking this will take you to the “Open a pull request” form. Select the target branch to merge into, enter a description, and then click the
Create pull requestbutton:

Review & Discuss Your Code
- After submitting a pull request, other users will receive notifications on GitHub:

- You can view the related commits and comments, but notice the large red “X” below. This is because every new push to GitHub triggers CircleCI’s automated build and test process, displaying the results directly on GitHub:

- Click the “X” to go to CircleCI and check the reason for the error:

- You will notice that the tests pushed to test-github-flow failed:


Back on GitHub, because the tests did not pass, the reviewer cannot merge this pull request into master.
- Locate the code from the recent commit, leave a comment asking the developer to fix the error, and then re-commit and push:


- Fix the test script in
test.js:
// test/test.js
// ...
assert.equal(-1, [1,2,3].indexOf(5));
- Commit & push again:
$ git add test/test.js
$ git commit -m "fix error test case"
$ git push
- Return to the GitHub pull request page, where you can see that the latest commit has successfully passed the CircleCI tests:


Merge & Deploy
- After review, if everything is confirmed to be correct, you can click the
Merge pull requestbutton to merge the code fromtest-github-flowback into the main branchmaster:


Docker

Installation:
- boot2docker: 1.5 (Mac only)
- docker: 1.5
What is Docker? Why use it?
Since Docker has become very popular, there are plenty of articles online introducing it. Please forgive me for only briefly mentioning it here:
In the past, developers often faced issues with inconsistent development environments, leading to the frustrating situation where “it works on my machine.” To address such problems, virtual machines (VMs) were typically used along with tools like Vagrant and Chef to help unify the execution environment for developers, testers, and production deployments.

Docker offers a similar solution. Unlike VMs, Docker runs more lightweightly and offers higher portability. Once a configuration is set up, everyone can immediately start developing, reducing unnecessary environment-related issues and improving efficiency.
Running Node.js in Docker
- Create a
Dockerfilein the project root directory:
# Dockerfile

# Install the Node.js image from [Docker Hub](https://hub.docker.com/).
FROM node:0.10

# Set the default working directory inside the container
WORKDIR /hello-ci-workflow

# Copy files from the project root into the container
# Install npm packages
ADD . /hello-ci-workflow
RUN npm install

# Expose port 3000 on the container
EXPOSE 3000
CMD npm start
- Build your image using
docker build:
$ docker build -t hello-ci-workflow .
-t hello-ci-workflowis the image name.
- Run your image using
docker run:
$ docker run -p 3000:3000 -d hello-ci-workflow
-druns Node in the background. You can check the execution results usingdocker logs.
- Open your browser to
http://localhost:3000to view the result:
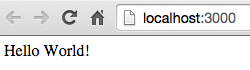
Actually, having to
buildandrunevery time is quite cumbersome. We recommend trying Docker Compose, which works somewhat similarly to Vagrant.
Testing Docker on CircleCI
- Modify
circle.yml:
# circle.yml
machine:
  # Change environment to docker
  services:
    - docker

dependencies:
  override:
    # Use docker build for construction
    - docker build -t hello-ci-workflow .

test:
  override:
    - ./node_modules/.bin/mocha
    # Use curl to test if Node is running successfully in Docker
    - docker run -d -p 3000:3000 hello-ci-workflow; sleep 10
    - curl --retry 10 --retry-delay 5 -v http://localhost:3000
- Push updates to GitHub:
$ git add Dockerfile circle.yml
$ git commit -m "add Docker"
$ git push
- Check CircleCI build and test results:

AWS Elastic Beanstalk

Account:
Installation:
- AWS EB CLI: 3.x
It’s time to deploy the application! There are many PaaS cloud platform options available now (Heroku, Google App Engine, Azure, OpenShift, Linode). Here, I will use Amazon’s Elastic Beanstalk as an example. Its features include:
- Supports a wide range of development environments (Java, .NET, PHP, Node.js, Python, Ruby, GO), and notably includes support for Docker!
- Simply upload your code, and Elastic Beanstalk will handle the deployment process, including capacity provisioning, load balancing, auto-scaling, and application health monitoring.

- Initialize the EB environment:
$ eb init -p docker
-pallows you to specify the EB application platform, such as PHP; here we use Docker.
The command will prompt you to configure various settings. Press Enter to accept the default values.
If you already have a set of AWS EB credentials configured, the command will automatically use them. Otherwise, it will prompt you to enter your
Access key IDandSecret access key, which must be created in AWS IAM.
- After successful initialization, you can use
eb createto quickly provision different environments, such as development, staging, or production. Here, we useenv-developmentas an example:
$ eb create env-development
Wait for Elastic Beanstalk to finish creating the environment. Once complete, your application will be equipped with load balancing and auto-scaling capabilities.

- Use
eb opento view the running result of the current version:
$ eb open env-development

Deploy AWS on Local Machine
- Slightly modify
index.js:
// index.js
// ...
app.get('/', function (req, res) {
  res.send('Hello env-development!');
});
// ...
- Run
eb deployto deploy the new version to AWS Elastic Beanstalk:
$ eb deploy env-development

- After deployment is complete, run
eb opento open the webpage:
$ eb open env-development

The application update on env-development is complete.
Deploy AWS on CircleCI
git checkoutswitches the branch back to the main master line:
$ git checkout master
eb createcreates a new environment for production deployment, namedenv-production:
$ eb create env-production
$ eb open env-production

This successfully launches the second set of instances. We now have two environments: env-development and env-production.
Navigate to AWS IAM to create an account for CircleCI:
Dashboard>UsersCreate New Users- Enter User Names: CircleCI >
Create Download CredentialsDashboard>Users>CircleCIAttach PolicyAWSElasticBeanstalkFullAccess>Attach Policy
Go to CircleCI to configure your AWS permissions:
Project SettingsPermissions>AWS Permissions- Open the previously downloaded
credentials.csvfile and enter theAccess Key ID&Secret Access Key Save AWS keys- Under the
.elasticbeanstalkdirectory, createconfig.global.yml:
# .elasticbeanstalk/config.global.yml
global:
  application_name: hello-ci-workflow
  default_region: us-west-2 # The region where EB is located; default is us-west-2
- Modify
circle.yml:
# circle.yml
machine:
  # Python is required to install EB
  python:
    version: 2.7
  services:
    - docker

dependencies:
  pre:
    # Install EB CLI
    - sudo pip install awsebcli
  override:
    - docker build -t hello-ci-workflow .

test:
  override:
    - npm test
    - docker run -d -p 3000:3000 hello-ci-workflow; sleep 10
    - curl --retry 10 --retry-delay 5 -v http://localhost:3000

# Add a deployment script
deployment:
  production:
    branch: master
    commands:
      - eb deploy env-production
This allows CircleCI to automatically trigger builds, tests, and deployments whenever there are updates on the GitHub master branch.
- Next, let’s try out the workflow by modifying
index.js:
// index.js
// ...
app.get('/', function (req, res) {
  res.send('Hello env-production!');
});
// ...
- Commit & Push:
$ git add .
$ git commit "test deploy production"
$ git push
- Go to CircleCI to check the results:

- Deployment successful. Use
eb opento open your browser and view the result:
$ eb open env-production

Slack

Account:
We are almost done here. Let’s talk about Slack.
Slack is a real-time communication tool designed for teams. Similar products include Gitter and HipChat.
So, what sets it apart from software like Skype or Lync?
It integrates with many development tools (such as GitHub and CircleCI). For example, notifications regarding new pushes, pull requests, or issues on GitHub, or failed unit tests in CircleCI, appear instantly in your team’s Slack channel. Since we have automated most of our workflow, it is essential to keep relevant stakeholders informed about activities within these tools. Therefore, using Slack is necessary.
- Log in to the Slack page
- Select
Configure Integrations>CircleCI


- Select the channel to receive CircleCI notifications
- Click the
Add CircleCI Integrationbutton - Copy the
webhook URLdisplayed on the screen


- Return to CircleCI
- Select
Project settings>Chat Notifications - Paste the copied
Webhook URL>Save


- Follow similar steps to add GitHub notifications to Slack:


<img class="attachment-medium" src="https://1.bp.blogspot.com/-1TQ2EXVEVvM/VTpUs2T2uvI/AAAAAAAAkjQ/Rn5aVsYfUSA/s1600/48.png" alt="687474703a2f2f312e62702e626c6f6773706f742e636f6d2f2d31545132455856
That’s it! On your next build, you’ll start seeing CircleCI build notifications in your Slack chatroom. Done! You can see the notification process for each step displayed in the Slack channel: Use “There is no road to the mountain of books; diligence is the only path. The sea of learning is boundless; hardship is the boat.” — Han Yu DevOps development processes and tools are constantly evolving every day. Stand on the shoulders of giants and maintain a mindset of lifelong learning. I have placed the source code for this example on GitHub. Feel free to check it out if you’re interested. If there are any areas in this article that need improvement, please do not hesitate to provide your feedback. I would greatly appreciate it.$ git branch test-slack
$ git checkout test-slack
index.js:// index.js
// ...
app.get('/', function (req, res) {
res.send('Hello Slack!');
});
// ...
$ git add index.js
$ git commit -m "index.js: update to test slack"
$ git push -u origin test-slack
test-slack back into master to trigger an automatic deployment via CircleCI.
eb open to open the browser and view the results; the new version has been successfully deployed automatically:$ eb open env-production
Conclusion
References
Related Reading