
Introduction
Among all AWS services, EC2 is likely the most widely used.
In many projects or requirements involving EC2, it is often necessary to configure email sending capabilities from within an EC2 instance. However, this is also a common source of issues. This article primarily explains the preparatory steps you should take before configuring your EC2 mail server to ensure that emails are sent successfully after proper configuration.
Application to Remove Email Sending Restrictions
AWS provides public IP addresses (Elastic IPs) to various users. Consequently, the public IP address assigned to your EC2 instance may already be listed on RBLs (Real-time Blackhole Lists). This typically happens if a previous user of that IP address sent a large volume of spam, causing it to be blacklisted.
Therefore, the first step is to apply to AWS to remove these email sending restrictions.
Log in to the following URL, fill in the required fields, and submit the request to AWS:
URL: Request to Remove Email Sending Limitations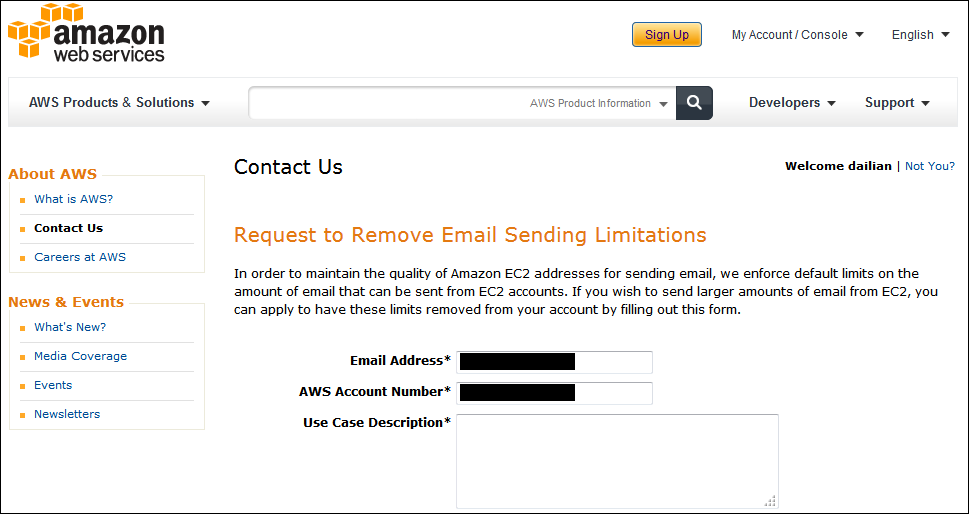 The Email Address and AWS Account Number fields are auto-filled upon logging into AWS and cannot be changed. You need to provide the reason for the request.
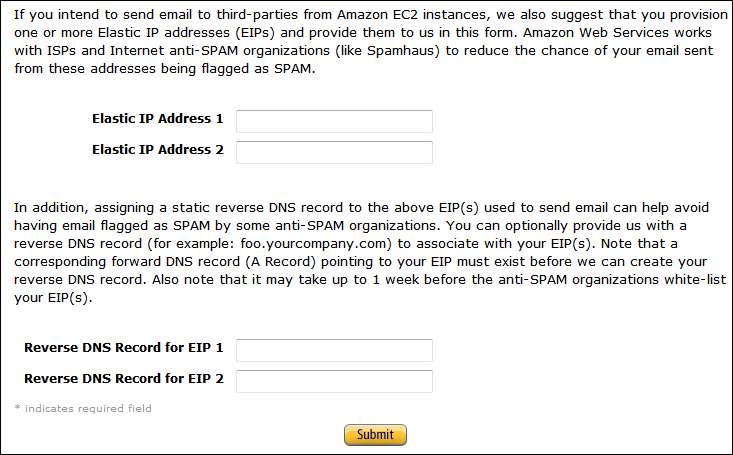 1. Note that when entering the IP addresses to be unblocked, you can only specify two Elastic IP addresses at a time. If you need to lift restrictions for three or more IP addresses, you must perform separate operations on this page for each batch.
2. The Reverse DNS Record field requires you to enter the PTR record for reverse DNS resolution, which AWS will verify. Please note the following conditions:
- You must use your own domain name; default AWS-assigned domains such as ec2-XX-XX-XX-XX.ap-northeast-1.compute.amazonaws.com are not allowed.
- You must pre-configure an A record in your DNS settings that maps the hostname to the Elastic IP address (you can use DNS providers other than Route 53).
After a few days, AWS will send the application result to your email. If approved, you will be able to send emails externally from your EC2 instances without encountering intermittent delivery failures.
DNS Configuration
Theoretically, once the restriction removal is approved, you should be able to send emails normally. However, if you are sending emails to multiple users via mailing lists (ML), configuring SPF (Sender Policy Framework) and DKIM (DomainKeys Identified Mail) via DNS can significantly improve email deliverability and accuracy.
SPF Configuration By adding an SPF record, receiving servers can verify that emails sent from yunwei123.com are trusted.
yunwei123.com. IN TXT "v=spf1 a:yunwei123.com -all"
DKIM Generate a DKIM key using the opendkim-genkey command from OpenDKIM, and then add the generated DKIM record to your DNS. OpenDKIM is included in the EPEL repository, so you can install it directly via yum after importing the EPEL source.
OpenDKIM Official Website: OpenDKIM
default._domainkey IN TXT ( "v=DKIM1; k=rsa;" "p=XXXXXXXXXXXXXXXXX.." ) ; ----- DKIM key default for yunwei123.com
Notes
If you prefer not to install and configure your own mail server, you can use AWS’s Simple Email Service (SES).
Alternatively, you can set up a Mail Gateway server to relay external emails. This approach is beneficial for handling Auto Scaling scenarios, as it is difficult to predict the IP addresses of EC2 instances generated after scaling events.
Conclusion
The above outlines some preparatory steps required before configuring a mail server on EC2, or points to consider if you encounter email sending anomalies after configuration. We hope this provides some useful insights for your daily work and life.