As the global leader in cloud services, AWS is always racing ahead on the path of innovation. In 2017 alone, AWS released over 1,300 new services, features, and capabilities, including five brand-new media services announced at re:Invent 2017: MediaConvert, MediaLive, MediaPackage, MediaStore, and MediaTailor. These fully managed services enable users to easily build reliable, broadcast-quality video workflows in the cloud. When building internet video or OTT video businesses, users can launch live streaming, transcoding, storage, ad insertion, and other broadcast-grade business processes directly on the AWS console. You pay only for what you use, start and stop services at any time, without upfront investments in expensive hardware assets or costs associated with infrastructure maintenance. The AWS platform has global deployment capabilities, allowing you to expand your business to regions worldwide in minutes.
In this guide, we will use AWS Elemental MediaLive, MediaPackage, and CloudFront to build a complete live streaming OTT transcoding, packaging, and distribution service. Through this experiment, you will intuitively experience how convenient AWS media services are; all you need is an AWS Global account and a computer with internet access.
1. Prepare the Live Stream Source
MediaLive supports four input types: RTP, RTMP (Push), RTMP (Pull), and HLS. If you already have an RTMP live stream source, you can use it directly in this experiment.
This experiment uses HLS as an example, using a pre-transcoded file stored in S3 as the input source. For MediaLive, this input source acts as a live stream.
For example: https://s3-us-west-2.amazonaws.com/mytestbucket-og-media-3/keynote-hls/testvideo.m3u8
Ensure that public access is enabled for this directory (for more information about S3, please refer to https://docs.aws.amazon.com/zh_cn/AmazonS3/latest/dev/Welcome.html).
2. Create a MediaPackage Channel
a. Log in to the AWS Global Console, select Services, and choose MediaPackage.
b. On the Channels page, select Create Channel.
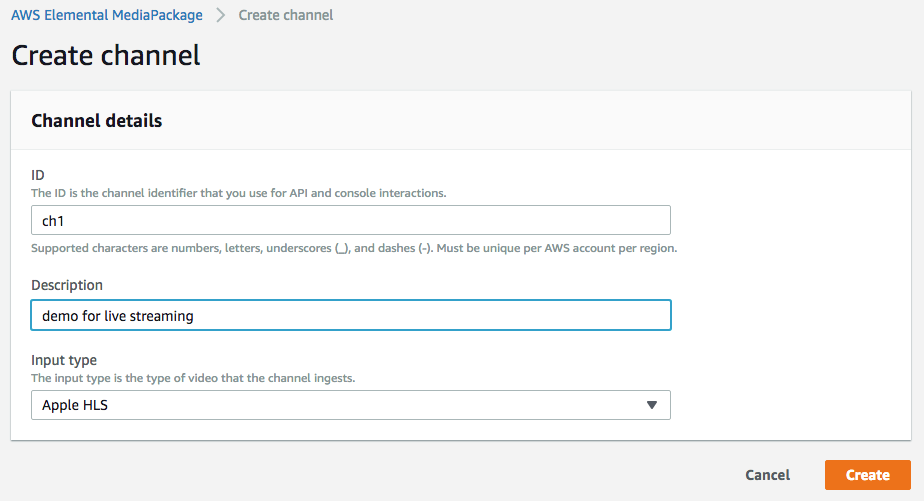
c. Enter an ID, which serves as the custom name for this channel (e.g., ch1). The Description field is optional.
d. Select Apple HLS for Input type.
e. Click Create channel.
f. Click the newly created channel. On the Channel Overview page, select Add/edit endpoint.
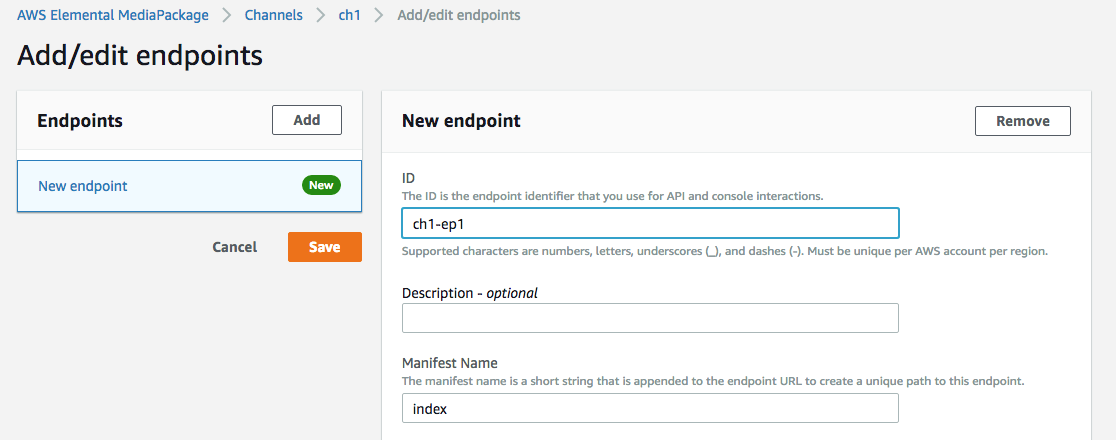
g. On the Endpoints page, click Add, enter an ID (e.g., ch1-ep1), and click Save.
h. Repeat the above steps to create a second Channel and its corresponding endpoint.
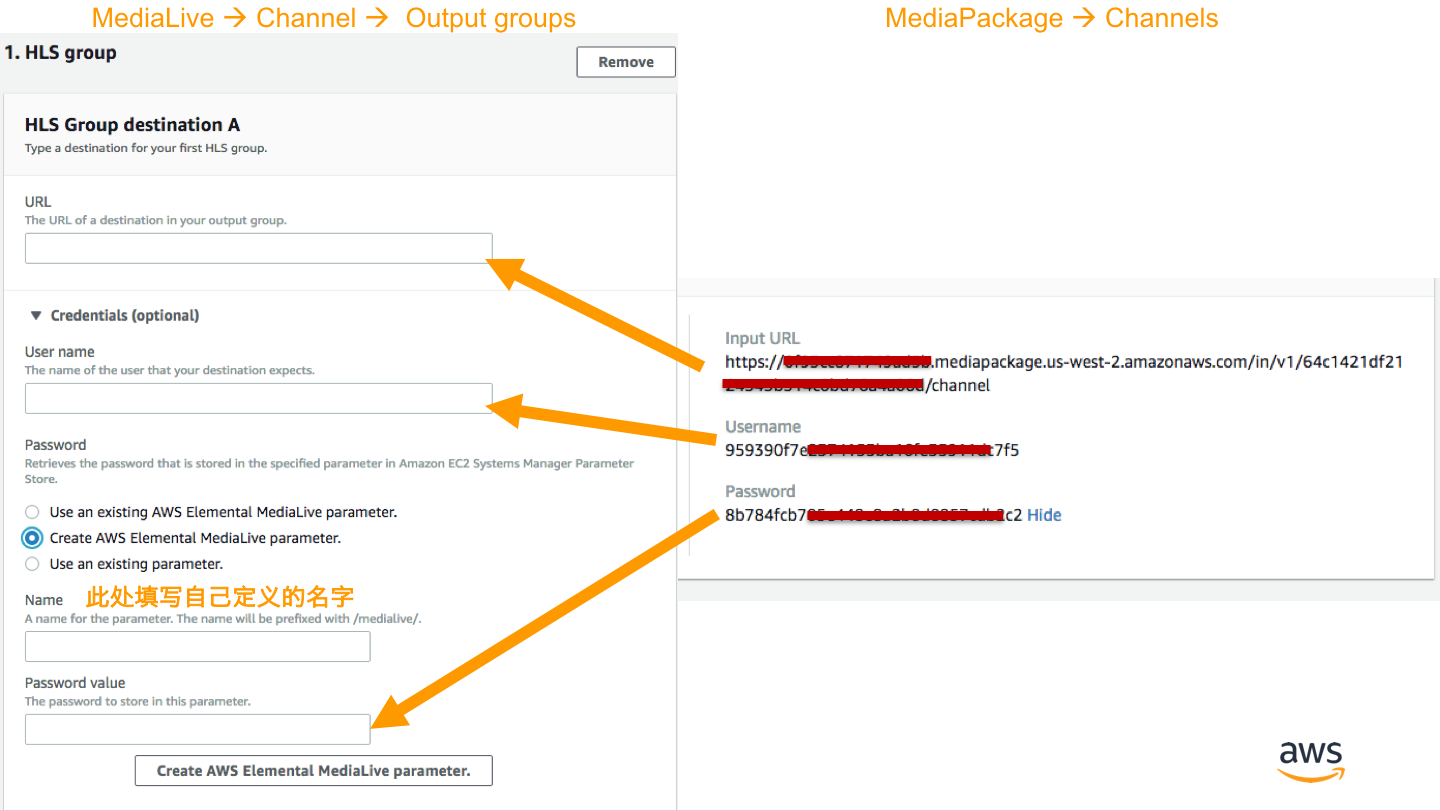
i. Note down the channel’s Input URL, username, and password.
3. Create a MediaLive Channel
a. In the Console Services menu, select MediaLive.
b. Go to the Channels page and click Create Channel.
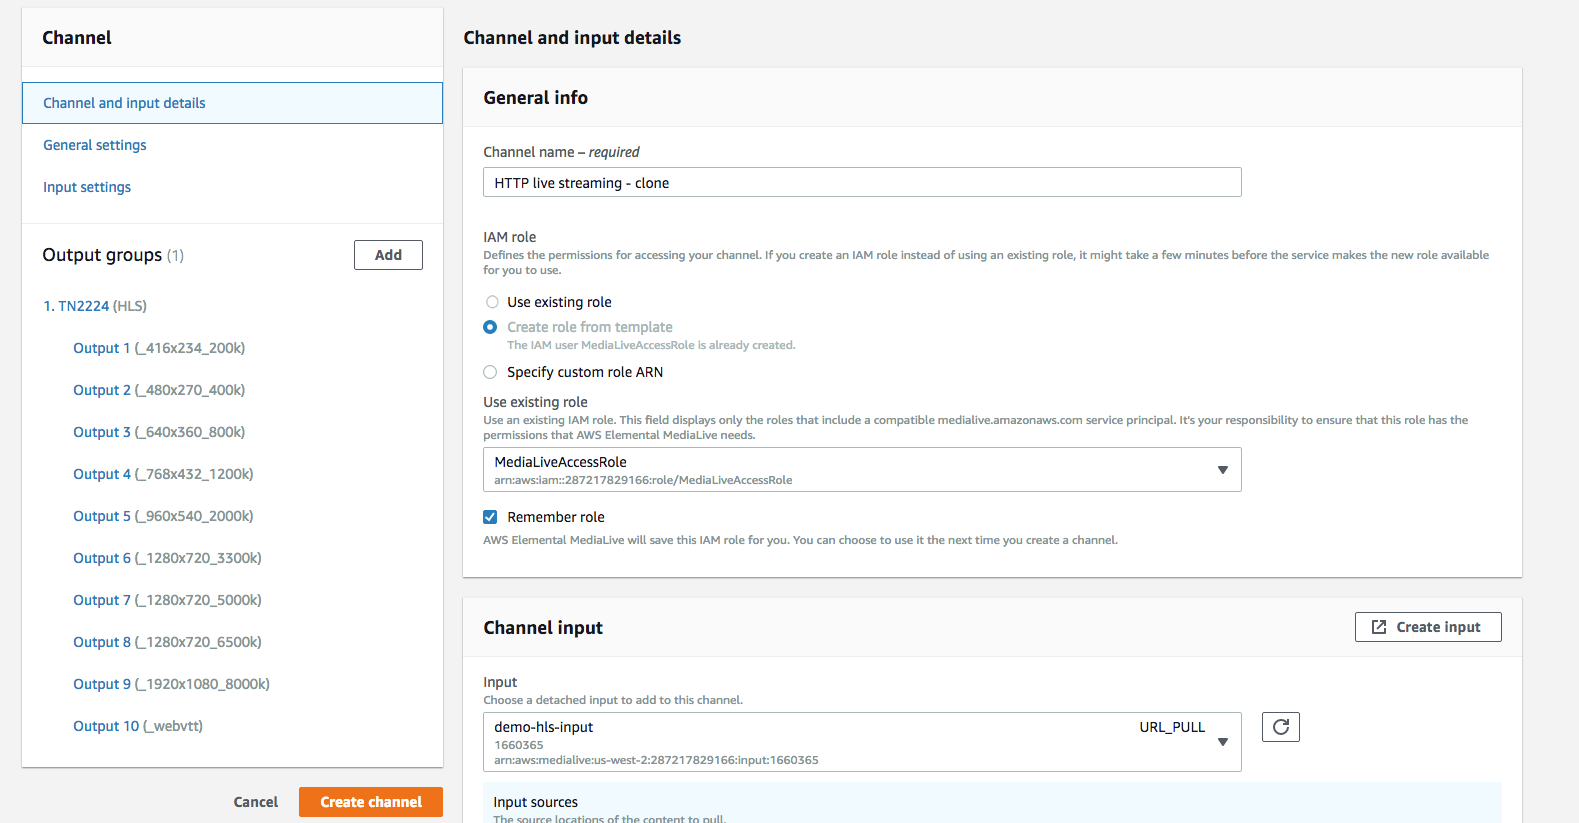
c. Enter a custom name in the Channel Name field.
d. For IAM Role, select Create role from template. Check the box for Remember ARN.
(For more information about IAM Roles, see https://docs.aws.amazon.com/zh_cn/IAM/latest/UserGuide/id_roles.html)
Create MediaLive Input
e. In the Channel input section, click Create input.
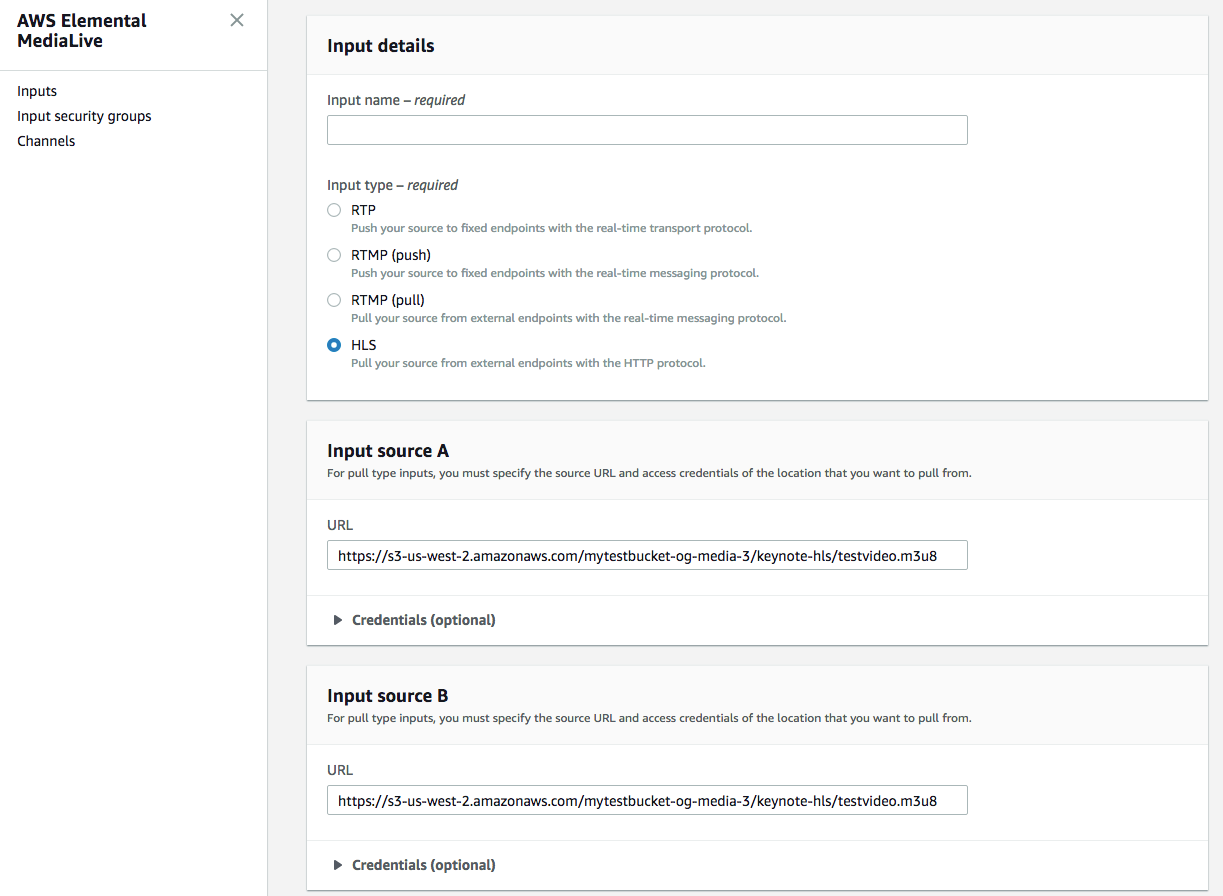
f. Enter a name for the Input.
g. Select HLS for Input type.
h. Paste the address of the HLS source prepared in Step 1 into the URLs for Input source A and Input source B. Note that for high availability, MediaLive Input requires two inputs configured as active/standby pairs. This experiment uses HLS URLs from two different buckets as input sources; in a production environment, you should also use two different input source addresses to ensure high reliability.
i. Click Create.
Create HLS Output Group
j. In the channel template section, select the HTTP live streaming template, which will automatically add 10 outputs with different resolutions and bitrates. Alternatively, you can skip the template and manually add custom outputs.
k. Click the template name TN2224 under Output groups, then click Credentials (optional). Select Create AWS Elemental MediaLive parameter and sequentially fill in the URLs, Username, and Password for the two channels created in Step 2 into HLS Group destination A and HLS Group destination B. See the figure below.
l. Click Create channel
4. Start the Channel and Verify
a. After the channel is created, it will be in an idle state. Select it and click Start.
b. Use the endpoint created in Step 2 and play the live stream using VLC Player, for example:
https://103xxxxxxxxe303.mediapackage.us-west-2.amazonaws.com/out/v1/c78bcxxxxxxxxxxxxxxxxxxxxxx45/index.m3u8
c. If you cannot see the live video stream, check and confirm that there is network traffic in both the network in & out sections of the MediaLive Channel and MediaPackage Channel.
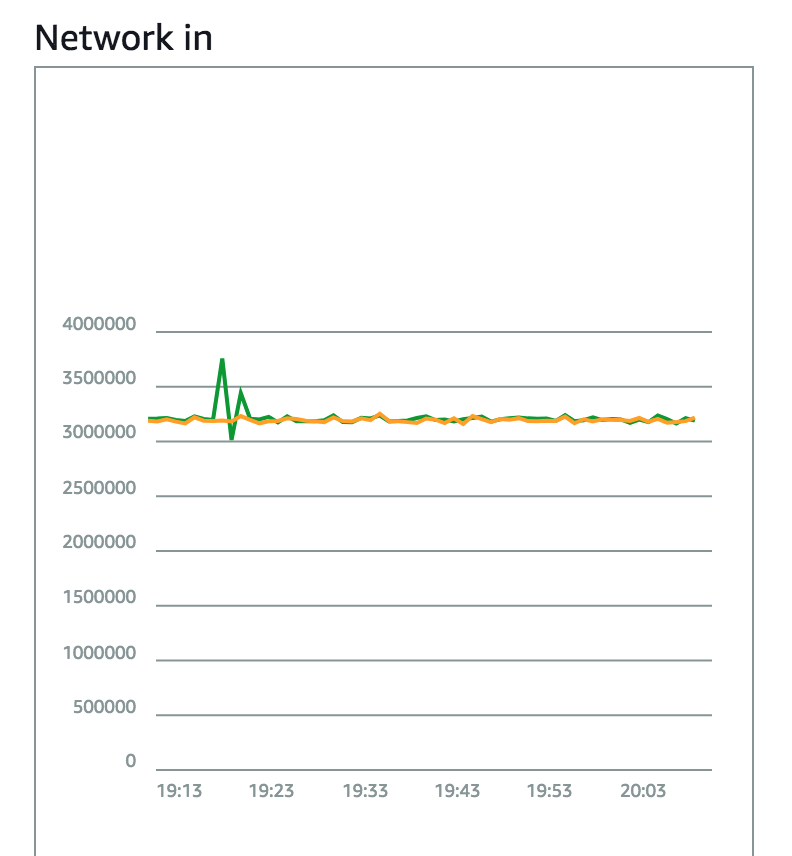
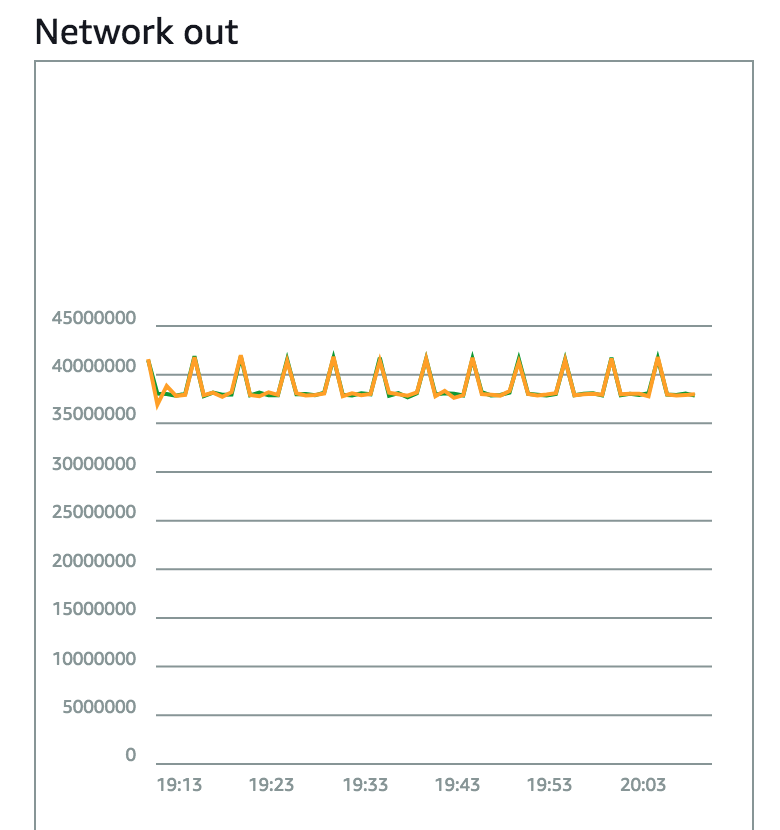
MediaLive Channel Network Status
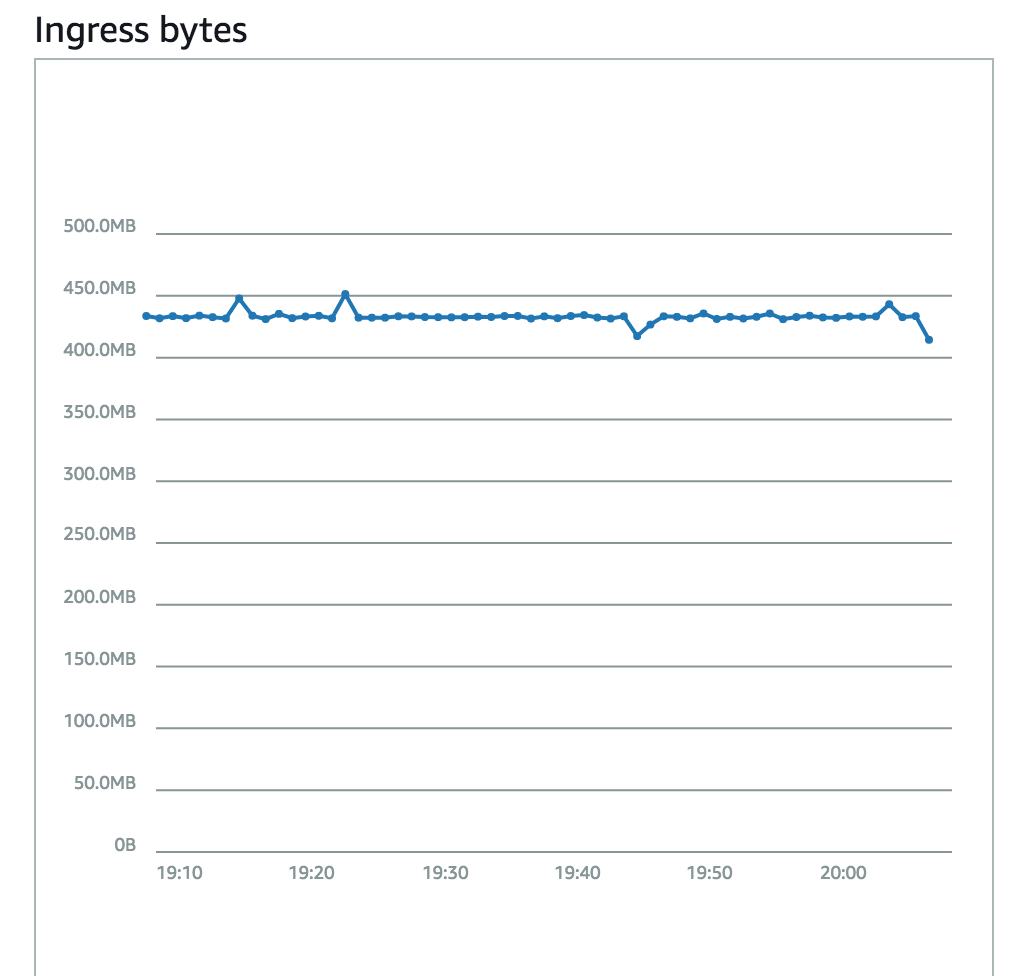
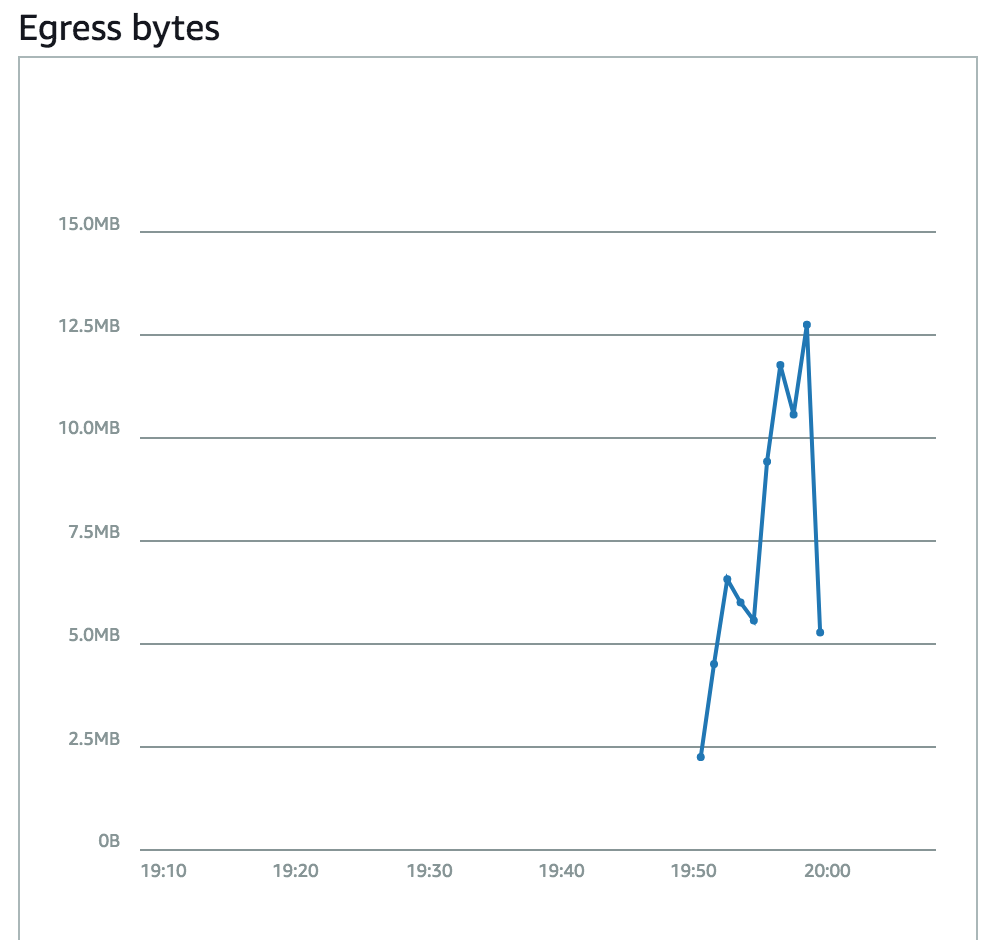
MediaPackage Channel Network Status
5. Create CDN Distribution Using CloudFront
a. Log in to the AWS Global Console, select Services, choose CloudFront, go to Distributions, and click Create Distribution.
b. Select Web mode and click Get Started.
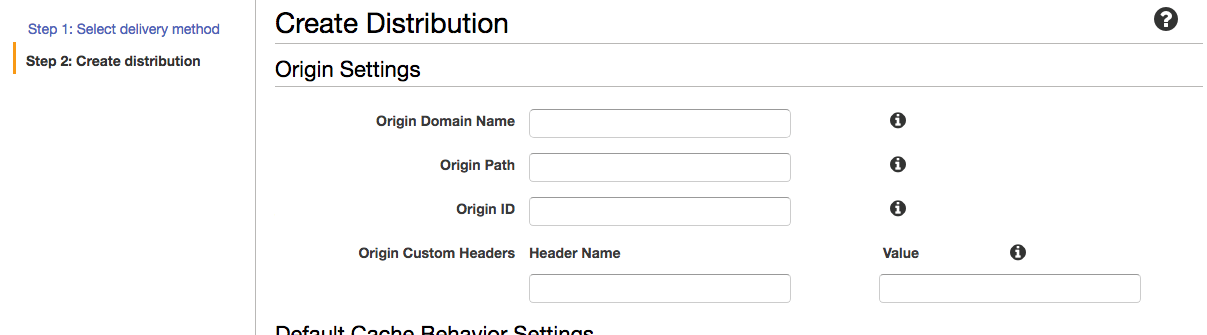
c. In the Origin Domain Name field, enter the MediaPackage endpoint domain created in Step 2, for example: https://103xxxxxxxxe303.mediapackage.us-west-2.amazonaws.com
In the Origin Path field, enter the path within the MediaPackage endpoint, for example: /out/v1/c78bcxxxxxxxxxxxxxxxxxxxxxx45
For Origin Protocol Policy, select HTTPS only.
You can leave other options unchanged. (For more information about CloudFront, see https://docs.aws.amazon.com/AmazonCloudFront/latest/DeveloperGuide/cf_dg.pdf)
Click Create Distribution.
d. Wait until the status changes from In progress to Deployed. You can then use the domain assigned by CloudFront followed by index.m3u8, for example: d2xxxxxxxxxxx4n4m.cloudfront.net/index.m3u8
Open this address in VLC Player to play the stream. This completes the CDN distribution of the playback stream. CloudFront will automatically select the edge location with the lowest latency for acceleration.
Now, your live streaming business is built and capable of global distribution and acceleration. AWS media services feature built-in reliability and elasticity. The service transparently manages resources across multiple Availability Zones and automatically monitors their health to detect and resolve any potential issues without interrupting live channels. With AWS media services, you achieve higher reliability than the infrastructure typically used for broadcast workloads.
MediaLive inputs support SD, HD, and UHD, and support H.264 (AVC), HEVC (H.265), and MPEG-2 video encoding formats. It supports AAC, Dolby Digital, Dolby Digital Plus, MPEG Audio, and PCM audio formats. It also supports AFD, frame rate control, GOP structure settings, various encoding profiles, multiple subtitle standards, timecode insertion, digital rights management, and more.
Beyond MediaLive and MediaPackage, you can also use MediaConvert for video file transcoding, MediaStore for content storage, and MediaTailor for ad insertion. AWS media services integrate with complementary AWS services such as Amazon CloudFront, AWS CloudFormation, and Amazon CloudWatch, as well as third-party applications for security, management, and production, providing a comprehensive suite of tools to process and deliver real-time on-demand video content. Most importantly, AWS media services allow you to focus on content rather than managing complex infrastructure, enabling you to deliver an exceptional experience to your audience.