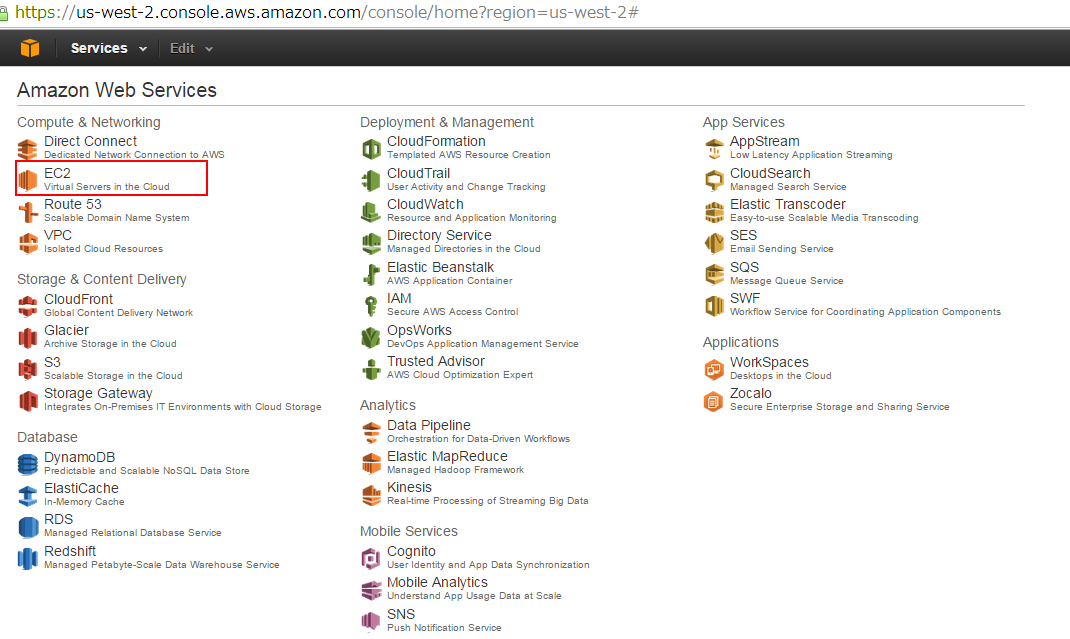
1. After logging into the AWS Management Console, click to open the EC2 dashboard.
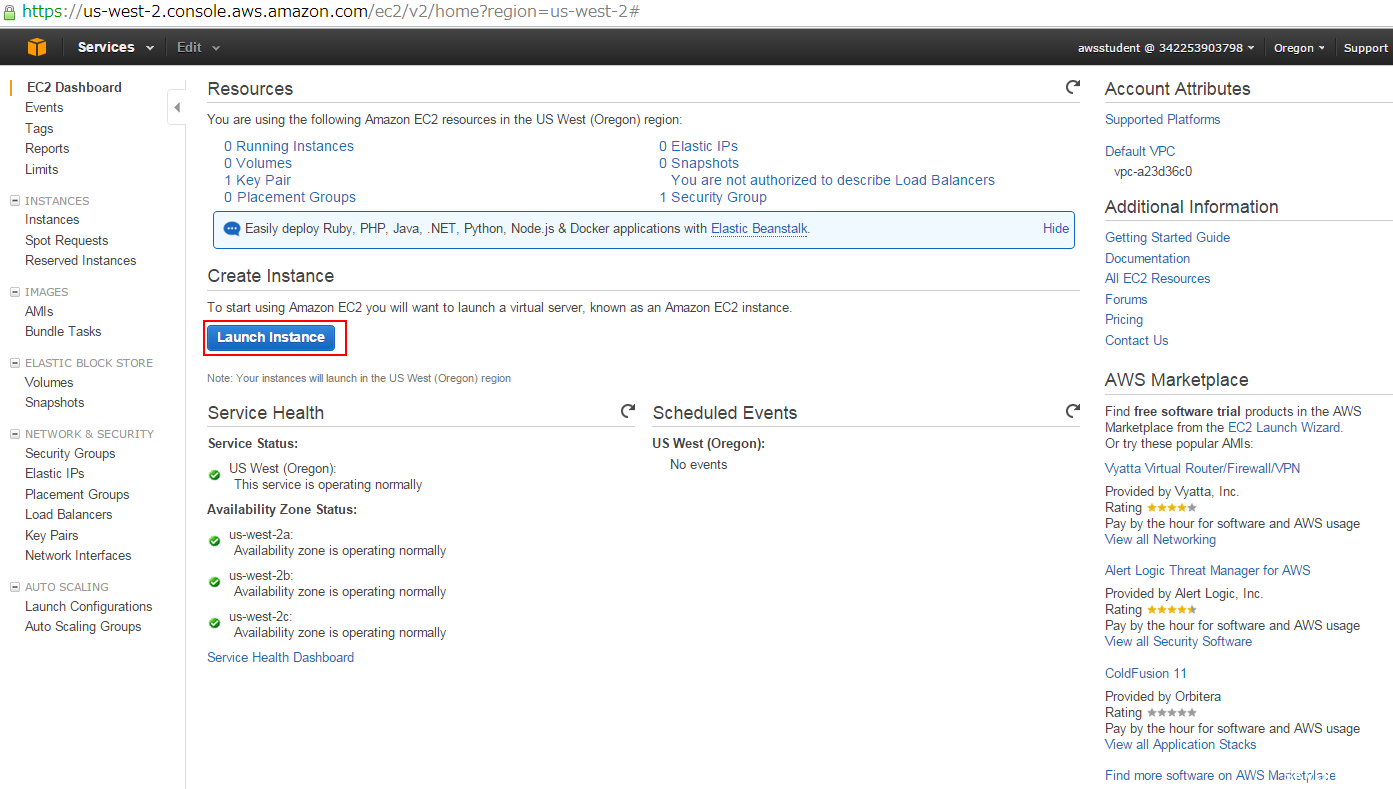
2. Click “Launch Instance” to start creating an instance.
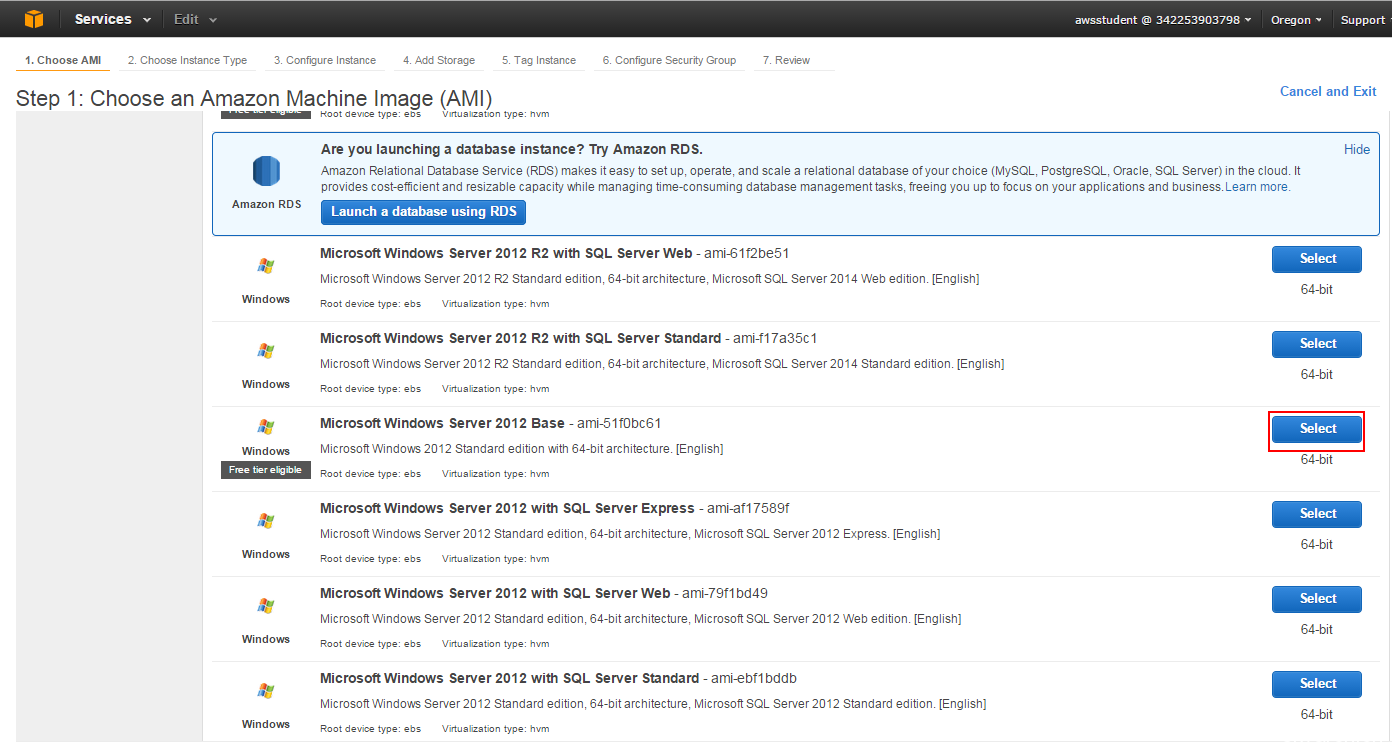
3. Select the desired Windows AMI. Here, we select “Microsoft Windows Server 2012 Base – ami-51f0bc61”.
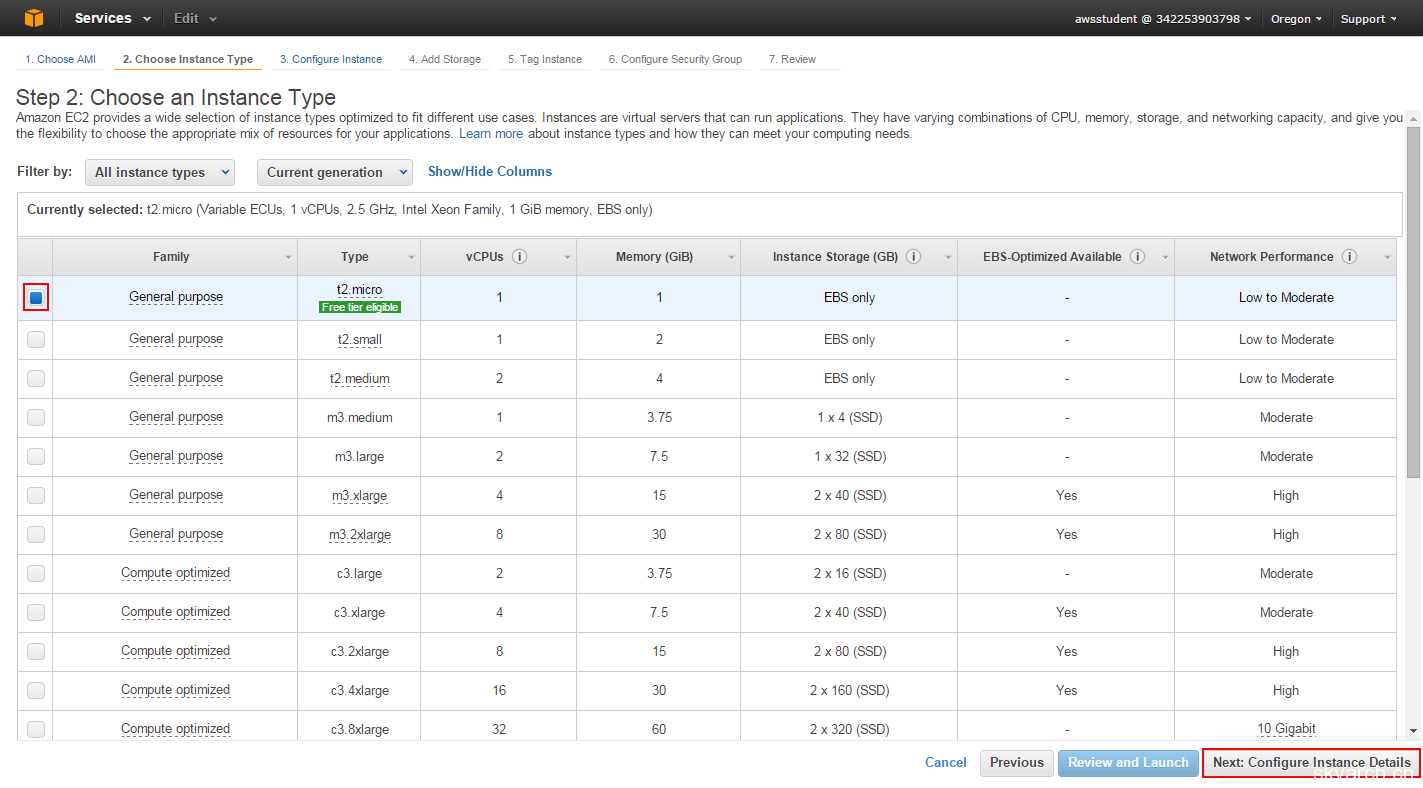
4. Select the required instance type. This is a critical step that determines instance performance; here we choose t2.micro. Click “Next: Configure Instance Details” to proceed.
5. You can ignore this item and keep the defaults. Click “Add Storage” to proceed.
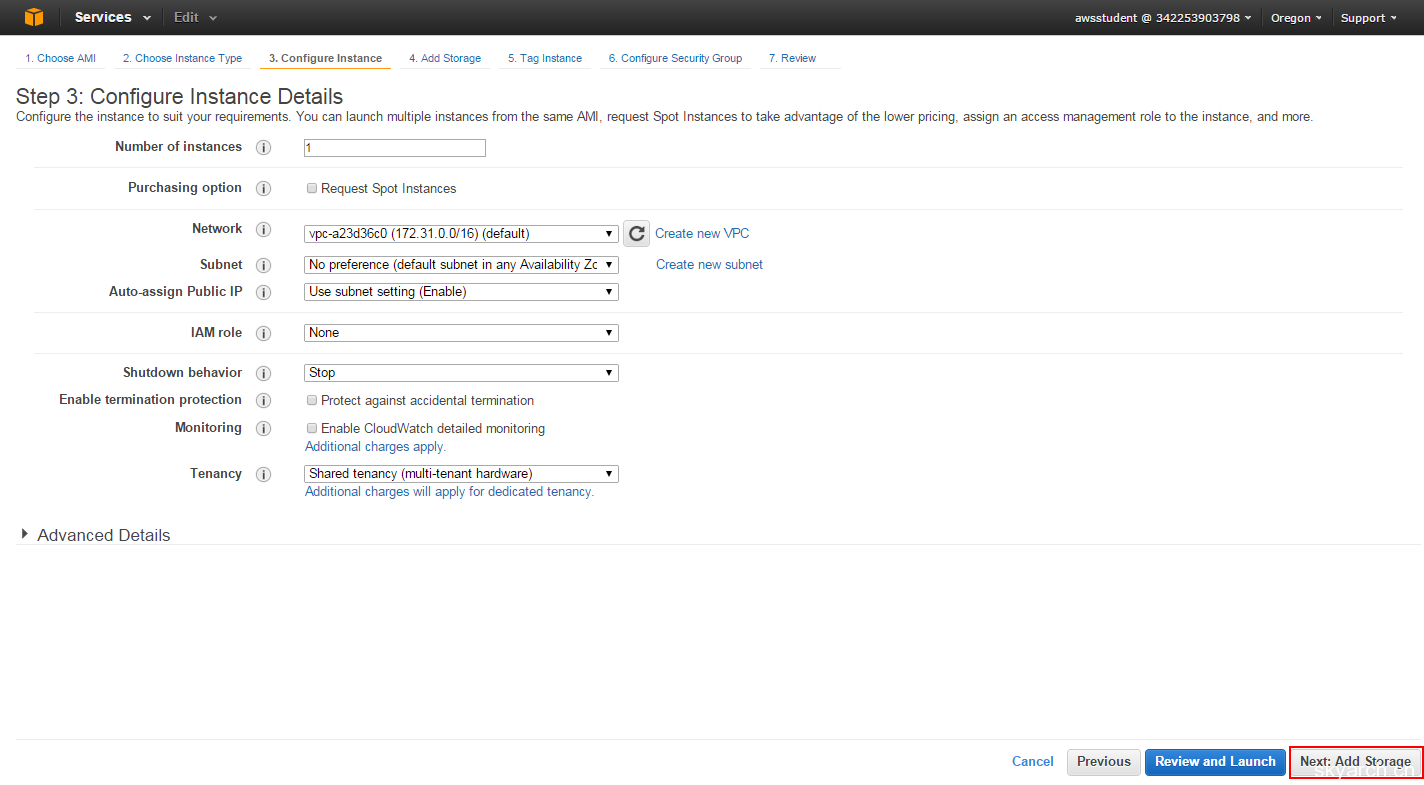
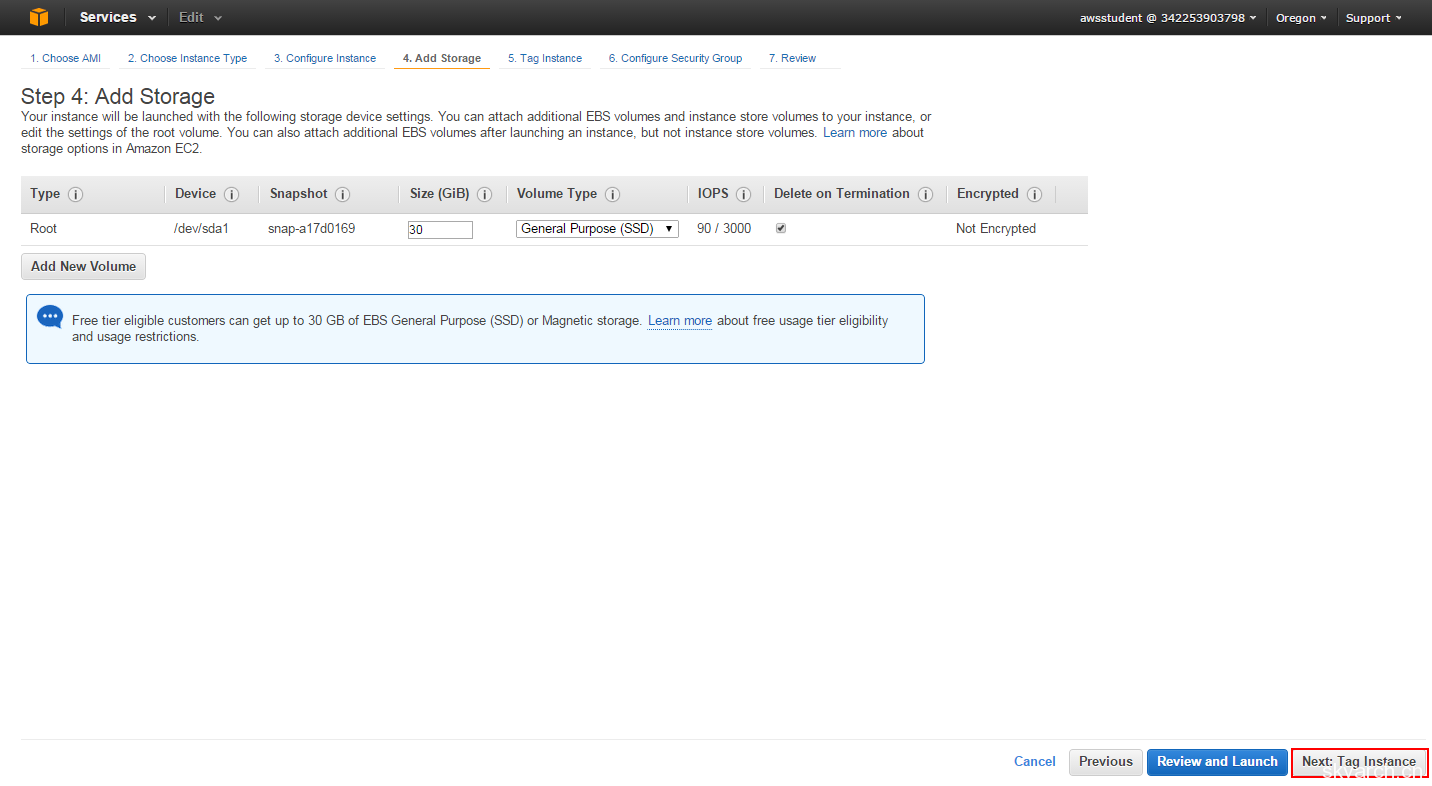
6. You can add storage if needed; here we use the default settings. Click “Next: Tag Instance” to proceed.
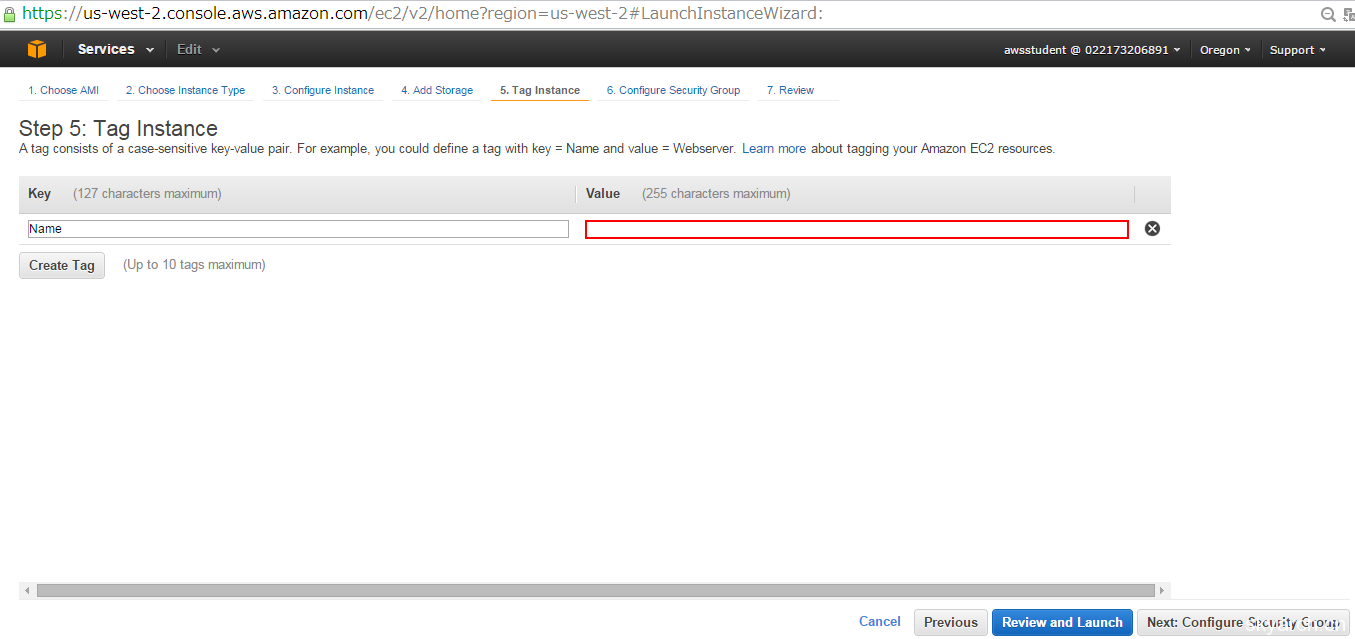
7. Enter an instance name if desired by filling in the “Value” field. Here, we leave it as default. Click “Next: Configure Security Group” to proceed.
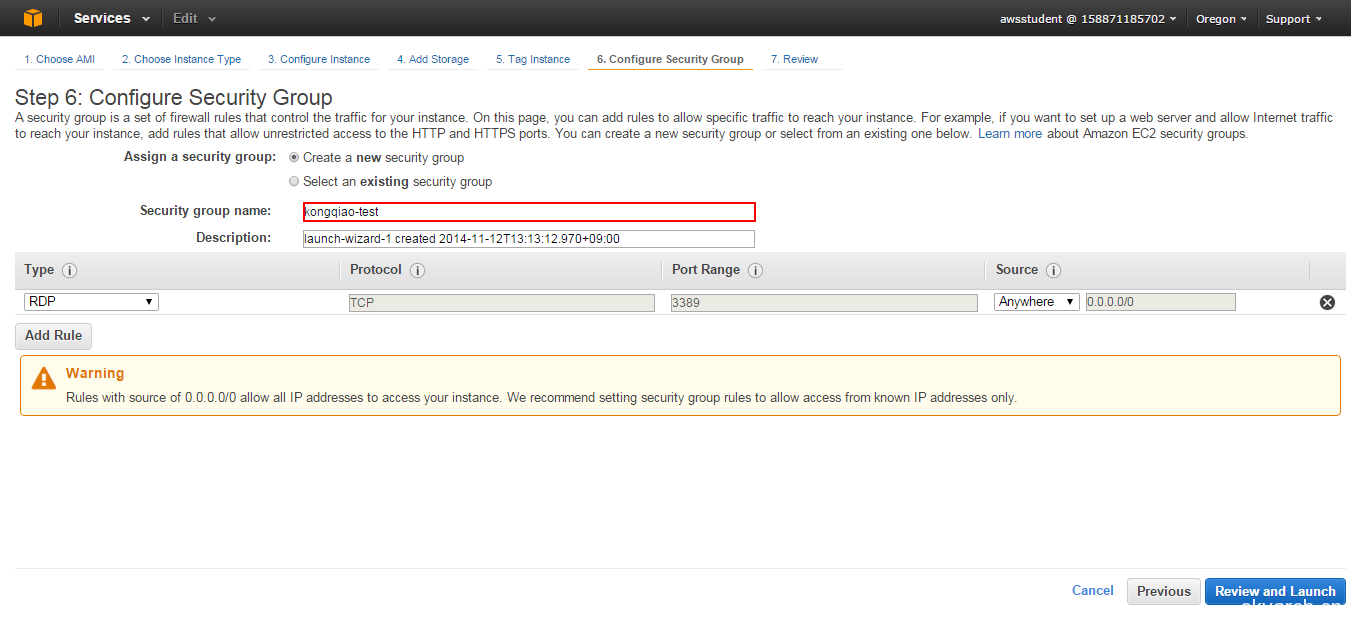
8. This step is important. Select “Create a New Security Group” and enter an appropriate security group name. Here, we use “yunwei123-test”. Below, there is a default rule allowing RDP access from 0.0.0.0/0, meaning anyone who knows the instance’s IP, username, and password can log in. If you want to restrict login to specific IPs, change the Source from Anywhere to Custom IP to allow only specific IPs (this can be changed later). Then, select “Review Launch” to proceed.
9. All configurations made so far are displayed for review. Click “Launch” to start the instance.
 0
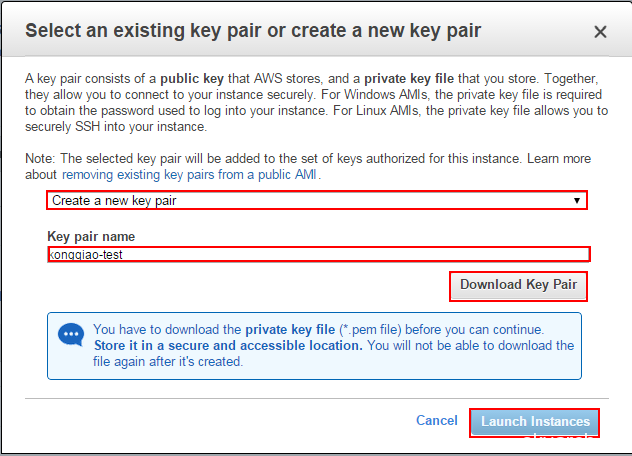
10. Create a key pair for generating passwords. Select “Create a New key pair” to create the key, named “yunwei123-test” here. Click “Download Key Pair” to download the file named “yunwei123-test.pem” to your local machine. Then, click “Launch Instances” to proceed.
::__IHACKLOG_REMOTE_IMAGE_AUTODOWN_BLOCK__::1
11. Click “View Instance” to view the created instance.
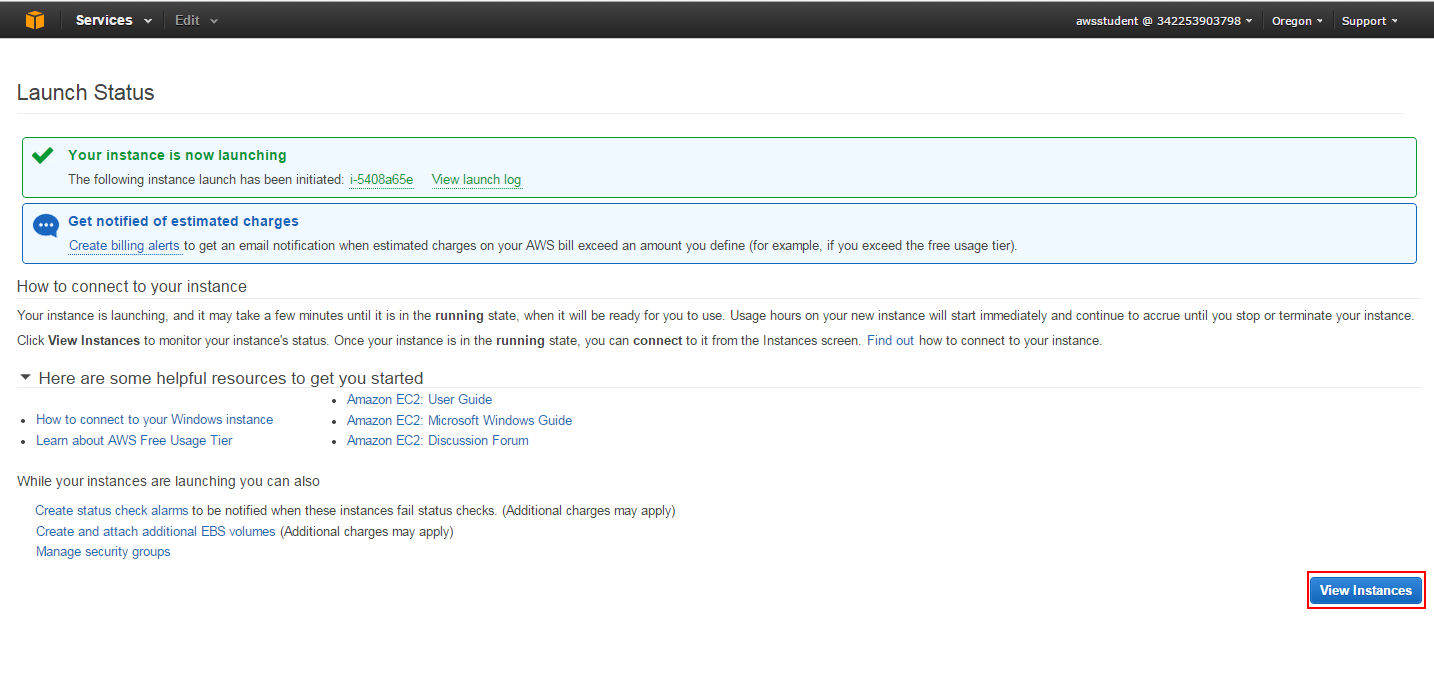
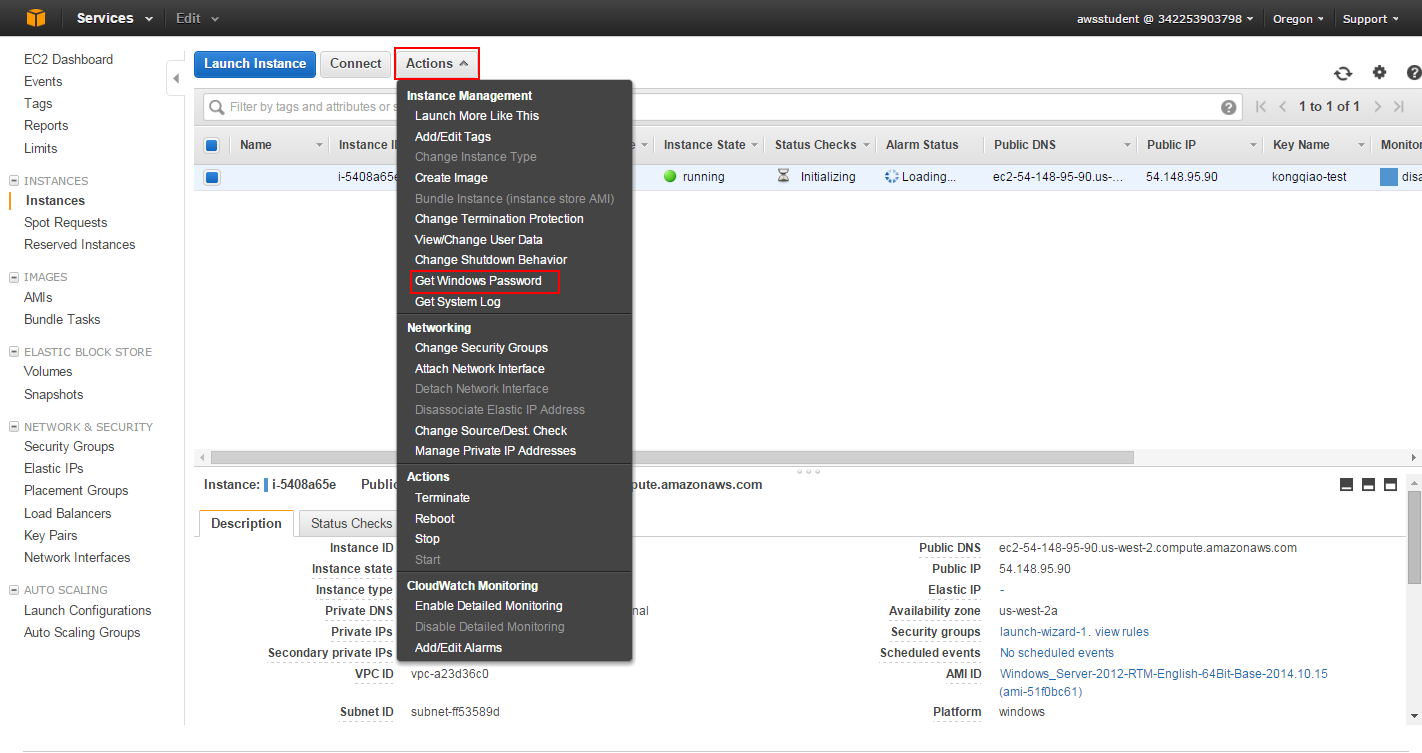
12. The new instance creation is complete. The lower part of the screen shows detailed information. Click “Actions”, select “Get Windows Password” from the menu bar to set the server login password.
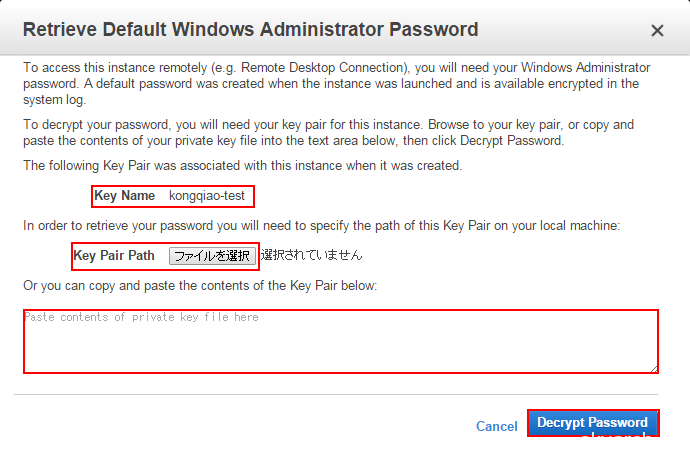
13. The Key Name field will display the name of the key you created. Click “Key Pair Path” to select your created key, or copy the key content into the blank space below. Click “Decrypt Password”.
14. As shown in the figure below: the IP, username, and password are all displayed. It is best to make a note of them. Then click “Close”.
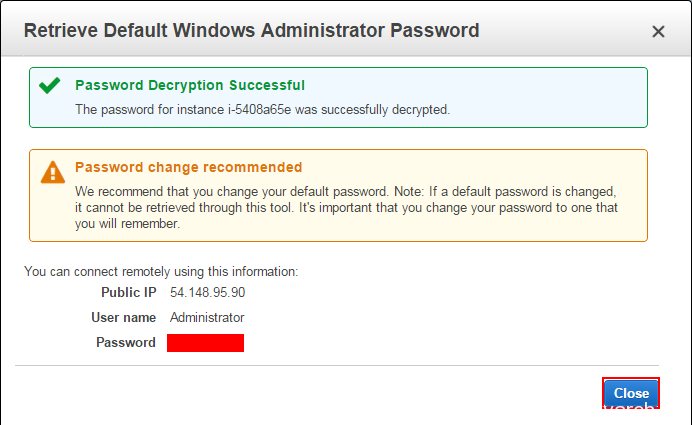
15. Use a remote connection tool. Enter the username and password to log in to the Windows server.
16. As shown in the figure below, the login is complete and the creation was successful.