1. Sharing AMI Images with Specific Users
Note: For sharing, both accounts must be in the same Region; this article uses Tokyo as an example.
If sharing between accounts in different Regions, simply copy the AMI to the target Region.
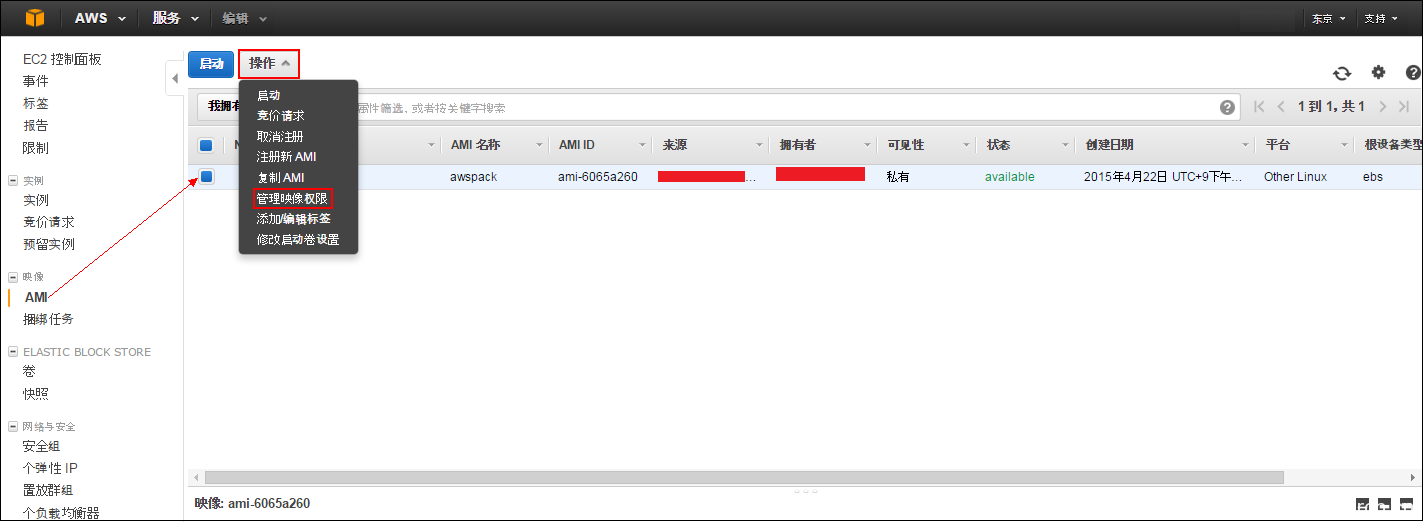
1-1. On the account providing the AMI image, click “AMI” in the left menu bar, select the AMI you wish to share, click “Actions”, and select “Manage Image Permissions”.
1-2. Enter the AWS account ID allowed for sharing, click “Add Permission”, and then “Save”.
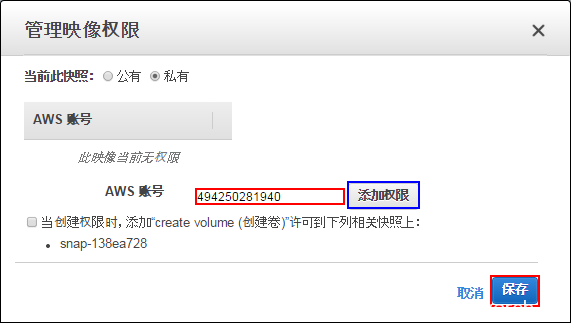
When creating permissions, if you allow adding “create volume” to the snapshot, please select that option.
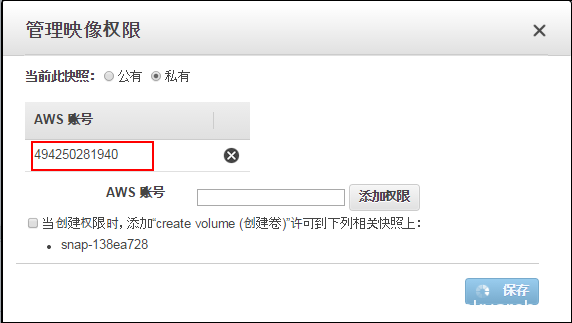
1-3. As shown below, the shared account has been successfully added.
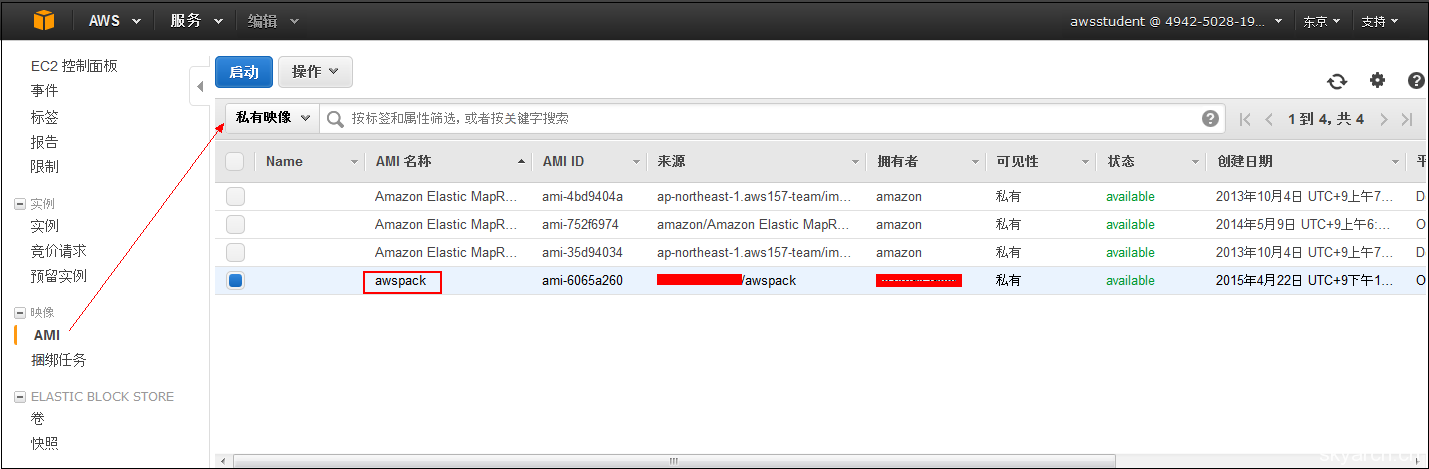
1-4. Log in to the receiving account, click “AMI” in the left menu bar, select “Private Images”, and confirm that the IAM sharing was successful.
However, if the providing AMI account deletes this AMI, it can no longer be shared. Therefore, create an instance using this AMI, and then create a new AMI from that instance to save it.
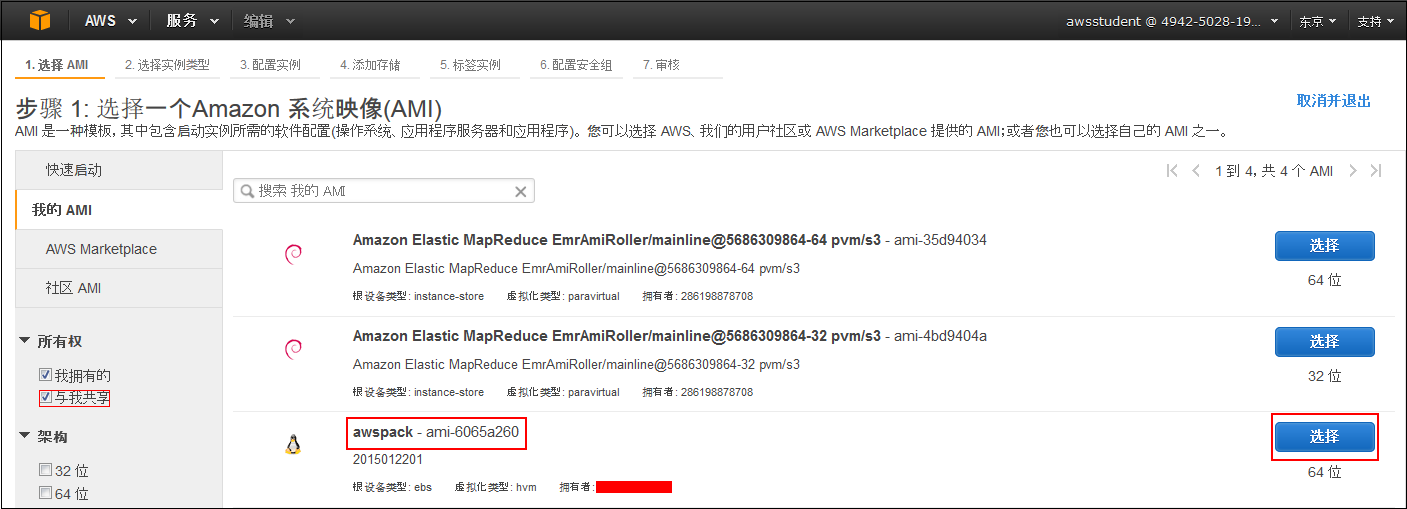
1-5. When creating an instance and selecting an image, click “My AMIs”, then select “Shared with me” to view the shared AMIs.
2. Sharing EBS Snapshots with Specific Users
Compared to AMI sharing, snapshot sharing has more restrictions. Here is a brief summary:
・The original snapshot cannot be modified.
・Snapshots are limited by the Region in which they were created.
・Unencrypted EBS snapshots can be shared.
・You can create your own EBS volumes from shared EBS snapshots.
・To share snapshots with other Regions, you need to copy the snapshot to that Region.
Additionally, encrypted snapshots cannot be shared because the keys used for encrypted volumes and snapshots are unique to each user.
To share them, you need to migrate the data to an unencrypted volume and then create a snapshot.
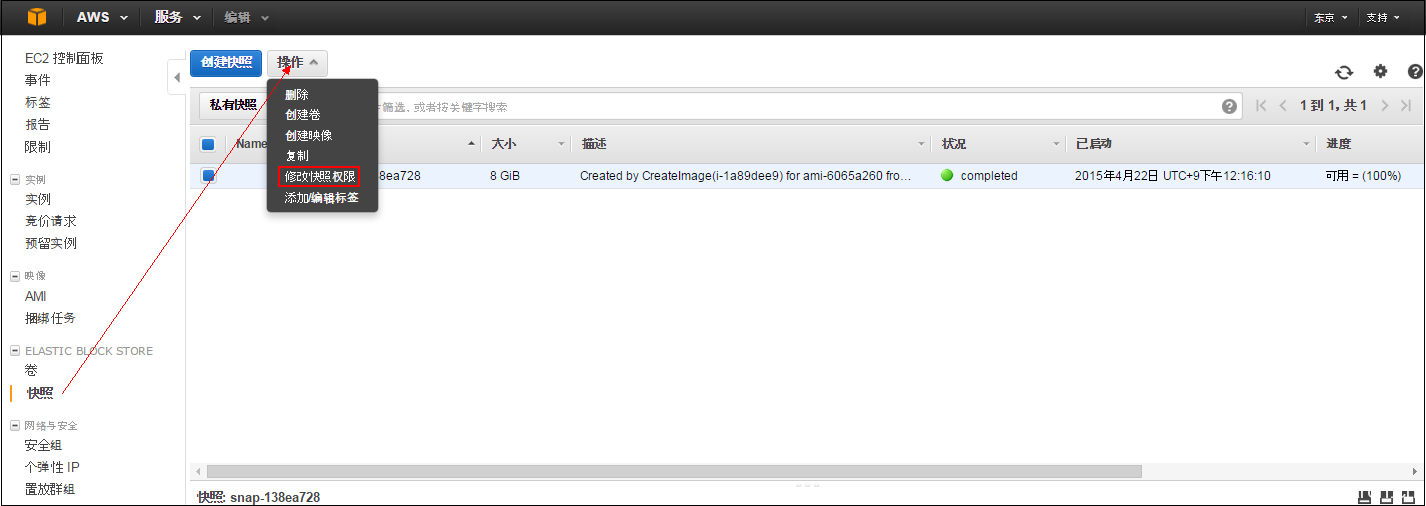
2-1. On the account providing the snapshot, click “Snapshots” in the left menu bar, select the snapshot you wish to share, click “Actions”, and select “Modify Snapshot Permissions”.
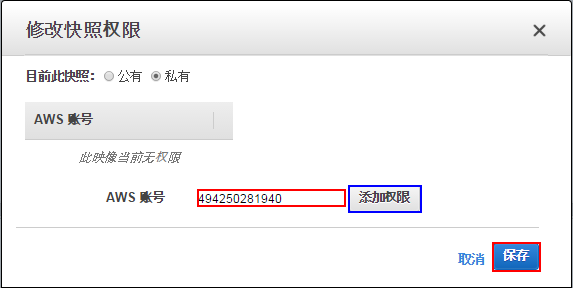
2-2. Enter the AWS account ID allowed for sharing, then click “Add Permission”, followed by “Save”.
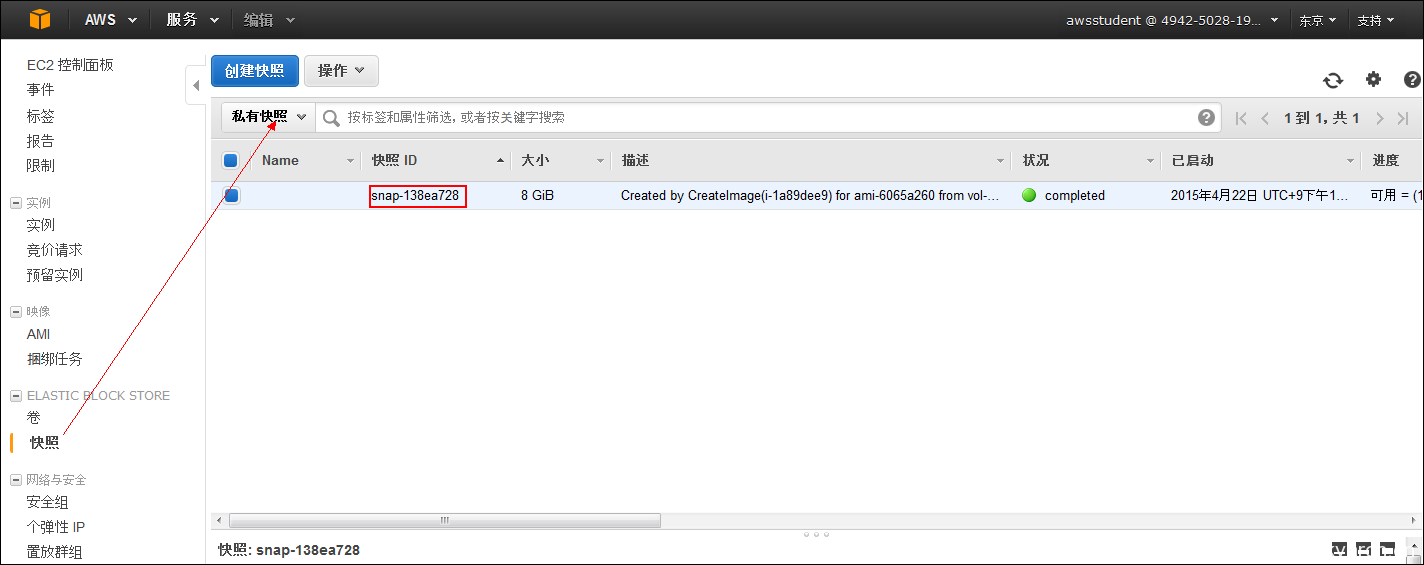
2-3. Log in to the receiving account, click “Snapshots” in the left sidebar, and select “Private Snapshots”. You can confirm that the snapshot sharing was successful.
Note: If the providing snapshot account deletes this snapshot, it can no longer be shared. Therefore, create a volume from it, then create a snapshot to save it. Alternatively, you can simply copy and save it.