Integrating Amazon Web Services (AWS) with Azure AD provides the following benefits:
- Control who has access to Amazon Web Services (AWS) in Azure AD
- Enable users to automatically sign in to Amazon Web Services (AWS) using their Azure AD accounts (Single Sign-On)
- Manage accounts from a central location (the Azure portal)
For more details on integrating SaaS applications with Azure AD, see What is application access and single sign-on with Azure Active Directory?.
Prerequisites
To configure integration between Azure AD and Amazon Web Services (AWS), you need the following:
- An Azure AD subscription
- A subscription with Amazon Web Services (AWS) Single Sign-On enabled
Note
We do not recommend testing the steps in this tutorial in a production environment.
Follow these recommendations when testing the steps in this tutorial:
- Do not use a production environment unless necessary.
- If you do not have an Azure AD trial environment, you can get a one-month trial here.
Scenario Description
In this tutorial, we will test Azure AD Single Sign-On in a test environment. The scenario outlined in this tutorial includes two main building blocks:
- Add Amazon Web Services (AWS) from the gallery
- Configure and test Azure AD Single Sign-On
Add Amazon Web Services (AWS) from the Gallery
To configure integration between Amazon Web Services (AWS) and Azure AD, you must add Amazon Web Services (AWS) to the list of hosted SaaS applications from the gallery.
To add Amazon Web Services (AWS) from the gallery, follow these steps:
- In the left navigation panel of the Azure portal, click the “Azure Active Directory” icon.

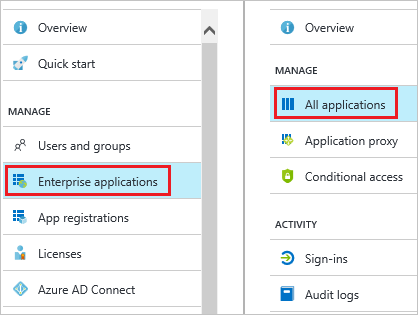
- Navigate to “Enterprise Applications.” Then go to “All applications.”
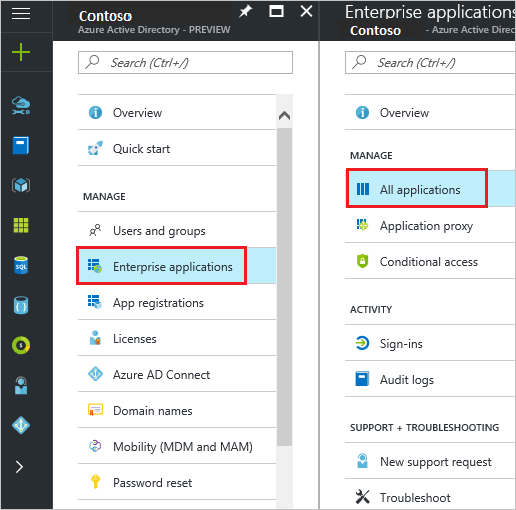
- Click the “Add” button at the top of the dialog.

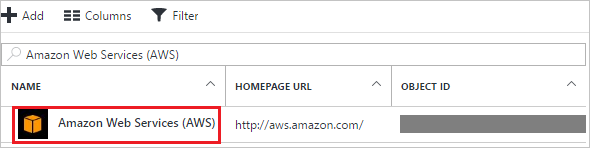
- In the search box, type Amazon Web Services (AWS).

- In the results pane, select “Amazon Web Services (AWS)” and click “Add” to add the application.

Configure and Test Azure AD Single Sign-On
In this section, we will configure and test Azure AD Single Sign-On for Amazon Web Services (AWS) based on a test user named “Britta Simon.”
To run Single Sign-On, Azure AD needs to know which Amazon Web Services (AWS) user corresponds to the Azure AD user. In other words, a link relationship must be established between the Azure AD user and the corresponding user in Amazon Web Services (AWS).
This link can be established by assigning the “username” value in Azure AD as the value of the “username” in Amazon Web Services (AWS).
To configure and test Azure AD Single Sign-On for Amazon Web Services (AWS), you need to complete the following building blocks:
- Configure Azure AD Single Sign-On – Enable users to use this feature.
- Create an Azure AD test user – Test Azure AD Single Sign-On with Britta Simon.
- Create an Amazon Web Services test user – Create the corresponding user for Britta Simon in Amazon Web Services (AWS) and link it to her Azure AD representation.
- Assign the Azure AD test user – Allow Britta Simon to use Azure AD Single Sign-On.
- Test Single Sign-On – Verify that the configuration works correctly.
Configure Azure AD Single Sign-On
In this section, we will enable Azure AD Single Sign-On in the Azure portal and configure Single Sign-On in the Amazon Web Services (AWS) application.
To configure Azure AD Single Sign-On for Amazon Web Services (AWS), follow these steps:
- In the Azure portal, on the Amazon Web Services (AWS) application integration page, click “Single sign-on”.
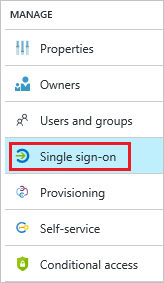
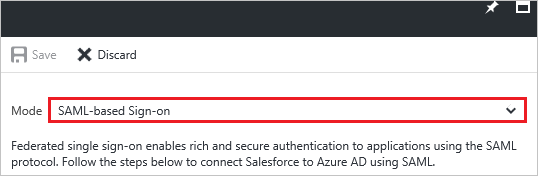
- In the “Single sign-on” dialog, select “SAML-based login” as the “Mode” to enable Single Sign-On.
- In the “Amazon Web Services (AWS) Domain and URL” section, no action is required because the app is pre-integrated with Azure.

- In the “SAML Signing Certificate” section, click “Metadata XML” and save the XML file to your computer.

- The Amazon Web Services (AWS) Software application requires SAML assertions in a specific format. Configure the following claims for this application. You can manage the values of these attributes in the “User Attributes” section of the application integration page. The following screenshot shows an example.
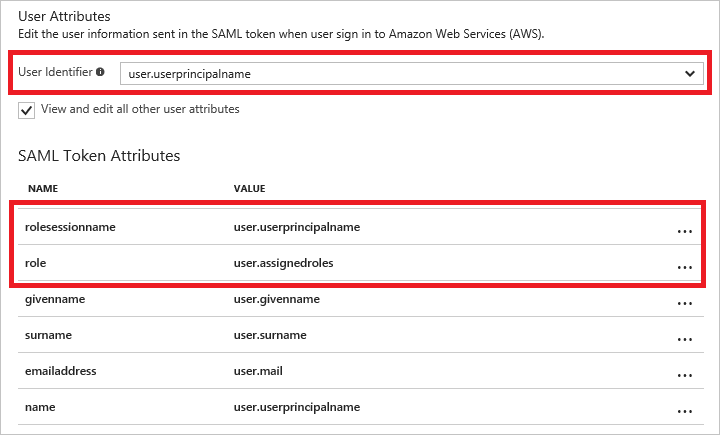
- In the “User Attributes” section of the “Single sign-on” dialog, configure the SAML token attributes as shown in the image above, and perform the following steps:
Attribute Name Attribute Value Namespace RoleSessionName user.userprincipalname https://aws.amazon.com/SAML/Attributes Role user.assignedroles https://aws.amazon.com/SAML/Attributes Tip
You need to configure user provisioning in Azure AD to retrieve all roles from the AWS console. See the provisioning steps below.
a. Click “Add attribute” to open the “Add attribute” dialog.

b.Keep the “Database Type” setting as “Shared”. In the “Name” text box, type the attribute name displayed for this row.
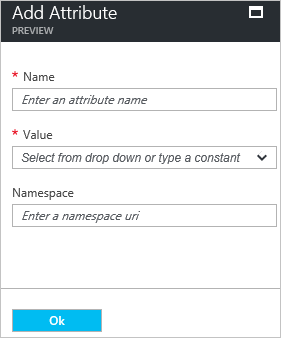
c. In the “Value” list, select the attribute value displayed for this row. Add the Namespace value as specified above.
d. Click “OK”.
- Click the “Save” button to save settings in Azure.

- In another browser window, log in to the Amazon Web Services (AWS) corporate site as an administrator.
- Click “Console Home”.

- From the Security, Identity, & Compliance services, click “IAM”.
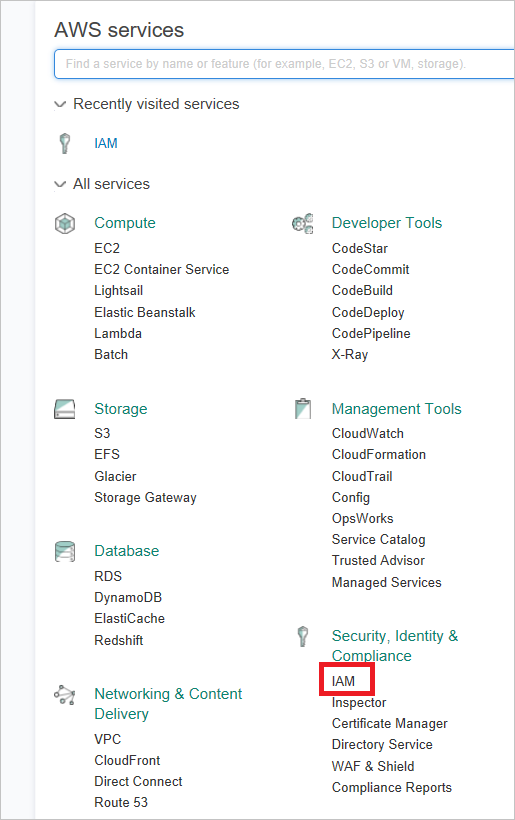
- Click “Identity Providers” and then click “Create Provider”.
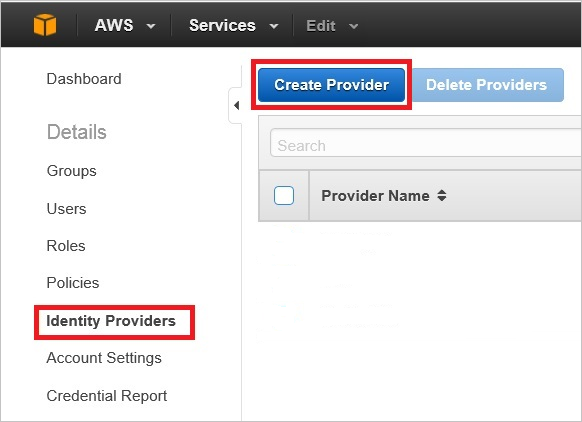
- On the “Configure Provider” dialog page, perform the following steps:
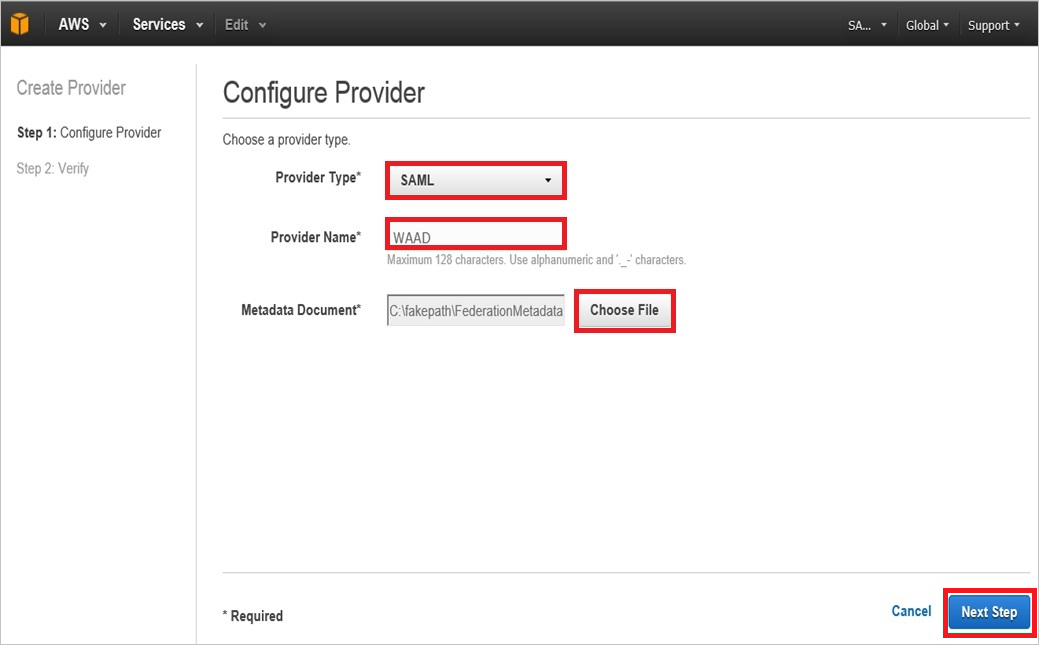
a. For “Provider Type,” select “SAML”.
b. In the “Provider Name” text box, type the provider name (e.g., WAAD).
c. To upload the downloaded metadata file, click “Choose File”.
d. Click “Next”.
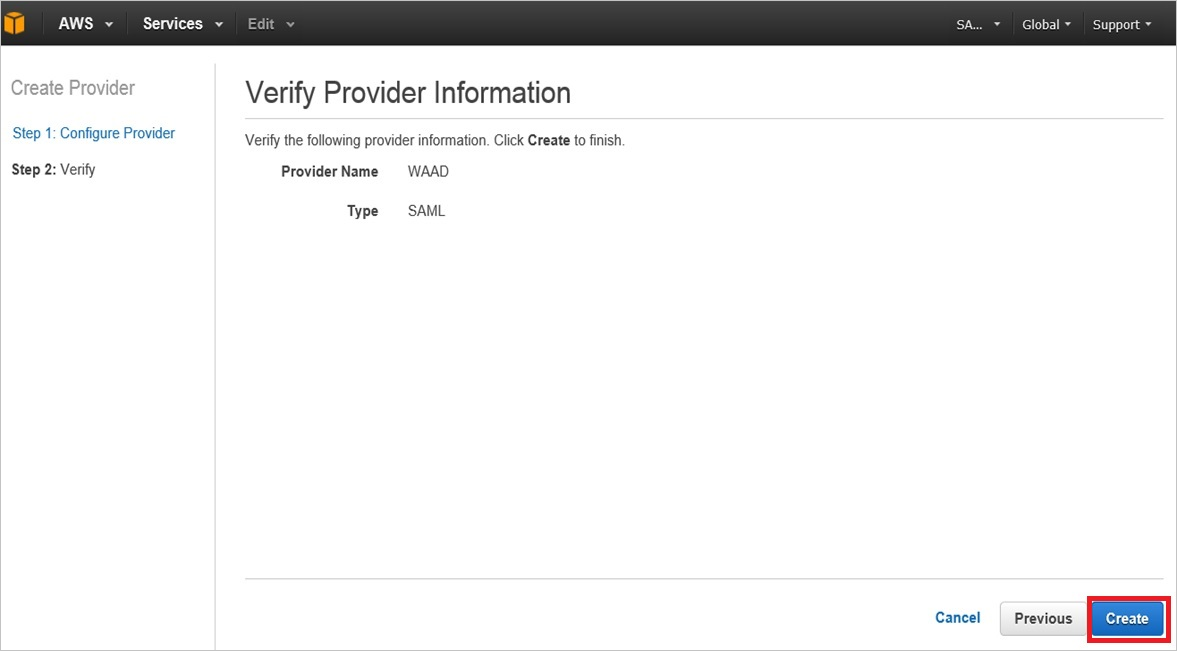
- On the “Verify Provider Information” dialog page, click “Create”.
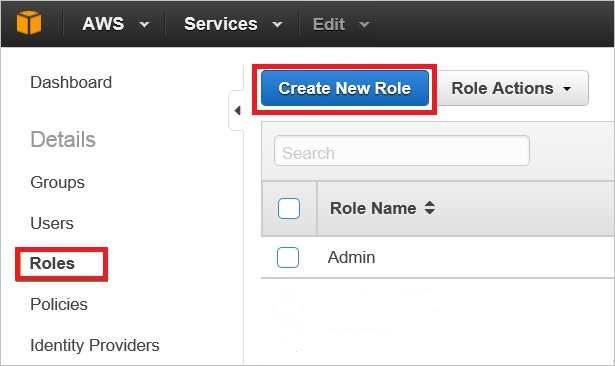
- Click “Roles” and then click “Create New Role”.
- In the “Set Role Name” dialog, perform the following steps:
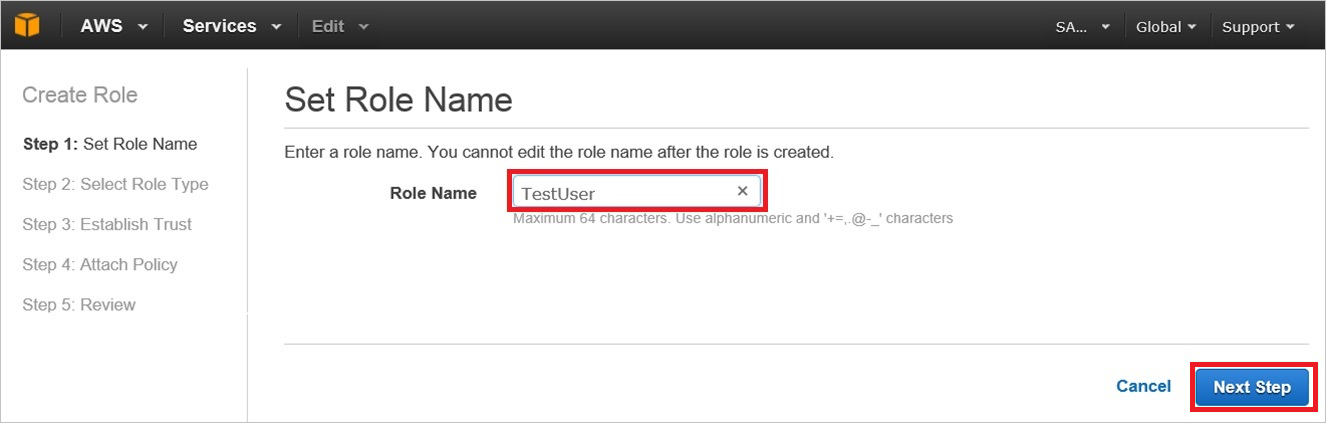
a. In the “Role Name” text box, type the role name (e.g., TestUser).
b. Click “Next”.
- In the “Select Role Type” dialog, perform the following steps:
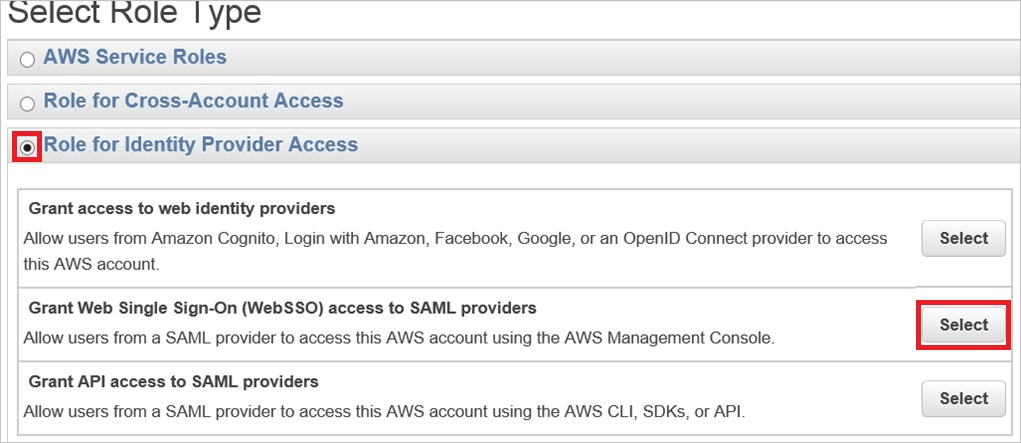
a. Select “Access to Identity Provider Roles”.
b. In the Grant Web Single Sign-On (WebSSO) Access to SAML Provider section, click “Select”.
- In the “Establish Trust” dialog, perform the following steps:
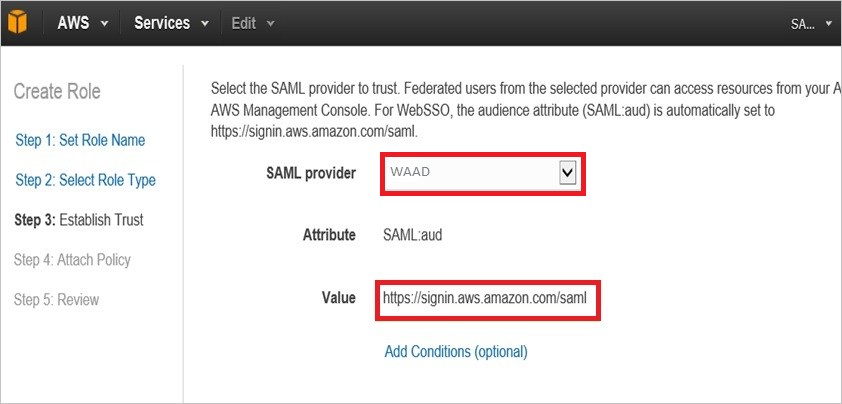
a. For the SAML provider, select the SAML provider created earlier (e.g., WAAD)
b. Click “Next”.
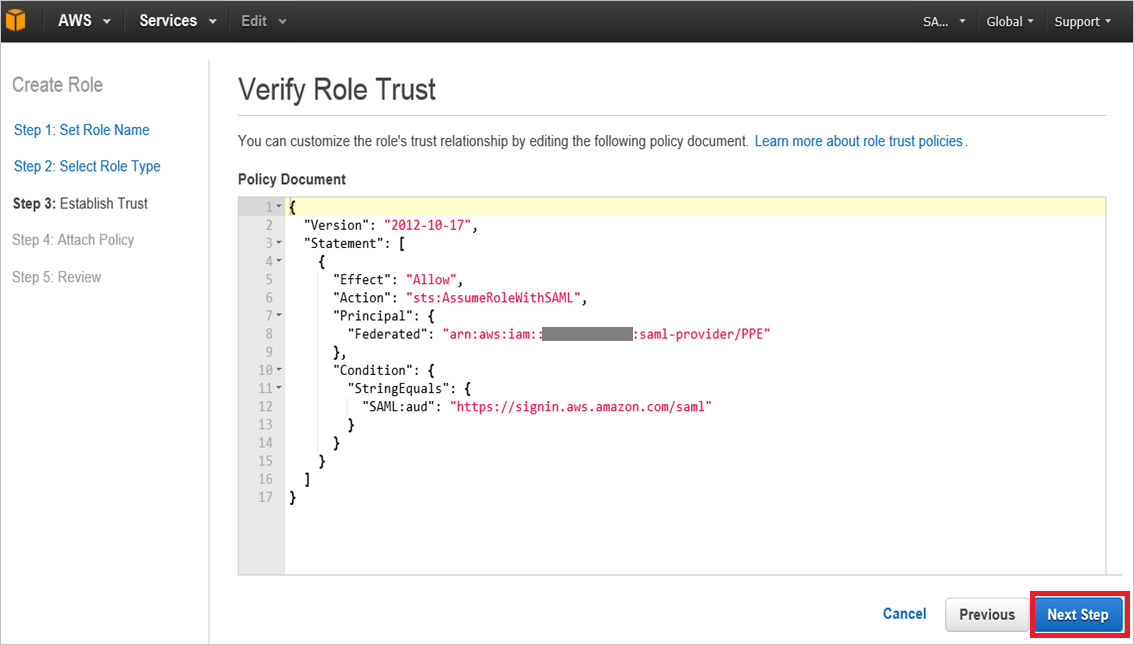
- In the “Verify Role Trust” dialog, click “Next”.
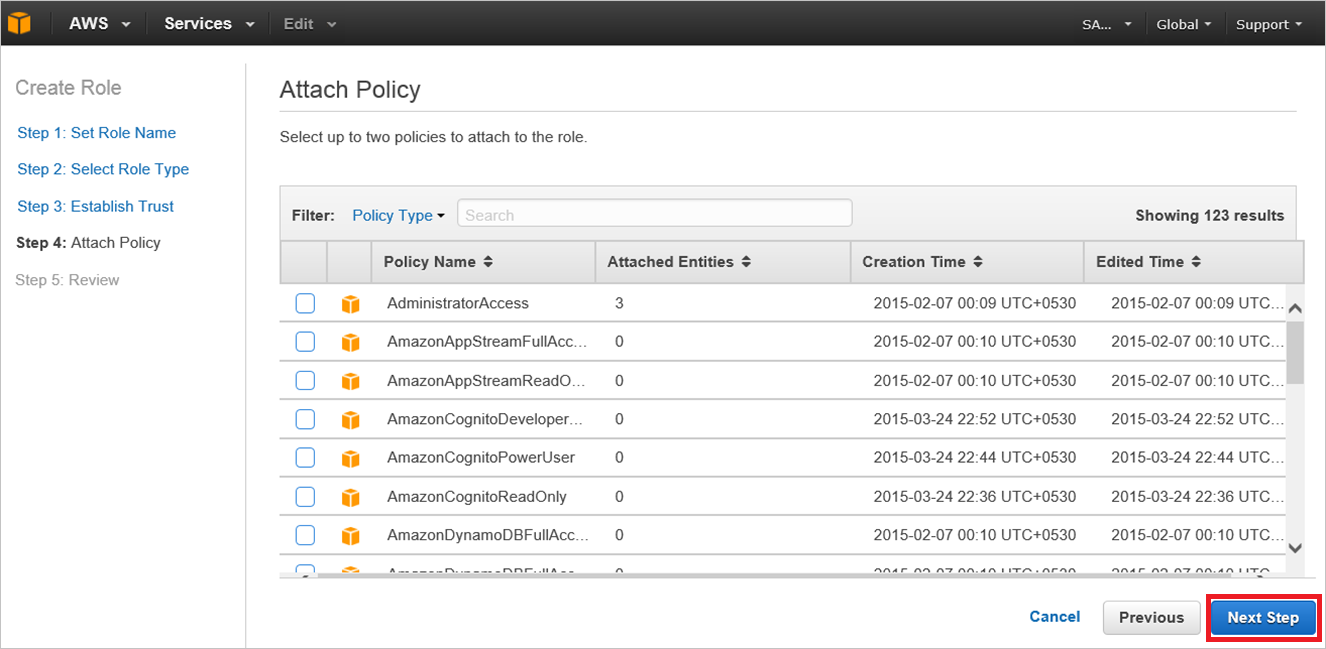
- In the “Attach Policies” dialog, click “Next”.
- In the “Review” dialog, perform the following steps:
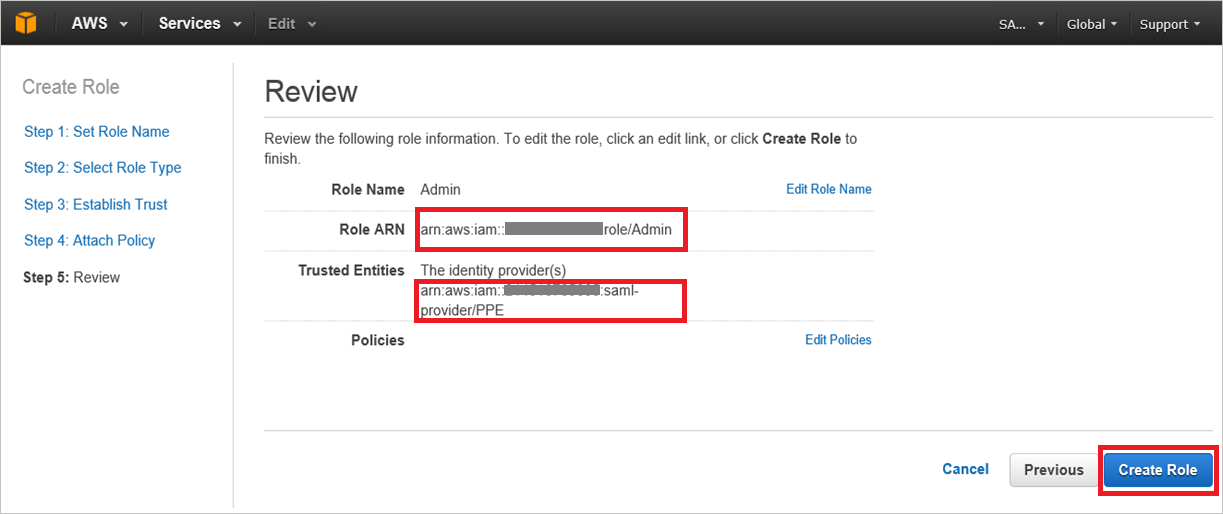
a. Click “Create Role”.
b. Create the required number of roles and map them to the identity provider.
- Now, configure user provisioning to retrieve all roles from AWS
a. Log in to the AWS console using the root account
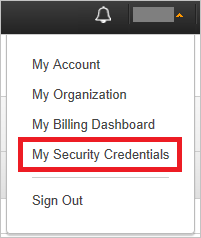
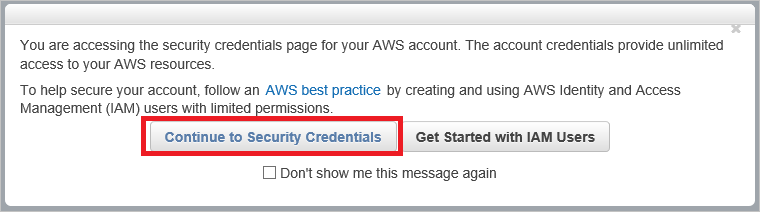
b. In the upper right corner, click your name and click the “My Security Credentials” option. This opens a screen displaying a warning message. Click the “Security Credentials” button to proceed past this screen.
c. In the “Access Keys” section, click the “Create New Access Key” button. This generates an Access Key ID and Token value.

d. Copy these values and download them to avoid losing them.
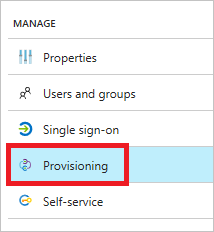
e. In the Azure portal, on the Amazon Web Services (AWS) application integration page, click “Provisioning”.
f. Set the provisioning mode to “Automatic”

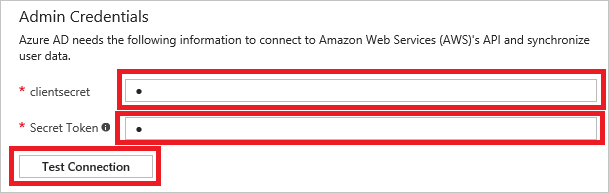
g. Now, paste the corresponding values copied from the AWS console into “clientsecret” and “Key Tag”.
h. You can click the “Test Connection” button to test the connection. Upon success, you can start the provisioning connector.
i. Now, set the provisioning status to “On”. This will start retrieving roles from the application.
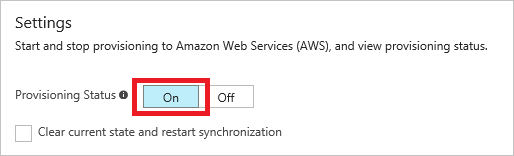
Note
The Azure AD provisioning service runs periodically to sync roles from AWS. You should see that all identity providers have attached AWS roles in Azure AD, and these roles can be used when assigning the application to users or groups.
Create an Azure AD Test User
The purpose of this section is to create a test user named Britta Simon in the Azure portal.

To create a test user in Azure AD, follow these steps:
- In the left navigation pane of the Azure portal, click the “Azure Active Directory” icon.

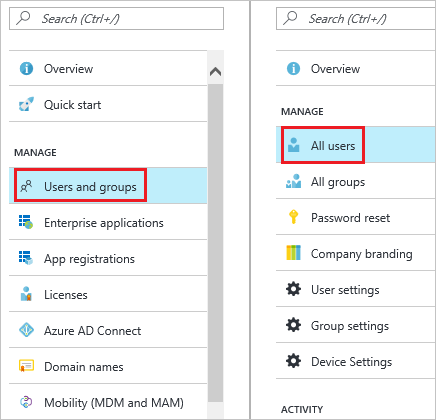
- Go to “Users and groups” and click “All users” to display the user list.
- Click “Add” at the top of the dialog to open the “Users” dialog.

- On the “Users” dialog page, perform the following steps:
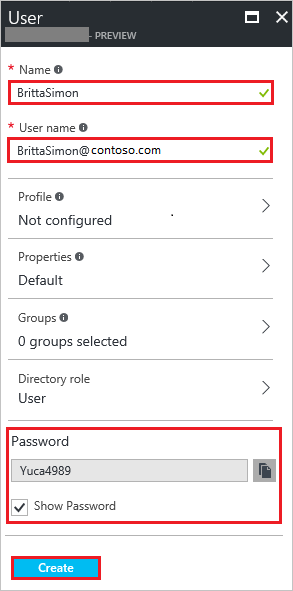
a. In the “Name” text box, type BrittaSimon.
b.Keep the “Database Type” setting as “Shared”. In the “Username” text box, type BrittaSimon’s “Email Address”.
c. Select “Show Password” and note the “Password” value.
d.Click “Next”. Click “Create”.
Create an Amazon Web Services Test User
For Azure AD users to be able to log in to Amazon Web Services (AWS), they must be provisioned into Amazon Web Services (AWS). For Amazon Web Services (AWS), provisioning tasks must be completed manually.
To provision a user account, follow these steps:
- Log in to the Amazon Web Services (AWS) corporate site as an administrator.
- Click the “Console Home” icon.

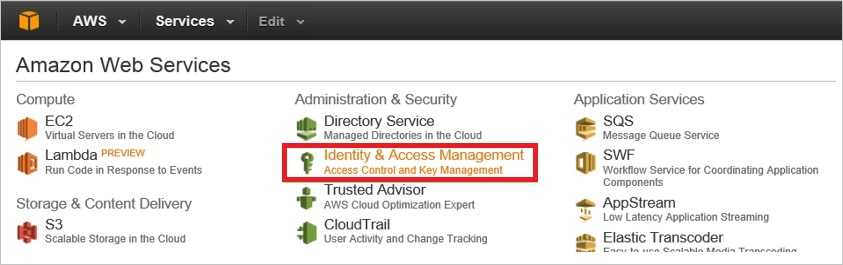
- Click “Identity and Access Management”.
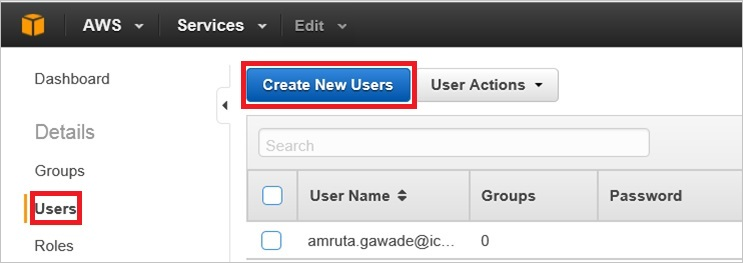
- In the dashboard, click “Users” and then click “Create New User”.
- On the “Create User” dialog page, perform the following steps:
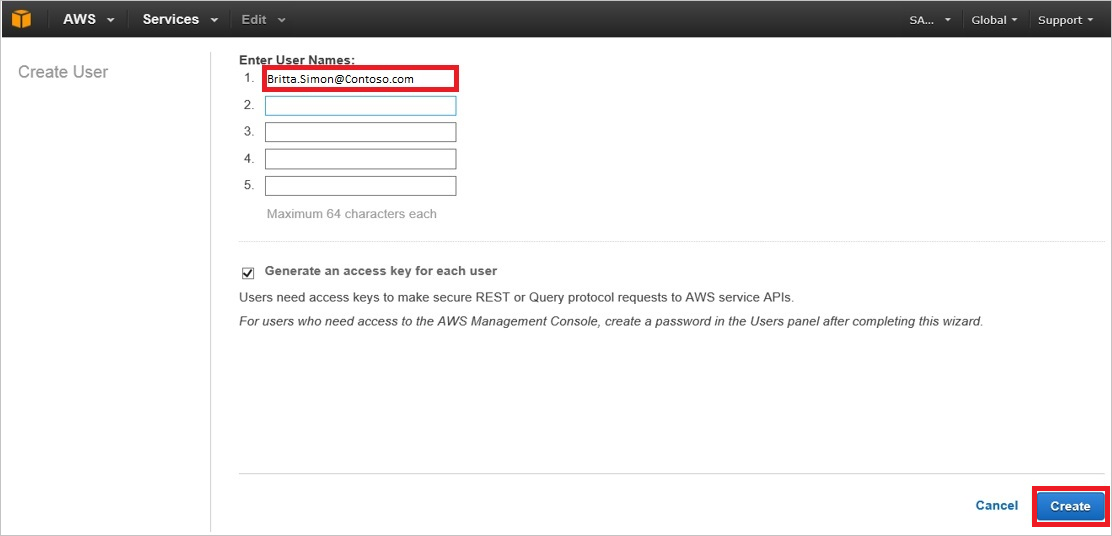
a. In the “Enter User Name” text box, type Britta Simon’s username (userprincipalname) in Azure AD.
b. Click “Create”.
Assign the Azure AD Test User
In this section, we will enable Britta Simon to use Azure Single Sign-On by granting her access to Amazon Web Services (AWS).

To assign Britta Simon to Amazon Web Services (AWS), follow these steps:
- Open the application view in the Azure portal, navigate to the directory view, then go to “Enterprise Applications” and click “All applications”.
- In the application list, select “Amazon Web Services (AWS)”.
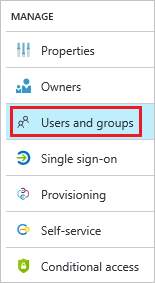
- In the left menu, click “Users and groups”.
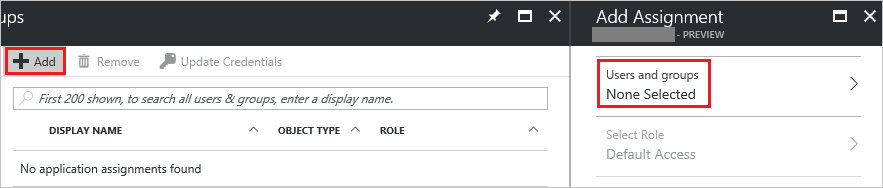
- Click the “Add” button. Then select “Users and groups” in the “Add assignment” dialog.
- In the “Users” list of the “Users and groups” dialog, select “Britta Simon”.
- In the “Users and groups” dialog, click the “Select” button.
- On the “Select Role” tab, select the appropriate role for the user. All these roles are displayed with the role name and identity provider name. Therefore, roles from AWS can be easily identified.
- In the “Add assignment” dialog, click the “Assign” button.
Test Single Sign-On
In this section, we will test the Azure AD Single Sign-On configuration using the Access Panel.
When you click the “Amazon Web Services (AWS)” tile in the Access Panel, you should automatically sign in to the Amazon Web Services (AWS) application.