1. Introduction to DMS
To make it easier for users to migrate databases to the cloud, AWS has launched the AWS Database Migration Service (DMS) in overseas regions. If your database is located overseas, DMS allows you to migrate data to the AWS Cloud without downtime. DMS is a powerful service that supports homogeneous database migrations (e.g., Oracle to Oracle) as well as heterogeneous database migrations (e.g., Oracle to MySQL). During the migration process, the source database does not need to be taken offline, and changes to the data are continuously replicated to the target database. Therefore, after the migration is complete, you only need to switch the database during a brief maintenance window, ensuring the integrity of business data.
In the China Beijing (BJS) region, the DMS service has not yet been launched; however, the Database Migration Tool (DMT) is provided. You can use the DMT tool to complete database migrations.
2. Completing Migration Using DMS
To use the DMS service, ensure that either the source or target database is hosted on the AWS Cloud. The steps to use the DMS service are as follows:
Step 1: Create Migration
Log in to the AWS Console in global regions, select DMS, and click “Create migration.” This takes you to the “Welcome” screen. From this screen, you can see that at least one source database, one target database, and one replication instance are required to perform data migration via DMS. Of course, DMS also supports migrating from multiple source databases to a single target database, as well as from a single source database to multiple target databases. During migration, data is copied from the source to the target via a task running on the replication instance. Click “Next” to create the replication instance.

Step 2: Create “Replication Instance”
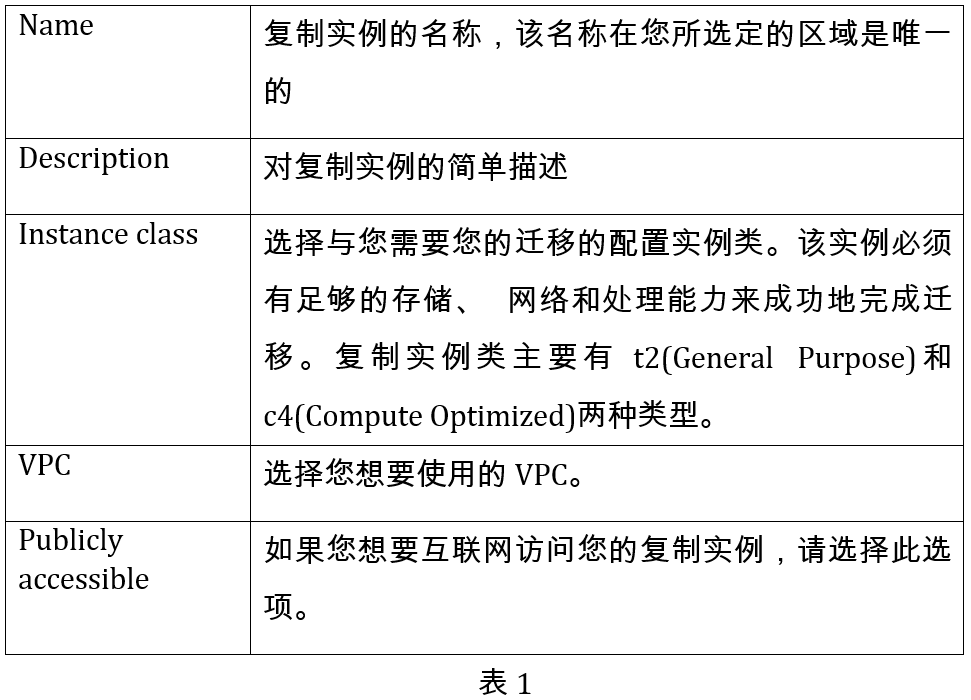
The first task in the database migration process is to create a replication instance with sufficient storage space and processing power. This instance executes the assigned tasks and migrates data from your source database to the target database. The size required for this instance depends on the amount of data you want to migrate and the volume of tasks you need to execute. See Table 1 below for specific configuration parameters.

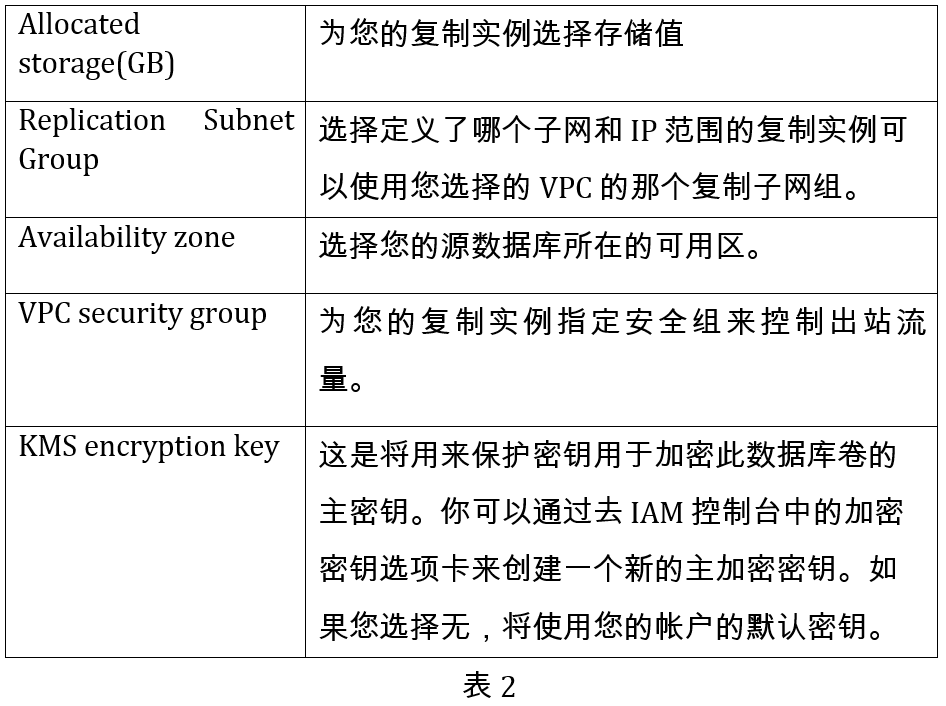
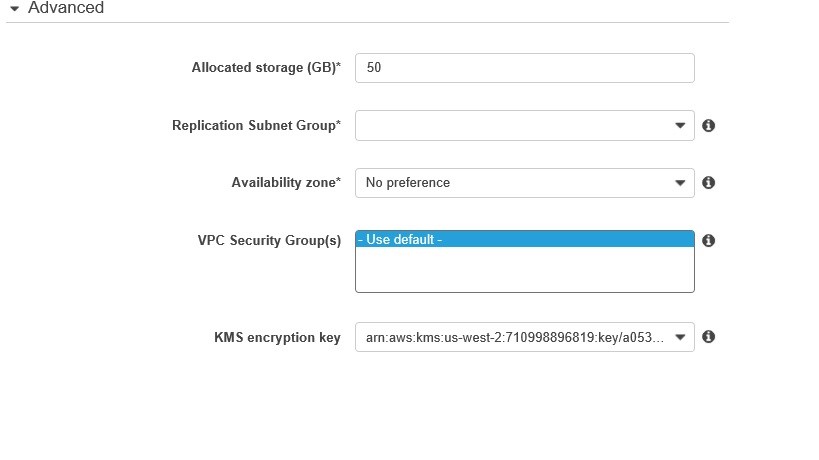
If you need to set values for network and encryption settings, select the Advanced tab. See Table 2 for specific parameters.
Step 3: Create Database Connections
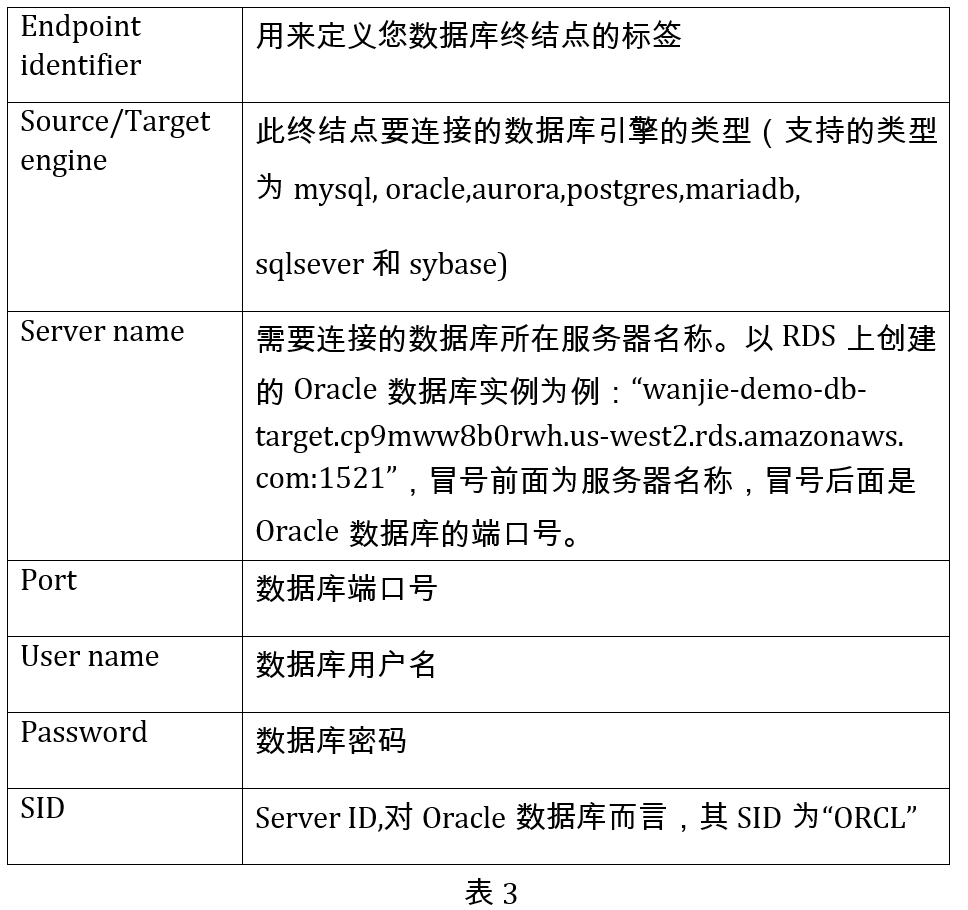
When creating the replication instance, you can specify the source and target databases. The source and target databases can be on AWS EC2, AWS Relational Database Service (RDS) DB instances, or on-premises databases. When setting up the source and target databases, refer to Table 3 for specific parameters. You can also use the Advanced tab to set the connection string and encryption key values.
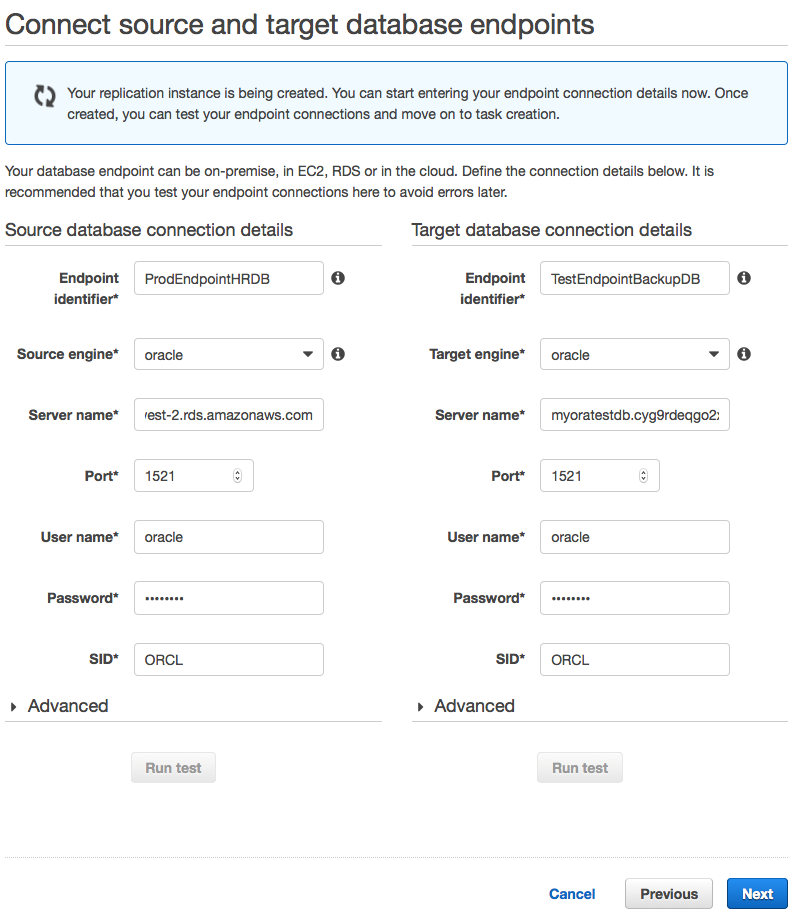
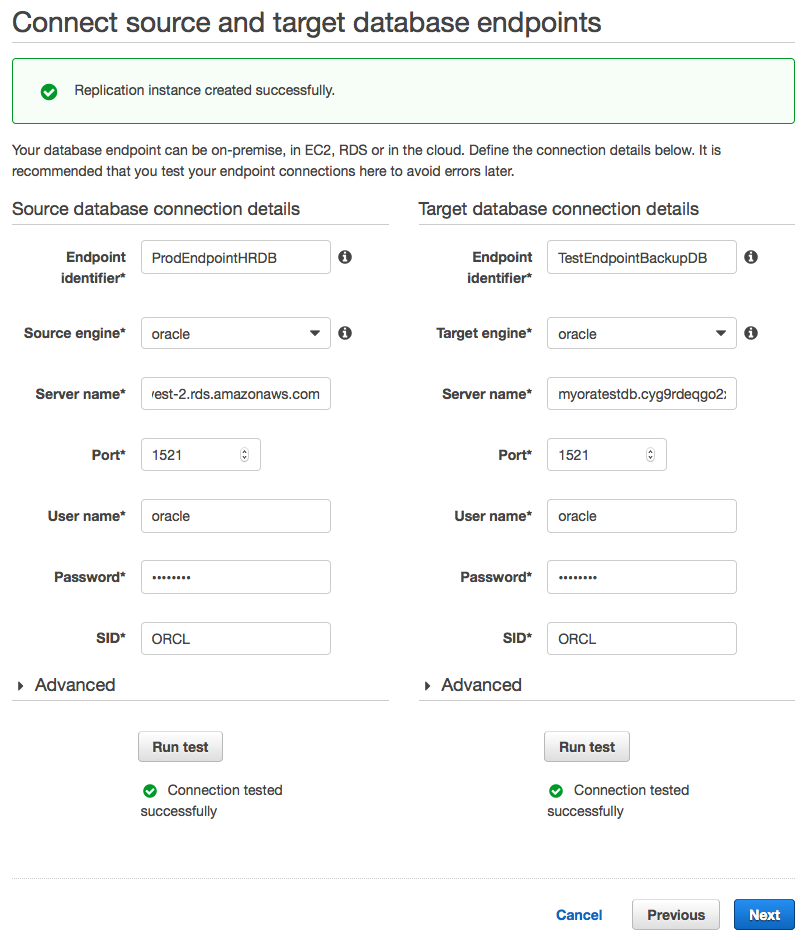
Wait until the status at the top of the diagram changes to “Replication instance created successfully” and the “Run test” button becomes active. Then, run the test to ensure the result is “Connection tested Successfully.” Since the database needs to be connected and tested from the AWS server side, you must configure the security group correctly. The configured security group must ensure that the replication instance can access both the source and target databases. If necessary, temporarily set the access for port 1521 to 0.0.0.0/0. After successful testing, click the “Next” button.
Step 4: Create “Task”
Once the connection between the source and target databases is established, you need to create a task to specify which tables need to be migrated, map the data using the target schema, and create new tables in the target database. As part of creating the task, you can choose the migration type: migrate existing data, migrate existing data and replicate ongoing changes, or replicate only changed data.
If you select the “Migrate existing data and replicate data changes” option, you need to enable the supplemental logging switch in Task Settings. In Table Mapping, under Schema to Migrate, select “Oracle,” and then click “Create Task.”
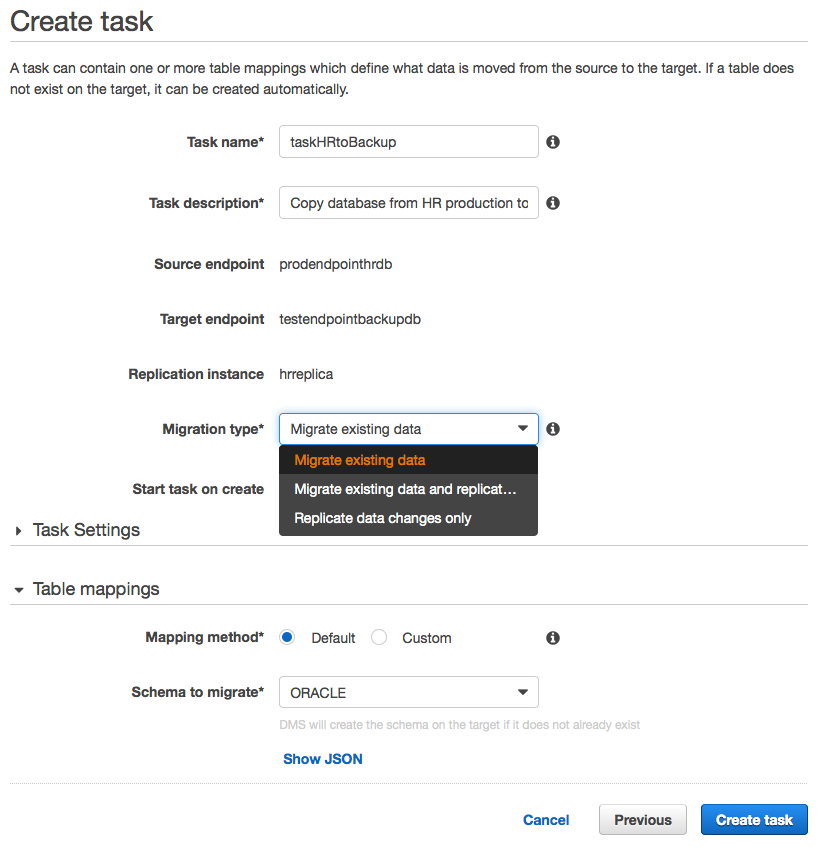
When the status of the task you created changes from “creating” to “ready,” your task has been created. Click on the “task” and then click “Start/Resume” at the top to begin your data migration task!

After the database migration is complete, the target database will remain synchronized with the source database within the time period you selected, allowing you to switch databases at your convenience.
3. Summary
From the process described above, we can see that with simple configuration, DMS can help us complete database migration tasks. Additionally, the DMS service itself is free; you are only charged for the resources used during the migration process.