There are two methods to create an EBS volume and connect it to an EC2 instance. This article explains how to attach an Elastic Block Store (EBS) volume to an existing EC2 instance. For instructions on adding an EBS volume when creating a new EC2 instance, please refer to our blog post “Creating an Amazon EBS Volume (Creating a New Instance).” Overview diagram: 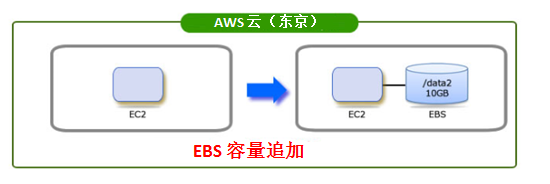
1. Create an EBS Volume
To link an EBS volume to an existing EC2 instance, follow the steps below.
1-1. First, open “Volumes” from the left-hand menu in the EC2 Management Console, then click “Create Volume” and enter the required details.
- Size: Select the hard drive size. (The image below shows 10 GB.)
- Availability Zone: Specify the region where the volume will be created.
- Snapshot: A snapshot that can be referenced when creating the volume. This can also be used later if you need to change the EBS volume capacity. For now, select “No Snapshot.”
1-2. The volume creation is now complete.
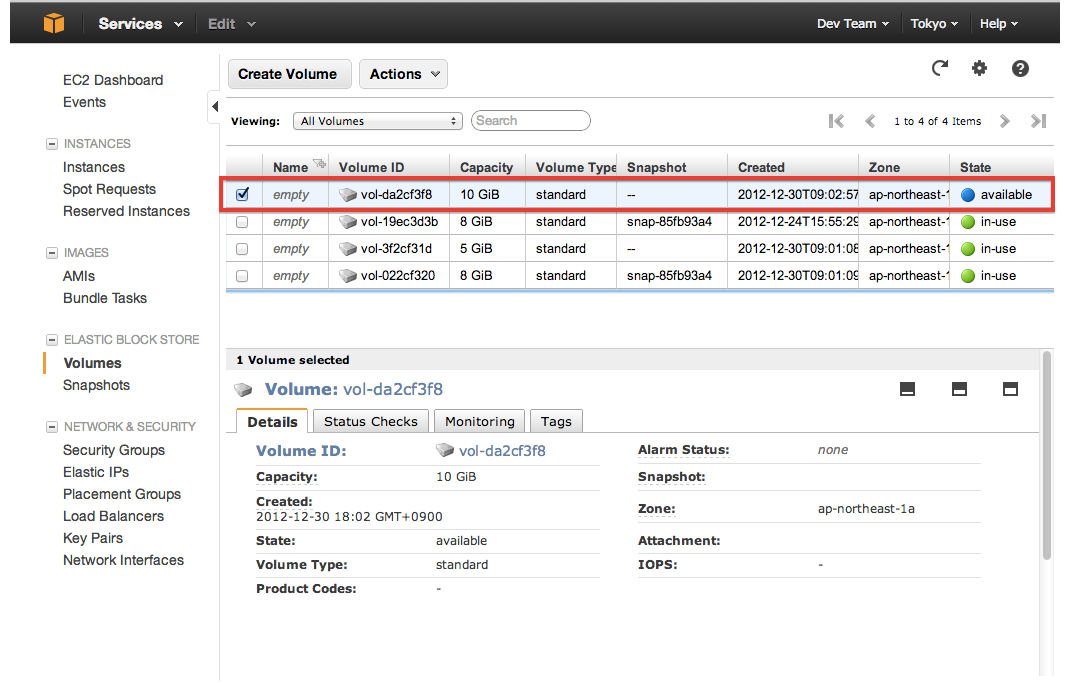
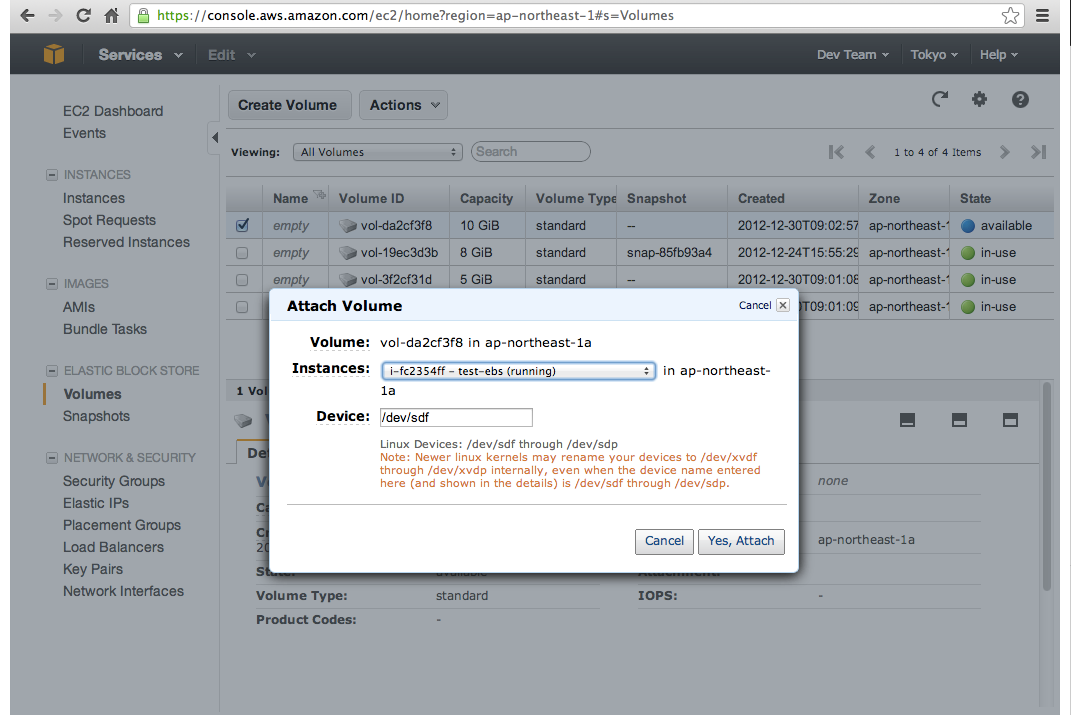
1-3. However, this volume is not yet attached to an EC2 instance. Click “Actions,” select “Attach Volume,” and enter the relevant details.
- Instances: Select the target instance to attach.
- Device: Specify the device name. Here, we specify /dev/sdf.
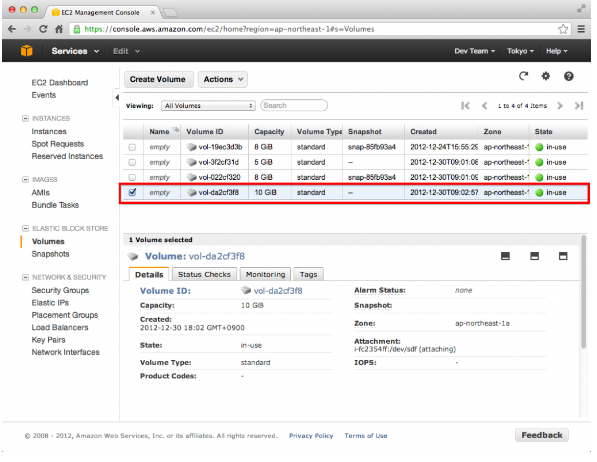
1-4. The volume’s “State” changes to “in-use,” indicating it is connected to the instance.
2. Mount the EBS Volume
Next, mount the EBS volume from within the EC2 instance. (In general, this follows the same procedure as mounting a standard hard drive.)
2-1. First, log in to the instance and verify that the created volume (/dev/sdf) is not currently mounted using the following command.
# df -h
Filesystem Size Used Avail Use% Mounted on
/dev/xvda1 7.9G 836M 7.0G 11% /
tmpfs 298M 0 298M 0% /dev/shm
2-2. Follow the steps below to format the volume and then mount it. In this example, the volume is mounted at /data2.
# mkfs -t ext3 /dev/sdf
# mkdir /data2
# mount /dev/sdf /data2
# exit
2-3. Execute the following command to confirm that the 10 GB volume is mounted under /data2.
# df -h
Filesystem Size Used Avail Use% Mounted on
/dev/xvda1 7.9G 836M 7.0G 11% /
tmpfs 298M 0 298M 0% /dev/shm
/dev/xvdf 9.9G 151M 9.2G 2% /data2
Note: On Linux instances running on AWS, the /dev/sdf device appears as /dev/xvdf.
2-4. Verify that the device is connected internally using the ls command.
# ll /dev/s*
lrwxrwxrwx 1 root root 5 Dec 30 09:01 2012 /dev/sda1 -> xvda1
lrwxrwxrwx 1 root root 4 Dec 30 09:01 2012 /dev/sdf -> xvdf
crw------- 1 root root 10, 231 Dec 30 09:01 2012 /dev/snapshot
lrwxrwxrwx 1 root root 15 Dec 30 09:01 2012 /dev/stderr -> /proc/self/fd/2
lrwxrwxrwx 1 root root 15 Dec 30 09:01 2012 /dev/stdin -> /proc/self/fd/0
lrwxrwxrwx 1 root root 15 Dec 30 09:01 2012 /dev/stdout -> /proc/self/fd/1
As shown above, the mount is complete. Finally, perform a write test on the volume.
# mkdir -p /data2/test/dir/to/file/
# echo "this is test2" > /data2/test/dir/to/file/testdata.txt
# cd /data2/test/dir/to/file/
# cat testdata.txt
this is test2