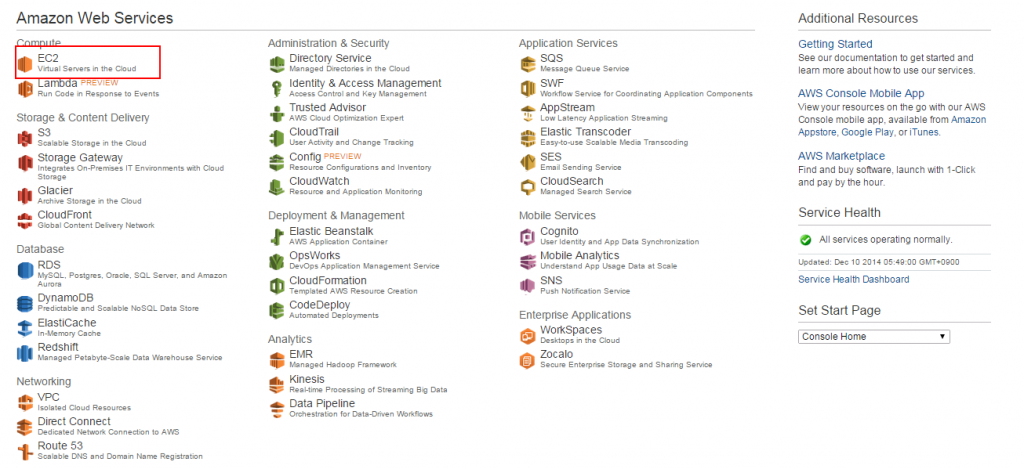
1. Log in to the Amazon Management Console and select EC2.
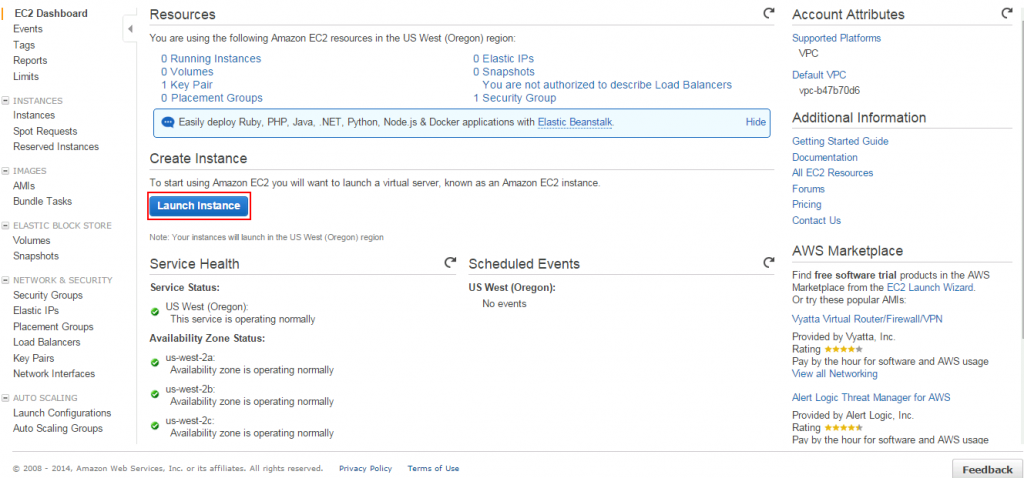
2. Click Launch Instance to start creating an instance.
3. Select the desired instance image; here we choose Red Hat (Free Tier eligible), then click Select.
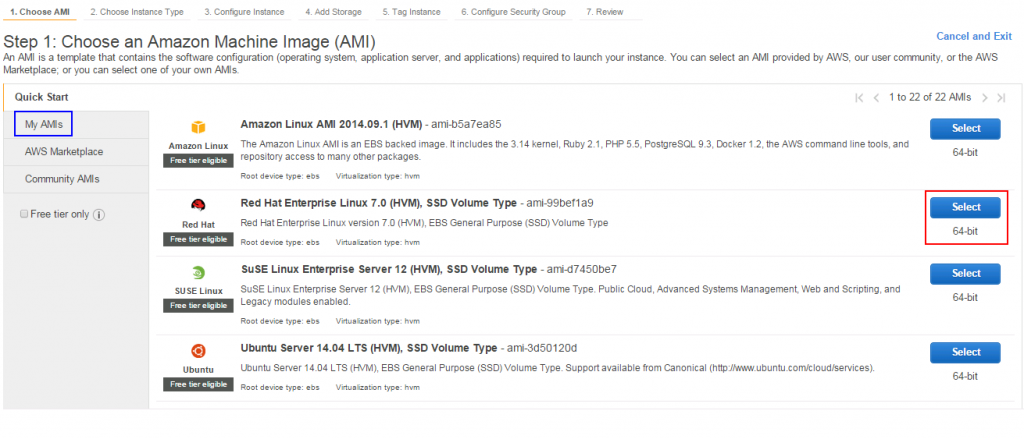
Note: You can also select your previously created My AMIs from the left-hand menu bar. Additionally, you can search for and purchase instance images via the AWS Marketplace.
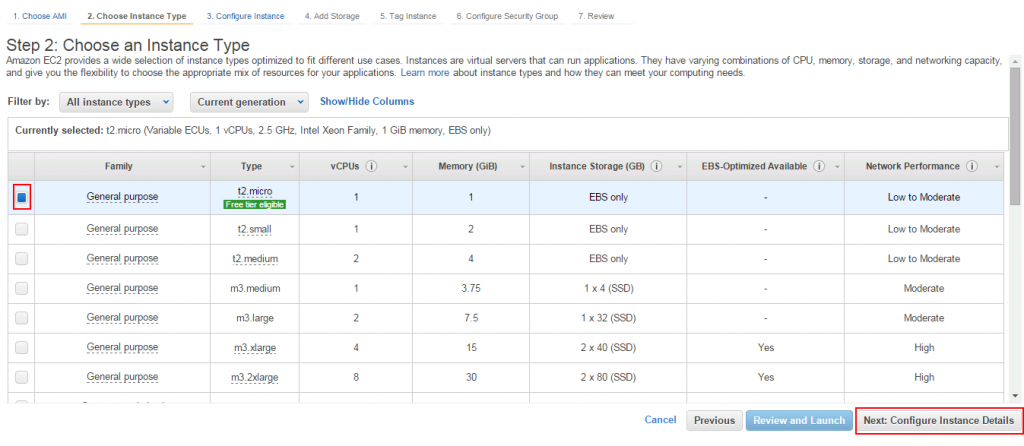
4. Select the desired instance type; here we choose t2.micro, then click Next: Configure Instance Details. You can change the instance type later based on your business needs.
5. Leave this step as default, then click Next: Add Storage.
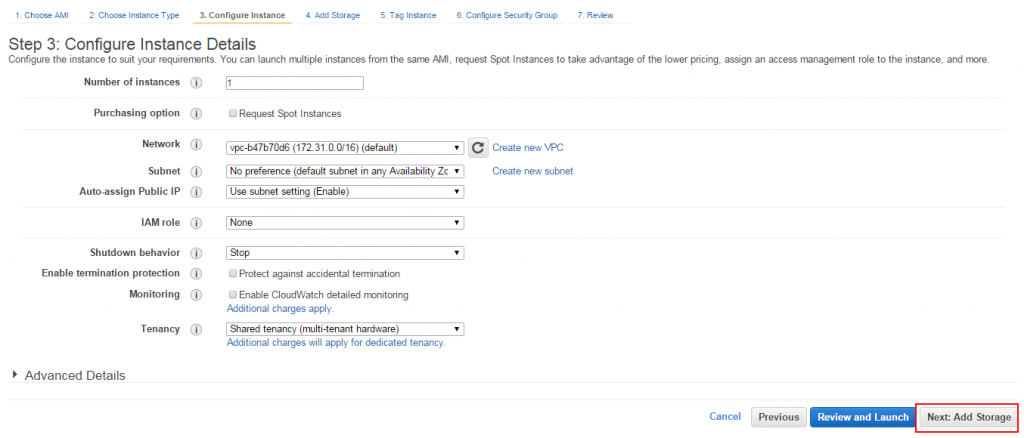
6. This step is set to default by default. You can add storage according to your needs, then click Next: Tag Instance to proceed.
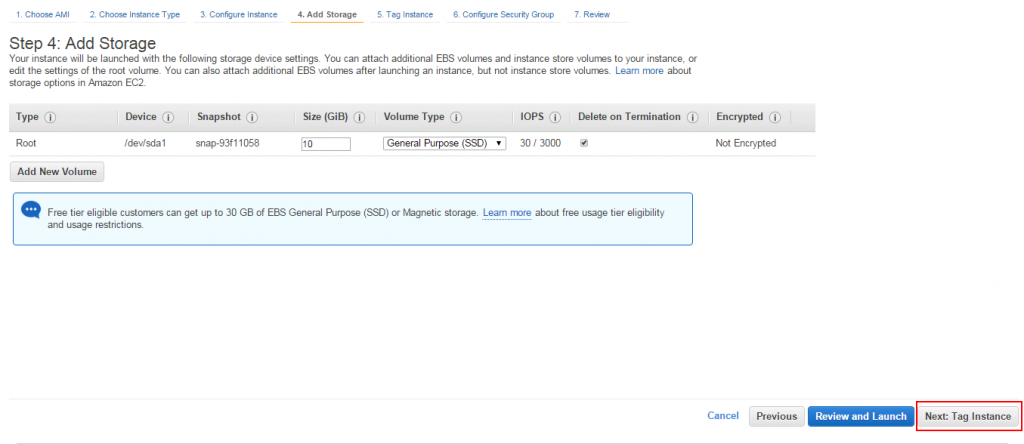
7. You can enter a tag name in the Value field, or leave it blank. Here we use yunwei123test, then click Next: Configure Security Group.
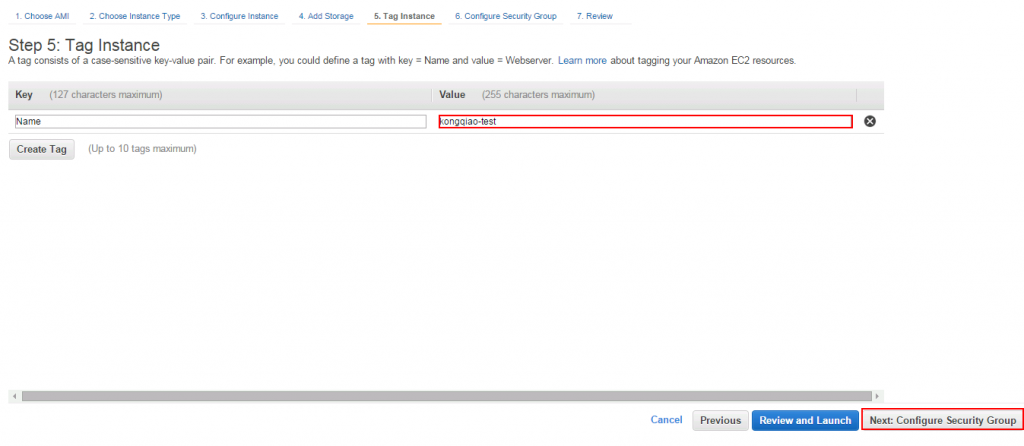
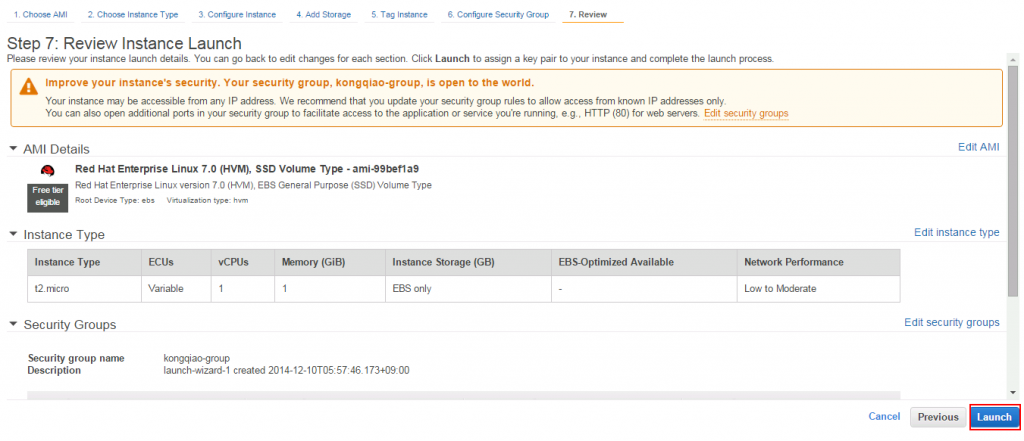
8. Create a security group (users can use the default security group or create a new one; here we use yunwei123-group). Then click Review and Launch.
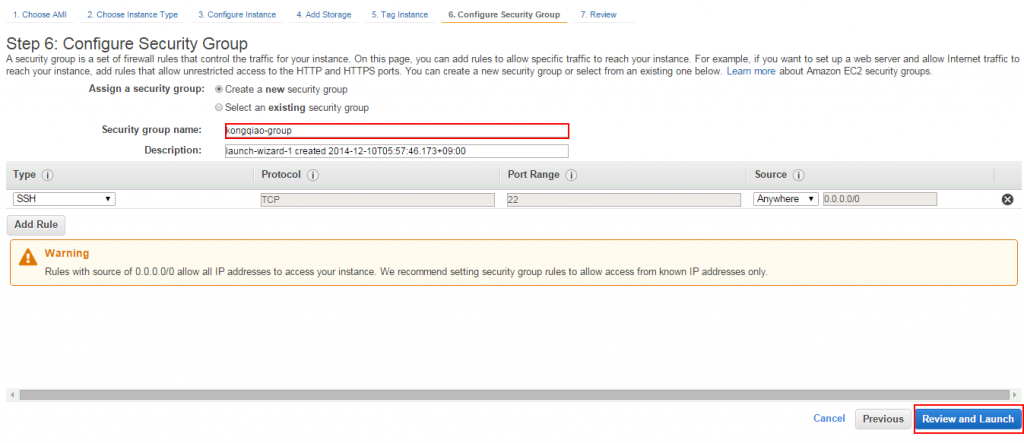
Note: By default, only the SSH port for remote login is open. You can open other relevant ports, such as HTTP (port 80), as needed later.
9. Click Launch to view the instance information.
10. Create a key pair for logging into the EC2 instance. Select Create a new key pair, enter the key pair name (here we use yunwei123test). Click Download Key Pair to download the key. After downloading, click Launch Instances.
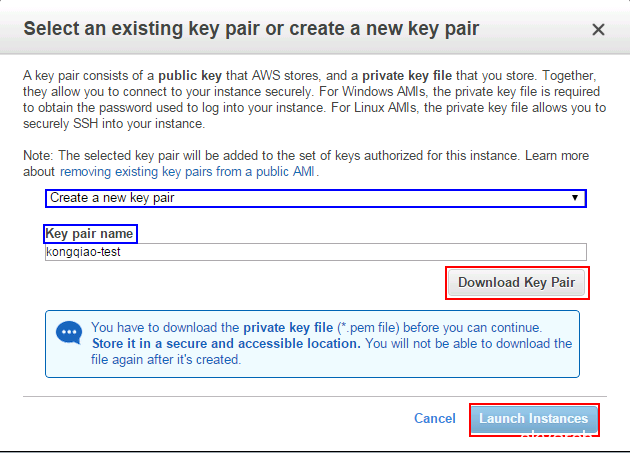
Note: If you do not download the key pair, you will be unable to log in to the EC2 instance after it is created.
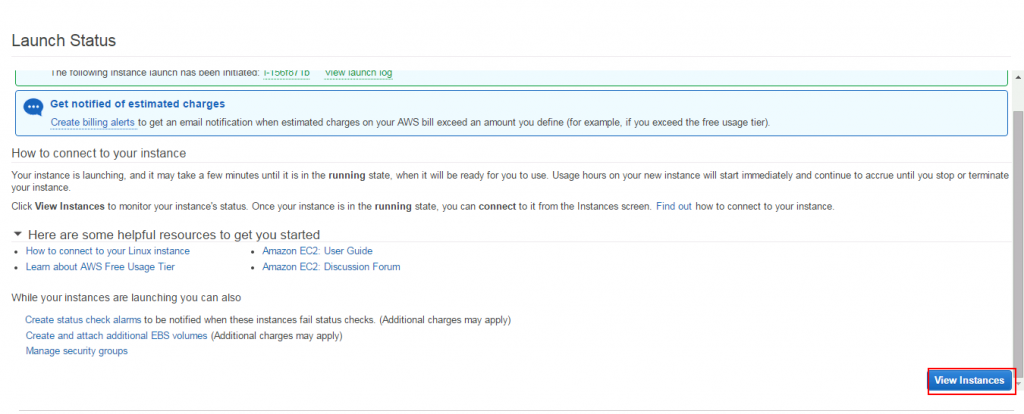
11. As shown below, the instance creation is complete.
12. You can see that the EC2 instance has been successfully created. The lower part of the page displays detailed information about the instance.
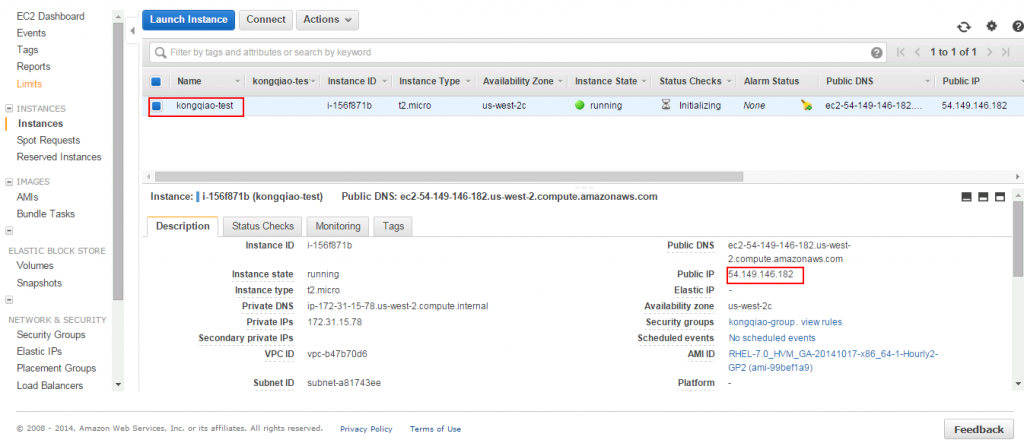
13. Test the login. For the first login, the username is ec2-user, and you must use the downloaded key pair.
Note: Please be aware that this instance does not have a static IP address. The system-assigned IP address will change after the instance is restarted. Therefore, we need to assign a static IP address to this instance. We will not elaborate on this process here. Please stay tuned to the Yunwei 123 Technology Blog for timely updates on AWS learning resources shared with everyone.