Having a dedicated VPS feels like having exclusive access to something premium. Alibaba Cloud servers are not only affordable but also offer flexible configurations (just click and drag) and excellent performance. This site, Yunwei 123 Server Maintenance Studio, is hosted on Alibaba Cloud. You can purchase Alibaba Cloud servers here: Cloud Server (click this link for a 10% discount!). Below, we will guide you through the installation process. It’s very simple; if you don’t understand, we’ll make sure you do, haha~ First, a reminder: to save time, we recommend starting the ICP filing process while configuring your server. The filing process usually takes about half a month.
Alibaba Cloud Elastic Compute Service (ECS) supports various operating systems. If you plan to run Drupal or WordPress, it is best to choose a Linux system. This article is based on the CentOS operating system on Alibaba Cloud. We will set up an Nginx + MySQL + PHP-FPM environment, commonly known as LNMP. Instead of explaining what each component is in detail, we will focus on the process and methods. For specific details, note that this manual was tested on Alibaba Cloud but should also apply to other servers using CentOS.
Step 1: Purchase a Server
Click here to enter: Cloud Server (10% off!). You can adjust the configuration slowly and just keep an eye on the price at the bottom. We recommend choosing a Linux system, such as CentOS 6.5 64-bit hardened or Debian 6.0.6 64-bit (I am currently using this one). Unless you are using ASP, we do not recommend choosing Windows. As for network lines, it doesn’t matter much since they are all BGP multi-line data centers; the difference is just distance. If your users are concentrated in North China, choose Qingdao; if in East China, choose Hangzhou. In reality, there isn’t much difference. As for bandwidth, it depends on your usage type. If traffic is high, you may need to upgrade. For example, an image site with 100 IPs might need 5M bandwidth, while a personal blog might only need 1M. However, this can be upgraded later, so don’t worry too much. Finally, just follow the prompts step by step.
After successful purchase, you will receive an email containing the IP address and password. If you are not using other Alibaba Cloud products, just remember the public IP address.
Create a Server Instance
Creating a server instance is essentially purchasing a cloud server with the desired configuration. Register and log in to the Alibaba Cloud website, select Elastic Compute Service (ECS) under Product Services, and click Buy Now on the page. You can purchase via Subscription (monthly/yearly) or Pay-As-You-Go (pay for what you use), but the latter does not support website filing.
After confirmation, configure the server as needed. It is recommended to start with the lowest configuration initially, as upgrading later is very easy. Select CPU, memory, and bandwidth; different configurations have different prices. You also need to select the Region, i.e., where the cloud server is located. Currently, only Qingdao and Hangzhou are available. Then select the operating system. The test for this article used CentOS 6.3 64-bit. If needed, you can add a data disk. By default, a system disk of 20 GB is included, which is sufficient for our testing.
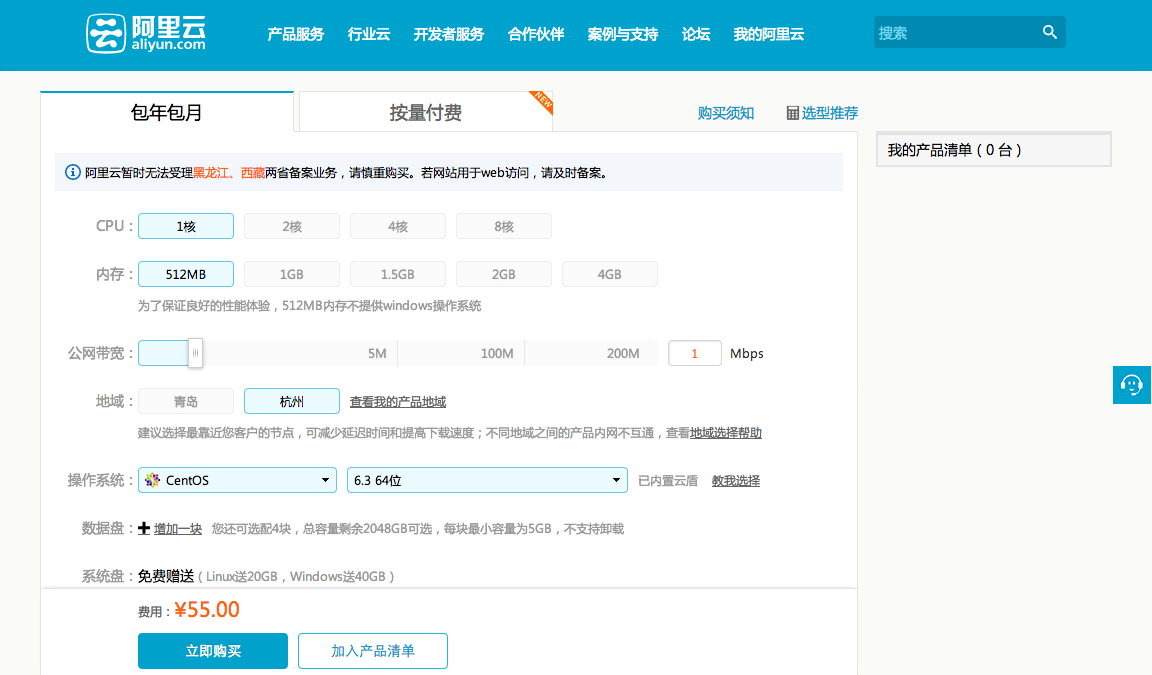
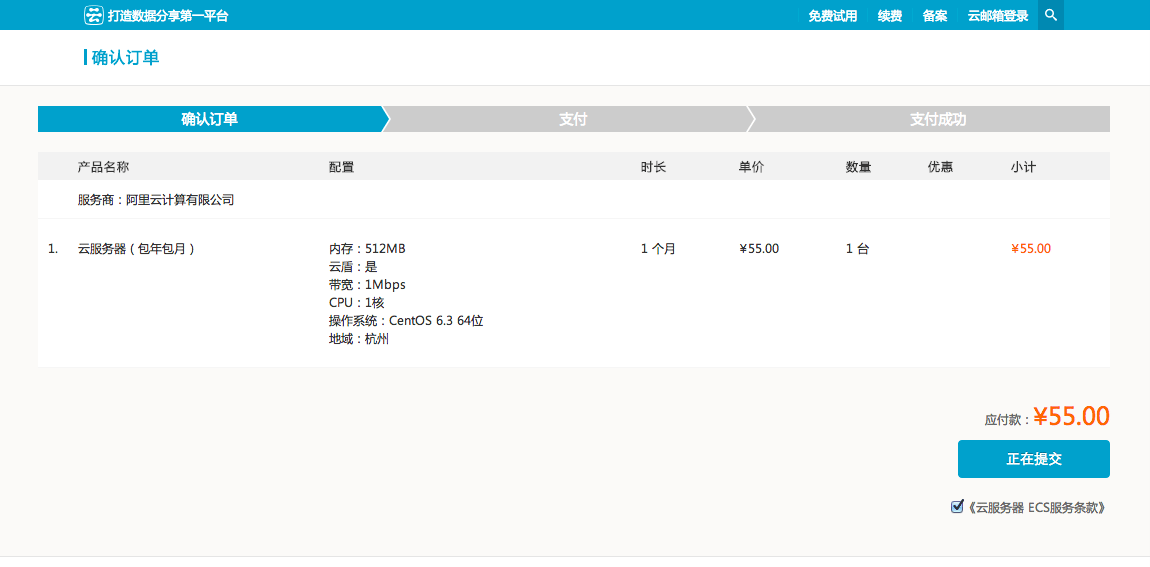
Click Buy Now, preview the selected server, and then Submit Order.
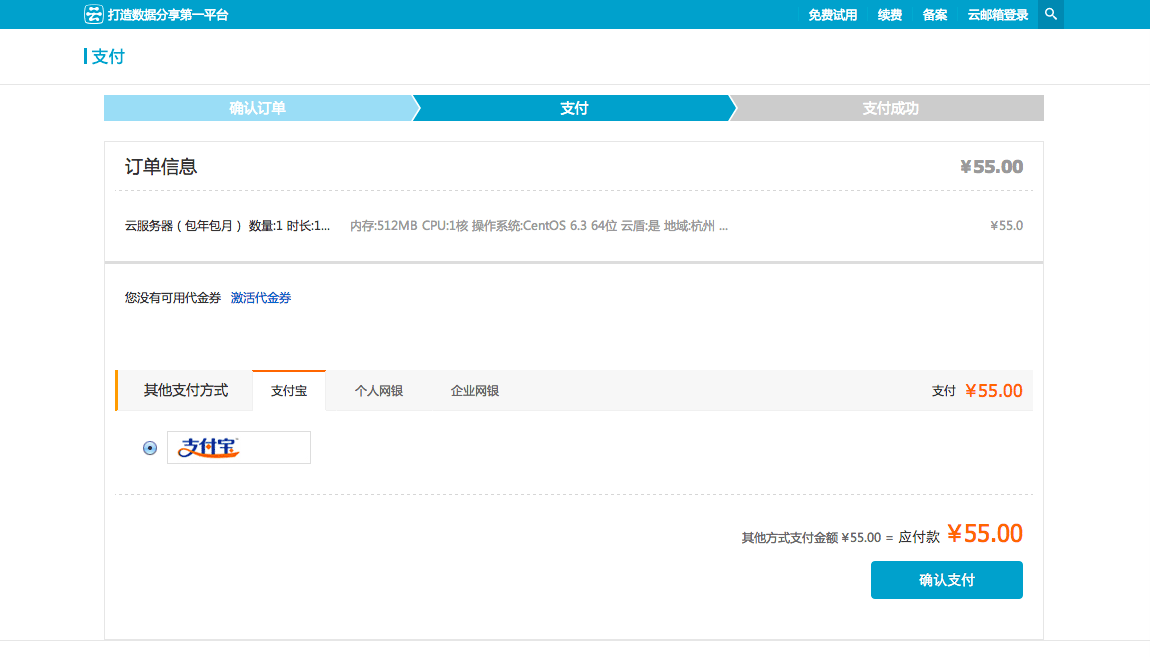
Select a payment method and then click Confirm Payment.
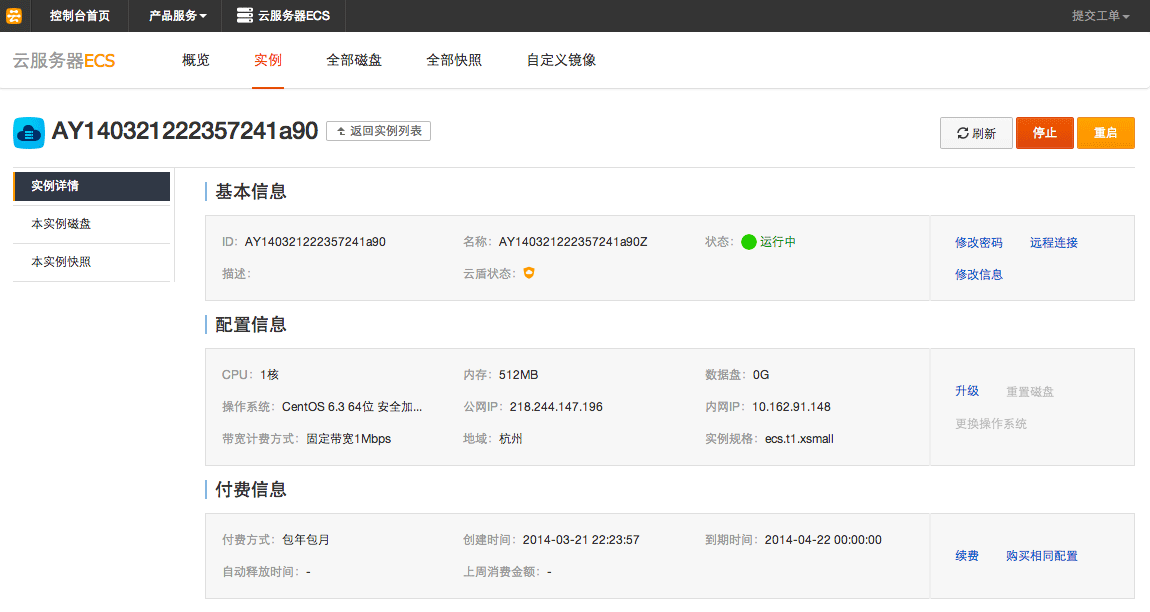
Note that after payment, it may take a short while for the order to take effect. At least, I had to wait a bit, possibly because I used the mobile version of Alipay. After successful payment, open your personal account page, select Management Console. Here, you can find the purchased cloud server. The default root (super administrator) password for the cloud server will be sent to your mobile phone. You can also click Modify Password to change the root user password.
On this interface, you can also Stop or Restart the server. You can also find the public IP address of your server. The server I purchased has the address 218.244.198.199. Using this address along with the root user and password, you can use tools to log in to the server for remote management, such as installing software, modifying settings, restarting services, etc.
Remotely Control Your Server
Step 2: Connect to the Server Using Xshell (Linux)
Remotely controlling a Linux-based server, such as one running CentOS, is generally different from Windows servers, which often use graphical remote desktop interfaces. We need to use command-line tools to connect to the server remotely and control it via commands. Windows users can use PuTTY, and Mac users can use the built-in Terminal tool. Then, use the ssh command to connect to your server, like this:
ssh root@218.244.198.199
The ‘root’ to the left of ‘@’ is the username used for connection, and the number to the right is your server’s IP address. This command means logging into the server 218.244.198.199 using the root user. After pressing Enter, you will be prompted to enter the root user’s password (this password is sent to your mobile phone by Alibaba Cloud).
If you are a beginner and don’t know how, you can check the video tutorial: http://help.aliyun.com/manual?helpId=1654
Step 3: Install Lamp System (64-bit System)
Alibaba Cloud recommends installing the WDCP system (Install WDCP System). It is indeed convenient, but after installing it several times, I found it very unstable with many issues, so I abandoned it.
Install Nginx
To install Nginx on CentOS, you first need to add a repository, like this:
vim /etc/yum.repos.d/nginx.repo
Use the vim command to open /etc/yum.repos.d/nginx.repo. If nginx.repo does not exist, it will create such a file. After opening, press the ‘i’ key to enter insert mode, then copy and paste the following lines of code. After completion, press the Esc key to exit, then type :wq (save and exit).
[nginx]
name=nginx repo
baseurl=http://nginx.org/packages/centos/$releasever/$basearch/
gpgcheck=0
enabled=1
After completion, we can use the yum command to install nginx, like this:
yum install nginx
Test the nginx service after installation:
service nginx status
It should return:
nginx is stopped
Test the nginx configuration file again:
nginx -t
It should return:
nginx: the configuration file /etc/nginx/nginx.conf syntax is ok
nginx: configuration file /etc/nginx/nginx.conf test is successful
… syntax is ok, … test is successful indicates that the configuration file is fine. Also, from this result, you can find the location of the nginx configuration file nginx.conf.
Control the nginx service
To control the service, you can use the service command, which can start (start), restart (restart), or stop (stop) the service. For example, to start the nginx service:
service nginx start
After the service starts, you can access the directory specified by the server using the server’s IP address or a domain name pointing to it in your browser. You will see text similar to the following.
Welcome to nginx! If you see this page, the nginx web server is successfully installed and working. Further configuration is required. For online documentation and support please refer to nginx.org. Commercial support is available at nginx.com. Thank you for using nginx.
Configure Nginx Virtual Host
After installing nginx, the first thing you might want to do is create a virtual host. A virtual host allows us to run multiple websites on the same server. We can bind different directories to different domains. When accessing a domain, it will open the content in the corresponding directory. Let’s look at how to configure a virtual host for nginx. First, enter the nginx configuration file directory:
cd /etc/nginx/conf.d
Copy default.conf in this directory. The copied file name can be your virtual host name. For example, to create a virtual host for www.yunwei123.com. You can use the cp command to copy the file, like this:
cp default.conf www.yunwei123.com.conf
Then edit the copied configuration file using the vim command:
vim www.yunwei123.com.conf
You will see code like this:
server {
 listen 80;
 server_name localhost;
 #charset koi8-r;
 #access_log   /var/log/nginx/log/host.access.log main;
 location / {
 root /usr/share/nginx/html;
 index index.html index.htm;
}
...
}
server_name is the hostname, i.e., the domain bound to this virtual host. I previously pointed www.yunwei123.com to the server, so this virtual host is prepared for it. Therefore, the content after server_name should be www.yunwei123.com. Immediately below server_name can be a root, which is the root directory of this virtual host, i.e., the directory where the website files are located. For example, if we want to place the files for www.yunwei123.com under /home/www/www.yunwei123.com, then this root should be that path.
Then remove the ‘root’ line inside ‘location /’. Add an index filename after ‘index’, which is the default file opened. Here, add ‘index.php’, so that accessing www.yunwei123.com will directly open index.php under the root directory. We will install php later. After modification, it looks like this:
server {
 listen 80;
 server_name www.yunwei123.com;
 root /home/www/www.yunwei123.com;
 #charset koi8-r;
 #access_log /var/log/nginx/log/host.access.log main;

 location / {
 index index.php index.html index.htm;
 }
...
}
Modify this configuration file for now; we will come back to modify it further later. Save it by pressing Esc, then typing :wq (save and exit). Now the virtual host should be usable. The host’s domain is www.yunwei123.com. When accessing it, it opens the content in the /home/www/www.yunwei123.com directory. You can put some files in this directory.
Restarting or reloading nginx makes the configuration file effective.
service nginx reload
Now, open your browser, enter the domain name you set for the virtual host, and see if it opens the content in the specified directory.
Configure PHP-FPM
To allow nginx to execute php files, you need to install php-fpm. It is included in the CentOS repository by default, so you can install it directly using the yum command:
yum install php-fpm
After completion, you can check the running status of php-fpm using the service command:
service php-fpm status
Returns:
php-fpm is stopped
Starting php-fpm can also be done using the service command:
service php-fpm start
Allow Nginx to Execute PHP
Now we should be able to let nginx execute php. However, you need to modify the nginx configuration file. Previously, when configuring the virtual host, we created a www.yunwei123.com.conf configuration file. You need to modify this nginx configuration file to enable php execution. Use the vim command to edit it:
vim /etc/nginx/conf.d/www.yunwei123.com.conf
Note that your configuration file may not be named www.yunwei123.com.conf; it should be the one you named. After opening, find the following code snippet:
    # pass the PHP scripts to FastCGI server listening on 127.0.0.1:9000
    #
    #location ~ .php$ {
    #    root           html;
    #    fastcgi_pass   127.0.0.1:9000;
    #    fastcgi_index  index.php;
    #    fastcgi_param  SCRIPT_FILENAME  /scripts$fastcgi_script_name;
    #    include        fastcgi_params;
    #}
This is the default configuration provided by nginx for executing php. Uncommenting from ‘location’ onwards will make this configuration effective. Then we need to make some simple modifications:
    # pass the PHP scripts to FastCGI server listening on 127.0.0.1:9000
    #
    location ~ .php$ {
    #   root           html;
        fastcgi_pass   127.0.0.1:9000;
        fastcgi_index  index.php;
        fastcgi_param  SCRIPT_FILENAME  $document_root$fastcgi_script_name;
        include        fastcgi_params;
    }
Note that ‘root’ is still commented out. Also, ‘SCRIPT_FILENAME’ has been modified, changing ‘/scripts’ to $document_root. Save and exit. Then restart nginx:
service nginx restart
Test PHP Execution
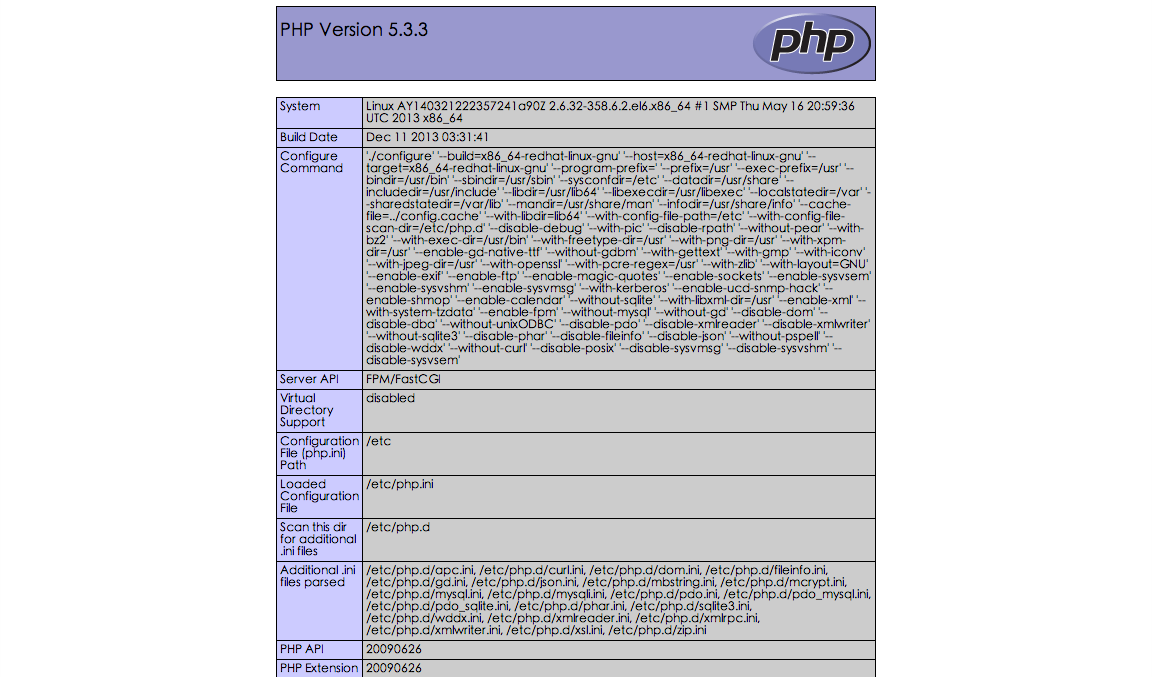
Now, we have installed php-fpm and modified the nginx configuration file to allow it to execute php. Next, we need to test it. We can use the php phpinfo(); function. The method is to create a php file in the root directory of your virtual host, named phpinfo.php, and input the following into the file:
<?php phpinfo(); ?>
Save the file and exit. Open this newly created php file in your browser. In my case, it should be https://www.yunwei123.com/phpinfo.php. After opening, you should see an interface like the one below. If you do, it means nginx can already execute php.
Add Repositories to the System
Previously, we used the yum command to install some things, which is very simple: yum + package name + install. It is actually a package management tool. When installing packages with it, it checks dependencies and installs them simultaneously. CentOS comes with some repositories, but not everything is in these repositories. Therefore, we can manually add some repositories to the system. This way, using the yum command, we can conveniently install things from these repositories.
Available repositories can be found here: http://iuscommunity.org/pages/Repos.html. You need to download the corresponding repository based on your system version and install it in the system. To check the system version, you can do this:
cat /etc/redhat-release
I am using the CentOS system, so it returns:
CentOS release 6.3 (Final)
This indicates I am using CentOS 6 and it is 64-bit. Open the repository address above, find Release Packages, and then locate the link under the CentOS 6 section. We will use this epel repository. After opening this address, copy the link epel-release-6-5.noarch under Packages. Then return to the terminal tool connected to the server. Windows users should be using putty. Use the cd command to enter a directory, such as the user’s home directory, like this:
cd ~
Then use the wget command to download the repository from the link you just copied:
wget http://dl.iuscommunity.org/pub/ius/stable/CentOS/6/x86_64/epel-release-6-5.noarch.rpm
You can use the ls command to view the contents of the current directory. You should see epel-release-6-5.noarch.rpm (or whatever repository you chose to download). After downloading, install it:
rpm -ivh epel-release-6-5.noarch.rpm
Check the repositories in the system:
yum repolist
You will see the epel repository, which we just installed. The repository addresses in the system are located at: /etc/yum.repos.d. Here, you can also find epel.repo. Now we can use the yum command to install more things.
Install MySQL
MySQL can manage the databases used by websites. Both WordPress and Drupal support MySQL databases. So, in our Web runtime environment, we need to install a MySQL. We have already added the repository, so we can directly use the yum command to install MySQL:
yum install mysql-server
After installation, use the service command to start the MySQL service:
service mysqld start
Then we need to simply configure MySQL. By default, after installation, the root user of MySQL has no password, which is definitely not acceptable for a production environment. Additionally, there are some security-related settings. You can use the following command to configure it. It is a wizard that asks you questions, and you need to provide answers, such as whether to set a root user password, what the password is, etc.
mysql_secure_installation
Enter current password for root (enter for none):
Explanation: Enter the current root user password. It is empty by default, so just press Enter.
Set root password? [Y/n] y
Explanation: Do you want to set a root password? Enter ‘y’ to confirm.
Remove anonymous users? [Y/n] y
Explanation: Do you want to remove anonymous users? Enter ‘y’ to confirm.
Disallow root login remotely? [Y/n] y
Explanation: Do you want to disallow remote root login? Enter ‘y’ to confirm.
Remove test database and access to it? [Y/n] y
Explanation: Do you want to remove the test database? Enter ‘y’ to confirm.
Reload privilege tables now? [Y/n] y
Explanation: Do you want to reload privilege tables now? Enter ‘y’ to confirm.
Install PHP Extensions
Now, we have nginx providing web services, php-fpm installed, nginx configured to execute php, and a database management system installed. However, when running a real website, we need to install some additional extensions for php, such as the mysql extension for handling MySQL databases, the apc extension for caching, the gd extension for image processing, etc. They can also be installed using the yum command.
yum install php-pecl-apc php-mysql php-gd php-mcrypt php-pear php-mbstring php-xmlrpc php-dom
Above, some php extensions were installed. If you find that other extensions are required during website installation, you can also use the yum command to install them. After installation, you need to restart php-fpm:
service php-fpm restart
Directory and File Permissions
Some directories or files on the website need write permissions. You need to assign appropriate permissions to these directories and files. Generally, you can set their owner to the user used by php and nginx. By default, the nginx user is nginx, and the php-fpm user is apache. We can change them to a unified user. You can modify the php-fpm user to nginx. You can use the following commands to check the usernames used by nginx and php-fpm:
ps aux|grep php
ps aux|grep nginx
To modify the user used, you can use the configuration files for nginx and php-fpm. The nginx configuration file is: /etc/nginx/nginx.conf, and the php-fpm configuration file is: /etc/php-fpm.conf. Also, all files in the /etc/php-fpm.d/* directory are php-fpm configuration files. By default, there is a www.conf in this directory. You can edit this file to modify the user name used by php-fpm. Use the vim command:
vim /etc/php-fpm.d/www.conf
After opening the file, you can search for the keywords user or apache. Type :/user or :/apache to search. Press ‘n’ to continue searching downwards, and ‘N’ to search upwards. Until you see:
user = apache
Change it to:
user=nginx
Press Esc to exit, then type :wq. Restart php-fpm. Now, our nginx server and php-fpm will use the same user: nginx. You can change the owner of directories and files that need write permissions to nginx. You can use the chown command:
chown -R nginx dirname/filename
Summary
Alright, now we have a server with an LNMP environment. There are many configurations provided in this manual that can be optimized further, such as optimizing the nginx configuration file specifically for Drupal. In subsequent articles, I will explain the usage of these configuration files in detail.
Step 4: Configure Your Drupal, Success!
Finally, you just need to log in to Drupal and do what you want.